

 Talos
Talos Omni
Omni Kubernetes Guides
This guide does not cover XCP-ng without Xen Orchestra installed, or XO Lite, even though some of the steps may be similar.
Installation
How to get Xen Orchestra
It is assumed that you already have XCP-ng and Xen Orchestra installed. If necessary, visit the XCP-ng downloads page and Xen Orchestra documentation.Install talosctl
You can downloadtalosctl on MacOS and Linux via:
Download the RAW disk image
To install Talos in Xen Orchestra, you will need the RAW image from Image Factory. To work with XCP-ng the image needs to be built for the Nocloud platform with the system extensionsiderolabs/xen-guest-agent. See this example Talos image you can use.
For example version for linux, download and extract the image:
Xen Guest Agent
It is recommended to use the Talos image with the system extension siderolabs/xen-guest-agent. It should work without it but some features, like IP addresses reported in Xen Orchestra, will be missing.
Create the template VM
This section explains how to create a reusable Talos VM template in Xen Orchestra.Recommended Configuration for VMs
Before you begin, familiarize yourself with Talos’ system requirements and allocate resourcesaccordingly.
| Parameter | Recommended Value | Notes |
|---|---|---|
| Boot Mode | UEFI | Modern firmware, Secure Boot support |
| vCPUs | 2+ (control plane), 4+ (workers) | Minimum 2 cores required |
| Memory | 4GB+ (control plane), 8GB+ (workers) | Minimum 2GB required |
| Storage Repository | Local Storage or Shared Storage | Depending on your infrastructure |
| Cloud-Init | Enabled | To automatically pass the Talos configuration |
| Advanced settings > Boot VM | false | To not start the template VM after creation |
Via Xen Orchestra web UI
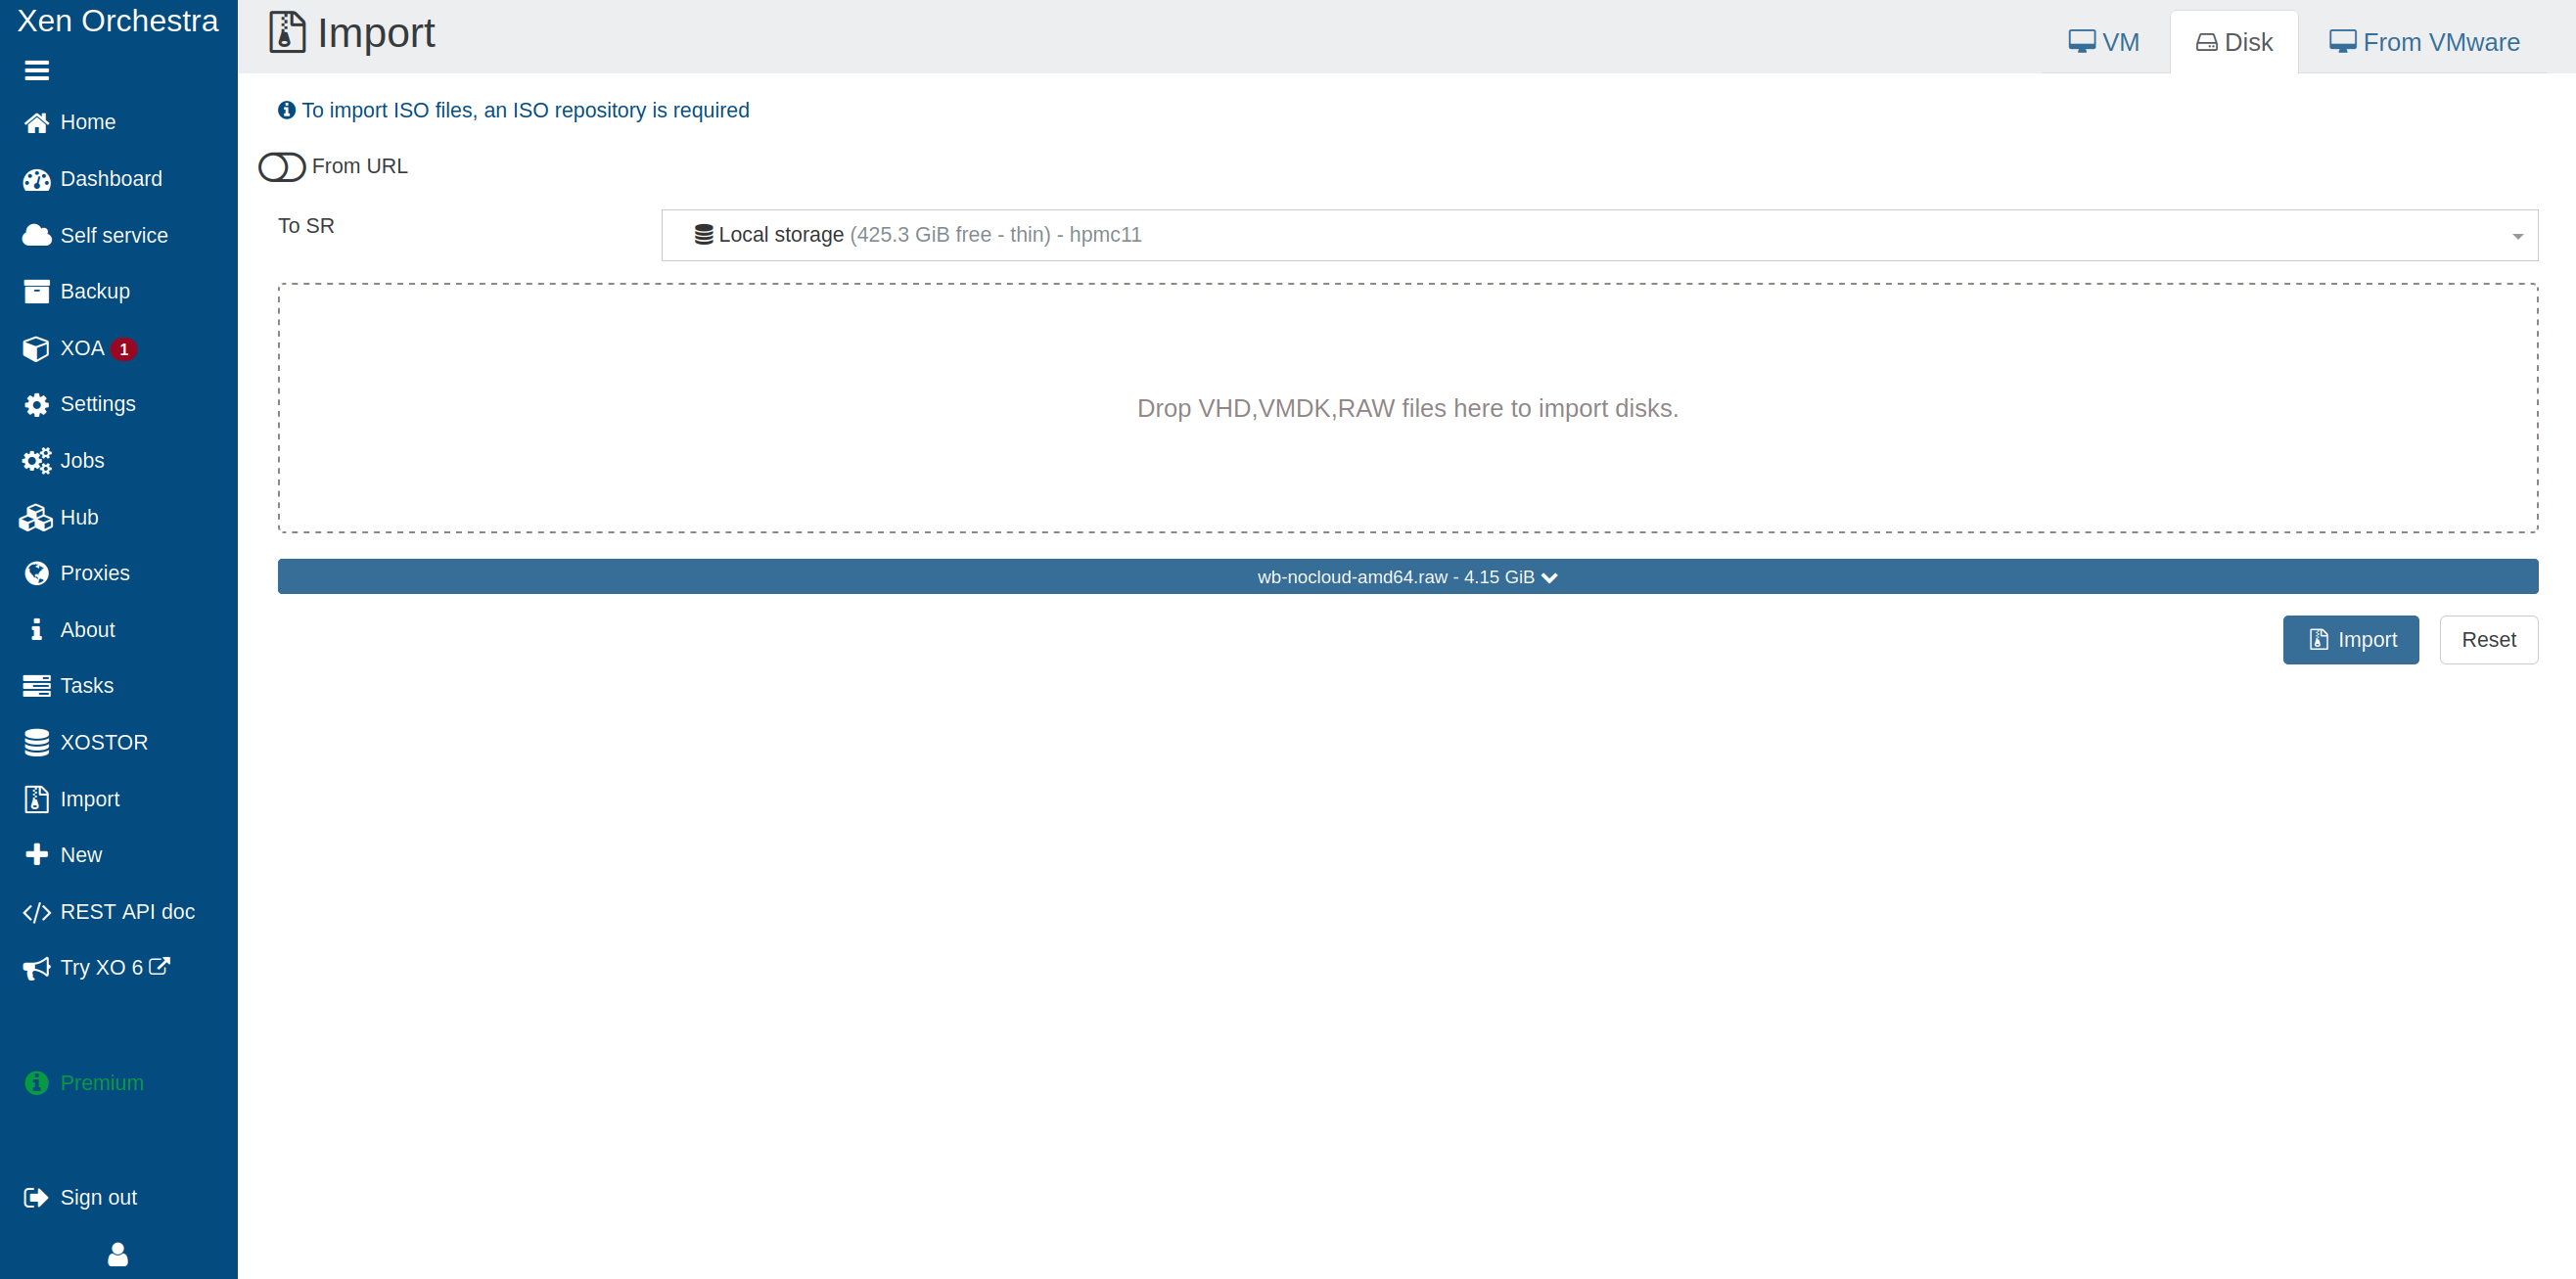
Follow these steps to create a Talos template using the Xen Orchestra web interface.Step 1: Upload disk image to Xen Orchestra
- Log in to Xen Orchestra.
- Navigate to (Sidebar Menu >) Import > Disks.
- Select the destination Storage Repository (SR).
- Drop the RAW file.
- Click the blue button below which displays the name of the disk.
- Change the Name to “talos-nocloud-amd64”. Add a description.
- Click Import.
- Wait until the download is complete.
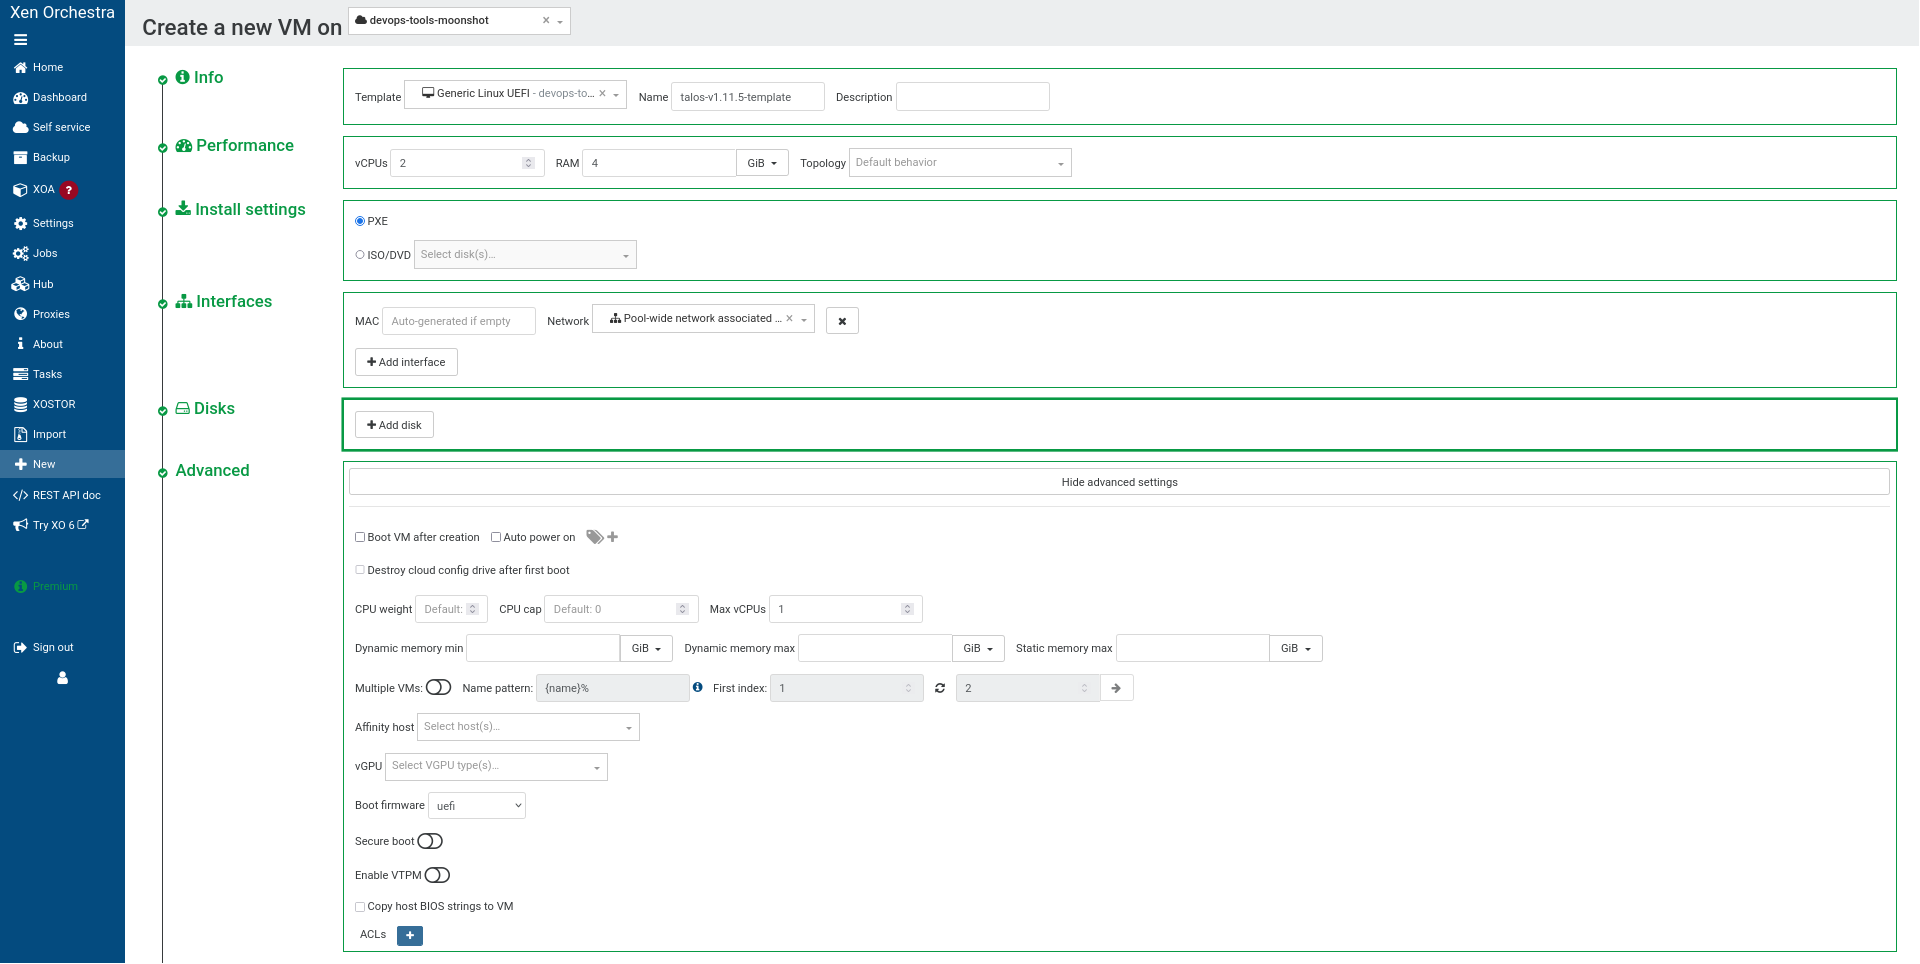
Step 2: Create a new VM
Create a new VM with the following settings:- Click (Sidebar Menu >) New > VM.
- Select the pool you want to create the VM on.
- Select Template as Generic Linux UEFI.
- Set Name to (for the control plane).
- Configure the following:
- Boot firmware: UEFI
- vCPUs: 2 minimum (4+ recommended for workers)
- RAM: 4096 MB minimum (4GB)
- Topology: (Default)
- Select PXE or any ISO/DVD, we won’t use it
- Select your network
- Do not create a new disk
- We will attach the imported Talos VDI
- Boot firmware : UEFI
- Boot VM after creation : Off
- Click on Create
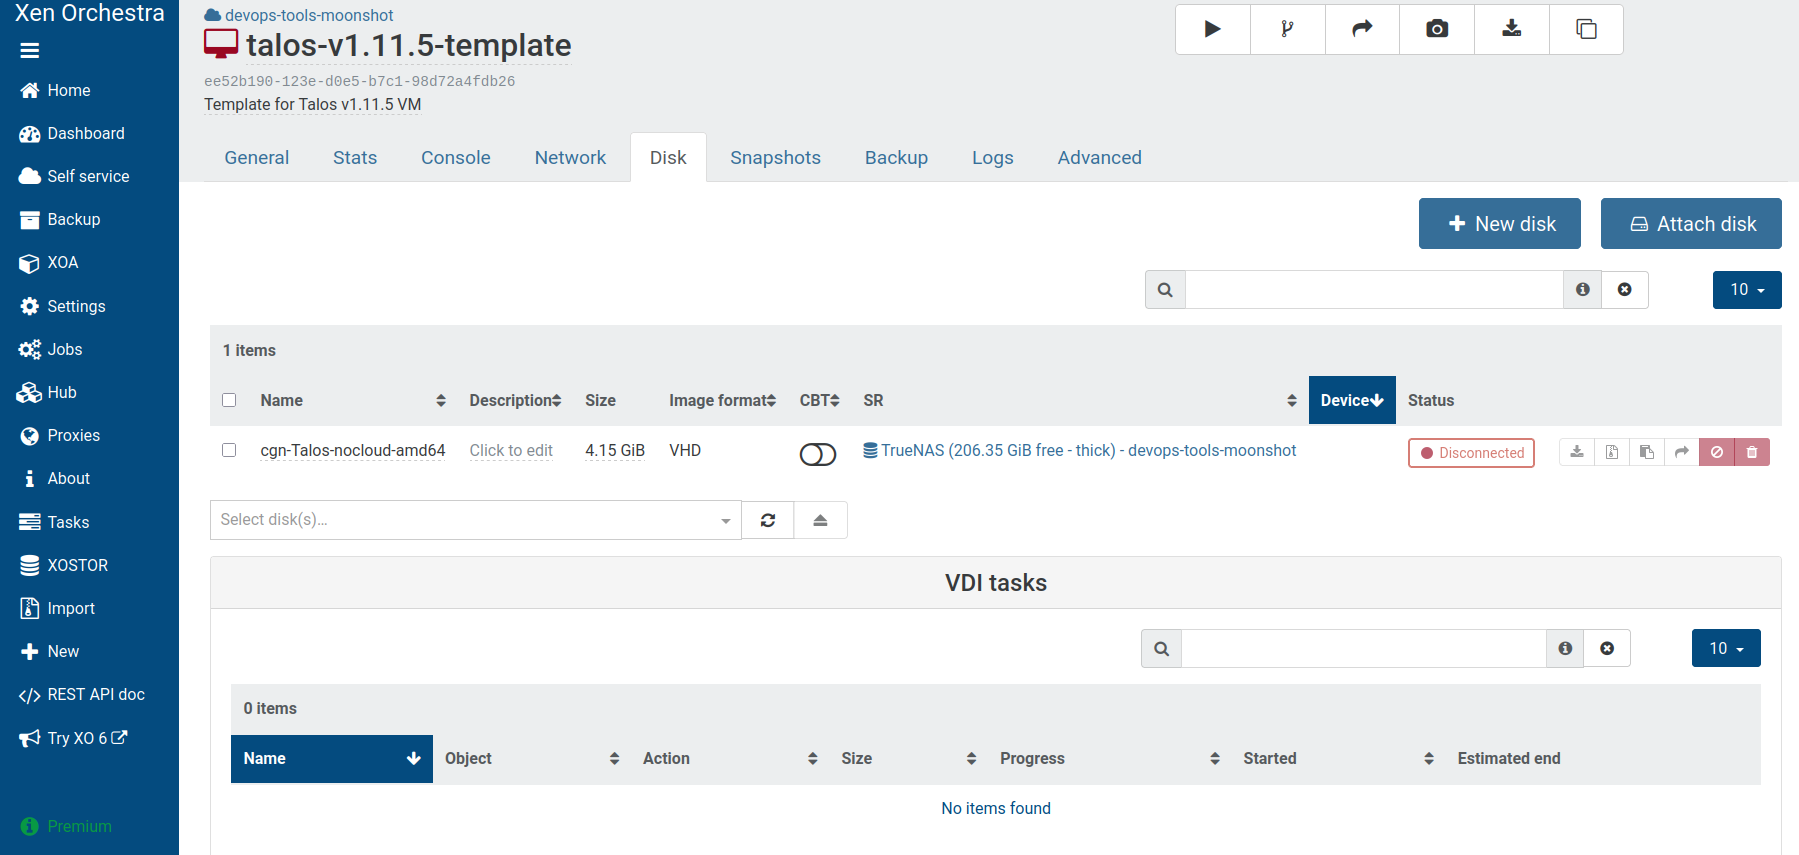
Step 3: Attach the Talos VDI
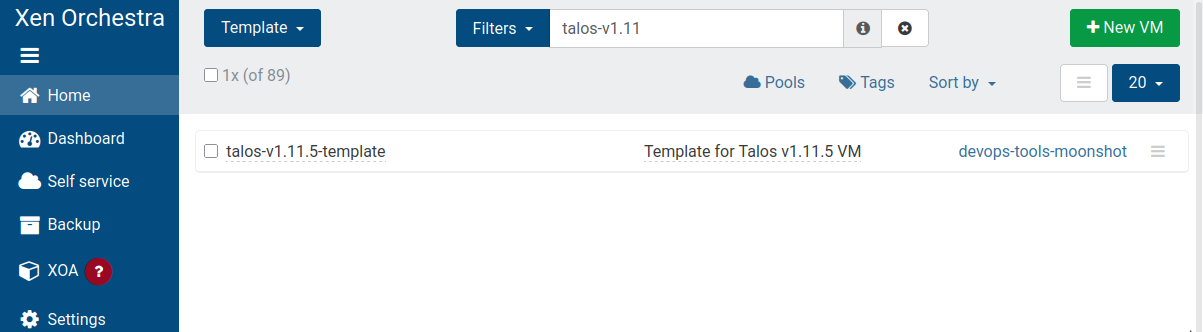
After creating the VM, attach the Talos disk image:- If the VM page isn’t automatically open after creation, navigate to (Sidebar Menu >) Home > VMs, clear the filters, and type .
- Open the Disk tab.
- Remove any existing disk.
- Click Attach disk.
- Select talos-nocloud-amd64.
- Click Attach below the dropdown field.
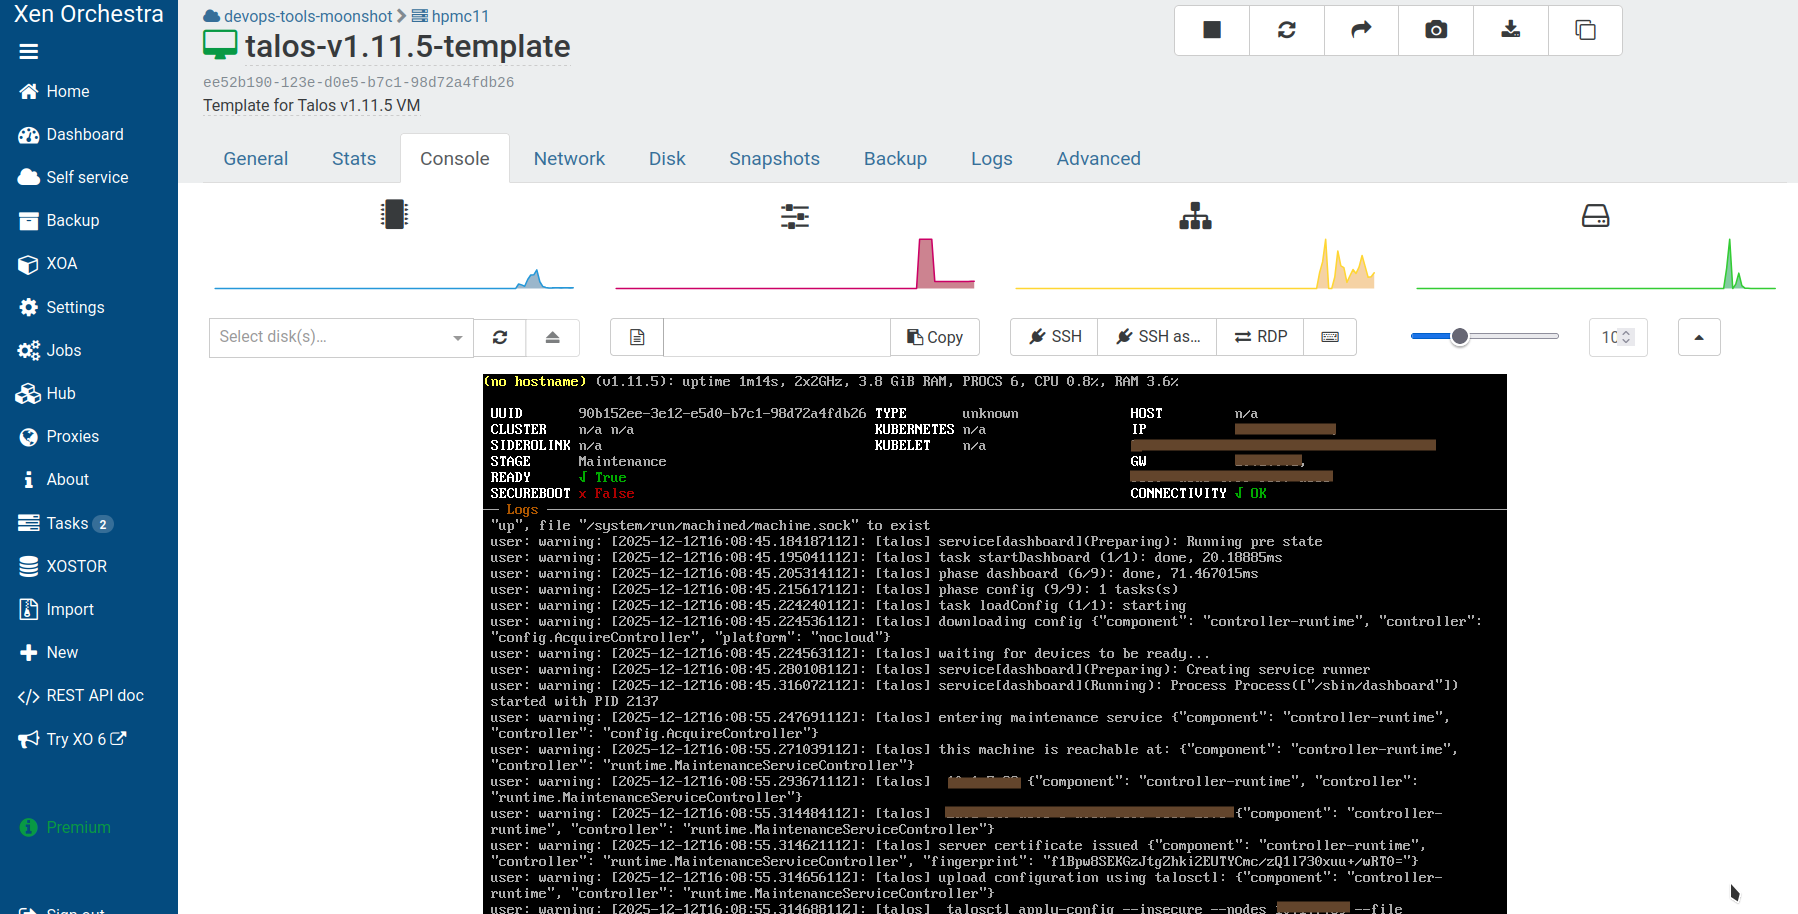
Step 4: Finalize template creation
Complete the template setup:- Open the Advanced tab.
- Change the Boot order to set the Hard-Drive first (instead of Network/PXE or DVD drive).
- Verify that the VM boots by starting it and opening the Console tab.
Step 5: Convert to template
Convert the VM to a template:- Stop the VM if it’s running.
- Open the Advanced tab.
- Click Convert to template and confirm.
Alternative
This template building can also be done using the XCP-ng Packer.io builder.Create the Talos cluster
Now that you have a template, you can quickly create Talos VMs with different configurations using cloud-init. In this guide we will create a simple Kubernetes cluster with one control plane and one worker node.Prerequisites
This guide uses the virtual IP (VIP) functionality built into Talos to provide a stable IP for the Kubernetes control plane. Choose an IP on your VM network to designate for this purpose and note it for use in the following steps.Step 1: Generate Talos configurations
Generate the base configuration files for the Talos machines using the control plane IP. We will use a patch to provide the control plane nodes with the virtual IP information. Createcp.patch.yaml with the content:
cp.patch.yaml
controlplane.yaml- Configuration for control planesworker.yaml- Configuration for workerstalosconfig- Talosctl configuration file
cp.patch.yaml file created earlier or by creating your own patch files.
Validate the configuration files:
Step 2: Create the control plane from the template
Create the control plane VM using the Xen Orchestra web interface.Via Xen Orchestra web UI
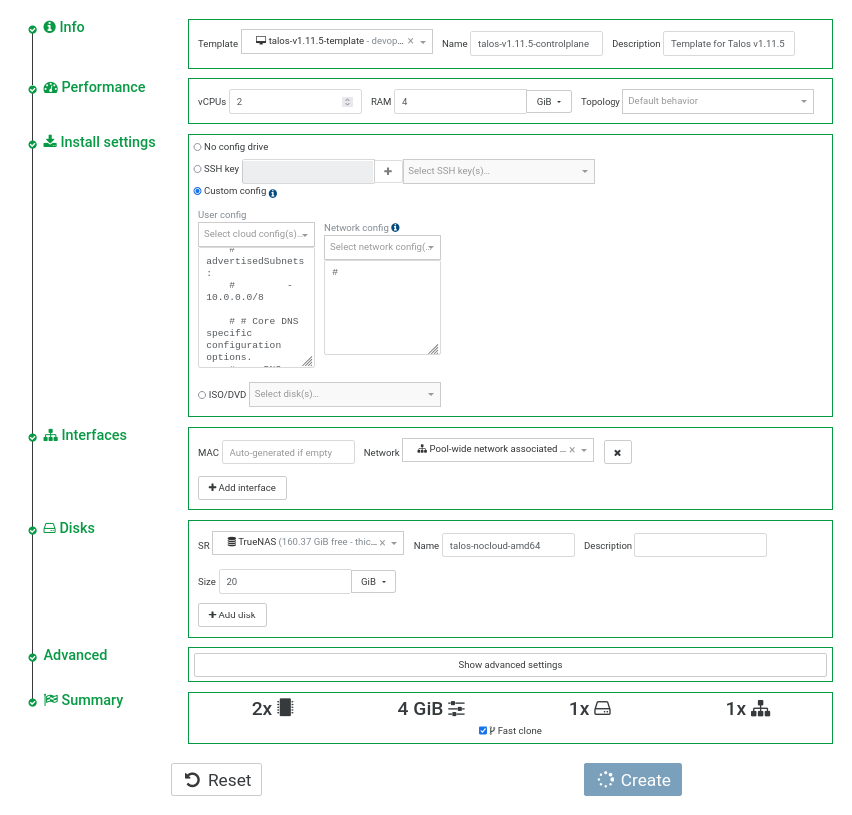
Create the control plane VM:- Click + New VM.
- Select the pool you want to create the VM on.
- In the Info section:
- Select the template .
- Change the Name to something like
demo-talos-cp.
- In the Performance section:
- Adjust VM settings according to requirements.
- In the Install settings section:
- Click Custom config.
- Paste the content of
controlplane.yamlinto User config. - Add at least a comment
#in Network config to avoid form validation errors.
- In the Interfaces section:
- Select your network.
- In the Disks section:
- Expand disk size to match your needs.
- Click Create.
Once the machine has started, check the VM dashboard, int the Network tab: the guest agent should have reported the VM IP address.Take note of this IP address, which will be referred to as
$CONTROL_PLANE_IP for the rest of this guide.Alternative with Terraform
The Terraform provider for Xen Orchestra can be used as an alternative to the Web UI, enabling declarative and automated infrastructure management. An example is provided in the contrib repository: Xen Orchestra Terraform examples.Step 3: Create the worker node
Create at least one worker node using a process similar to the control plane creation above. Use theworker.yaml configuration file in the Install settings > User config section.
Take note of the worker node’s IP address, which will be referred to as
$WORKER_IPStep 4: Bootstrap cluster
Open a console to the control plane node in the Xen Orchestra UI. You should see output indicating that etcd needs to be bootstrapped:Configure talosctl
Set up the talosctl configuration:
Bootstrap Etcd
Initialize the Etcd cluster: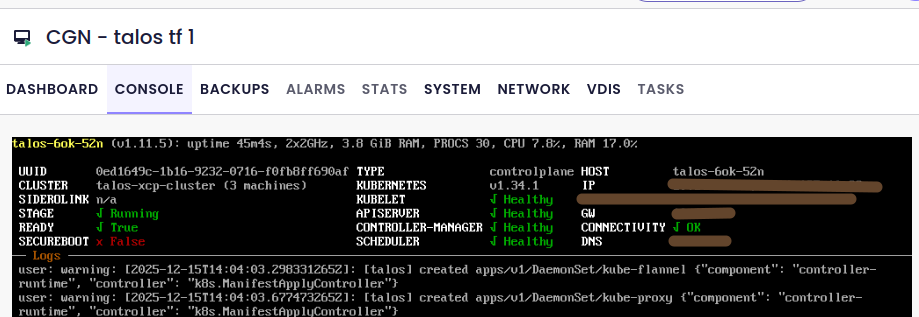
Retrieve the kubeconfig
Once the bootstrap is complete, retrieve the admin kubeconfig:
kubeconfig file in the current directory.
Verify the Kubernetes cluster: