

 Talos
Talos Omni
Omni Kubernetes Guides
talos.dashboard.disabled=1.
The dashboard runs only on the physical video console (not serial console) on the 2nd virtual TTY.
The first virtual TTY shows kernel logs same as in Talos
<1.4.0>.
The virtual TTYs can be switched with <Alt+F1> and <Alt+F2> keys.
Keys <F1> - <Fn> can be used to switch between different screens of the dashboard.
The dashboard is using either UEFI framebuffer or VGA/VESA framebuffer (for legacy BIOS boot).
Dashboard Resolution Control
On legacy BIOS systems, the screen resolution can be adjusted with thevga= kernel parameter.
In modern kernels and platforms, this parameter is often ignored. For reliable results, it is recommended to boot with UEFI.
When running in UEFI mode, you can set the screen resolution through your hypervisor or UEFI firmware settings.
Summary Screen (F1)
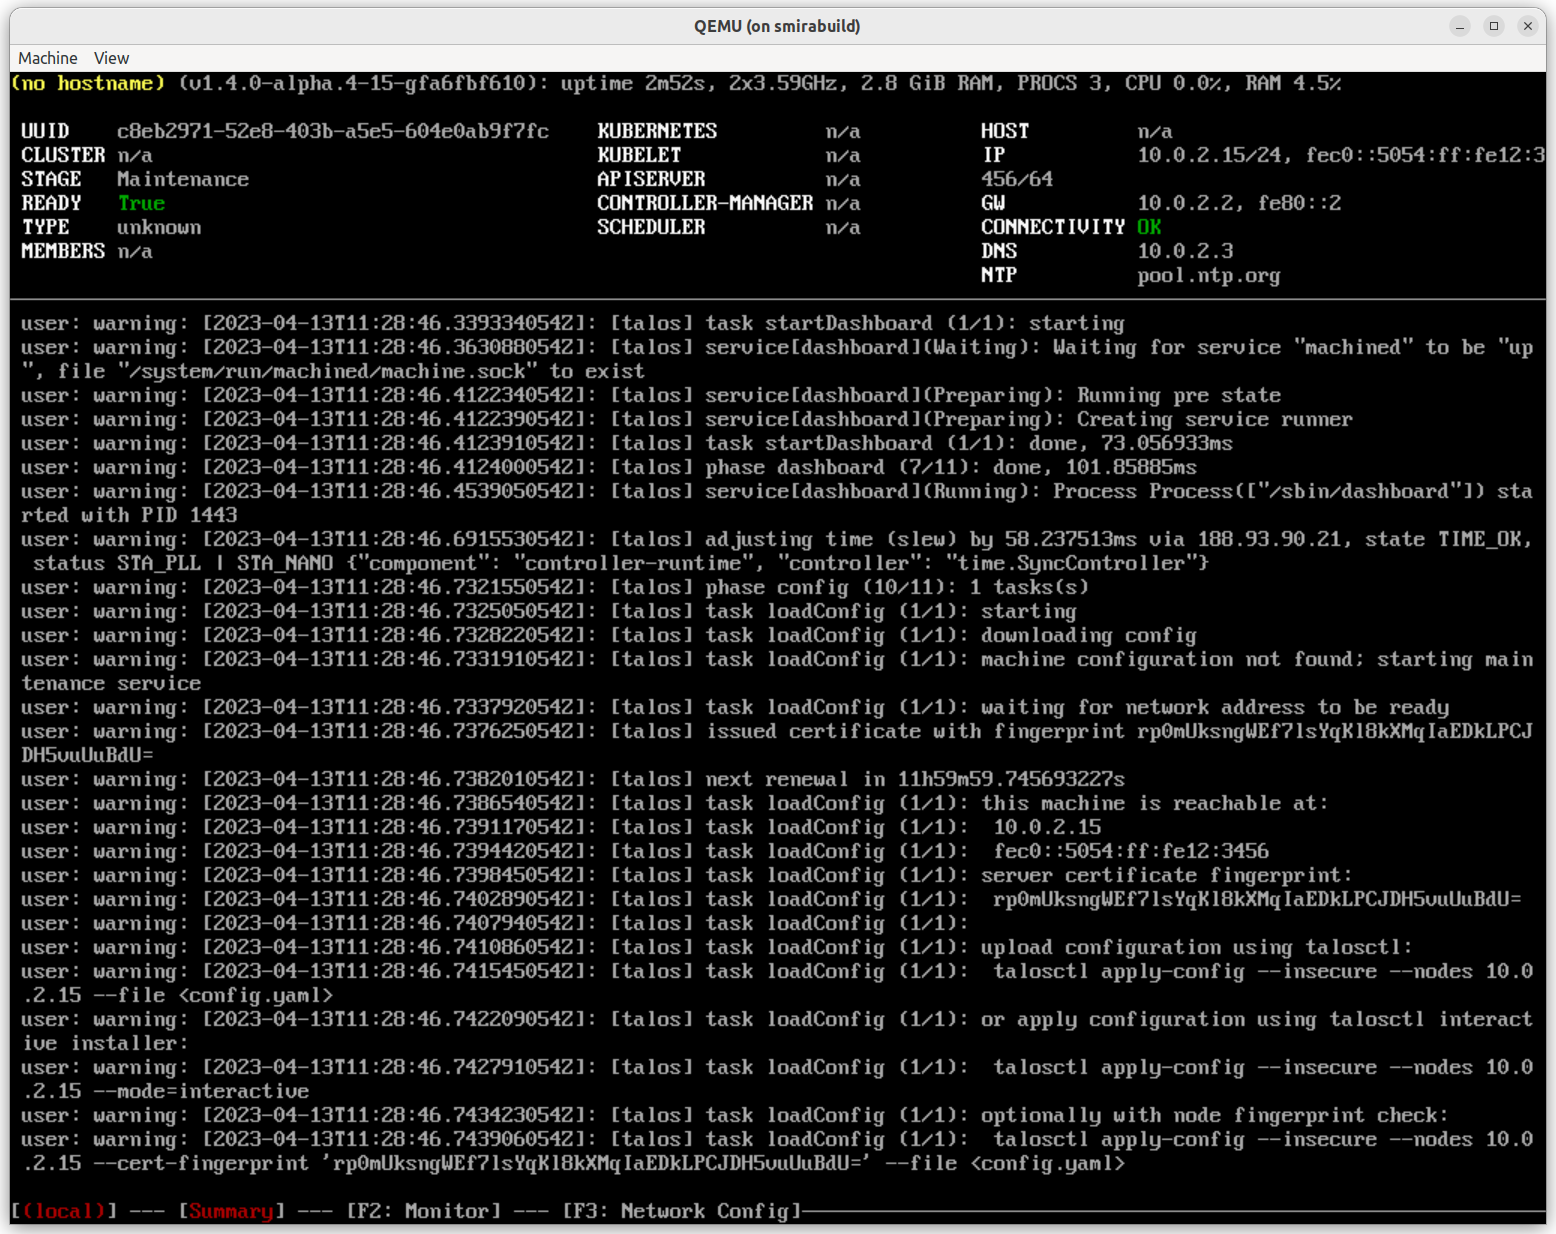
- hostname
- Talos version
- uptime
- CPU and memory hardware information
- CPU and memory load, number of processes
- UUID (from SMBIOS data)
- Cluster name (when the machine config is available)
- Machine stage:
Installing,Upgrading,Booting,Maintenance,Running,Rebooting,Shutting down, etc. - Machine stage readiness: checks Talos service status, static pod status, etc. (for
Runningstage) - Machine type: controlplane/worker
- Number of members discovered in the cluster
- Kubernetes version
- Status of Kubernetes components:
kubeletand Kubernetes controlplane components (only oncontrolplanemachines) - Network information: Hostname, Addresses, Gateway, Connectivity, DNS and NTP servers
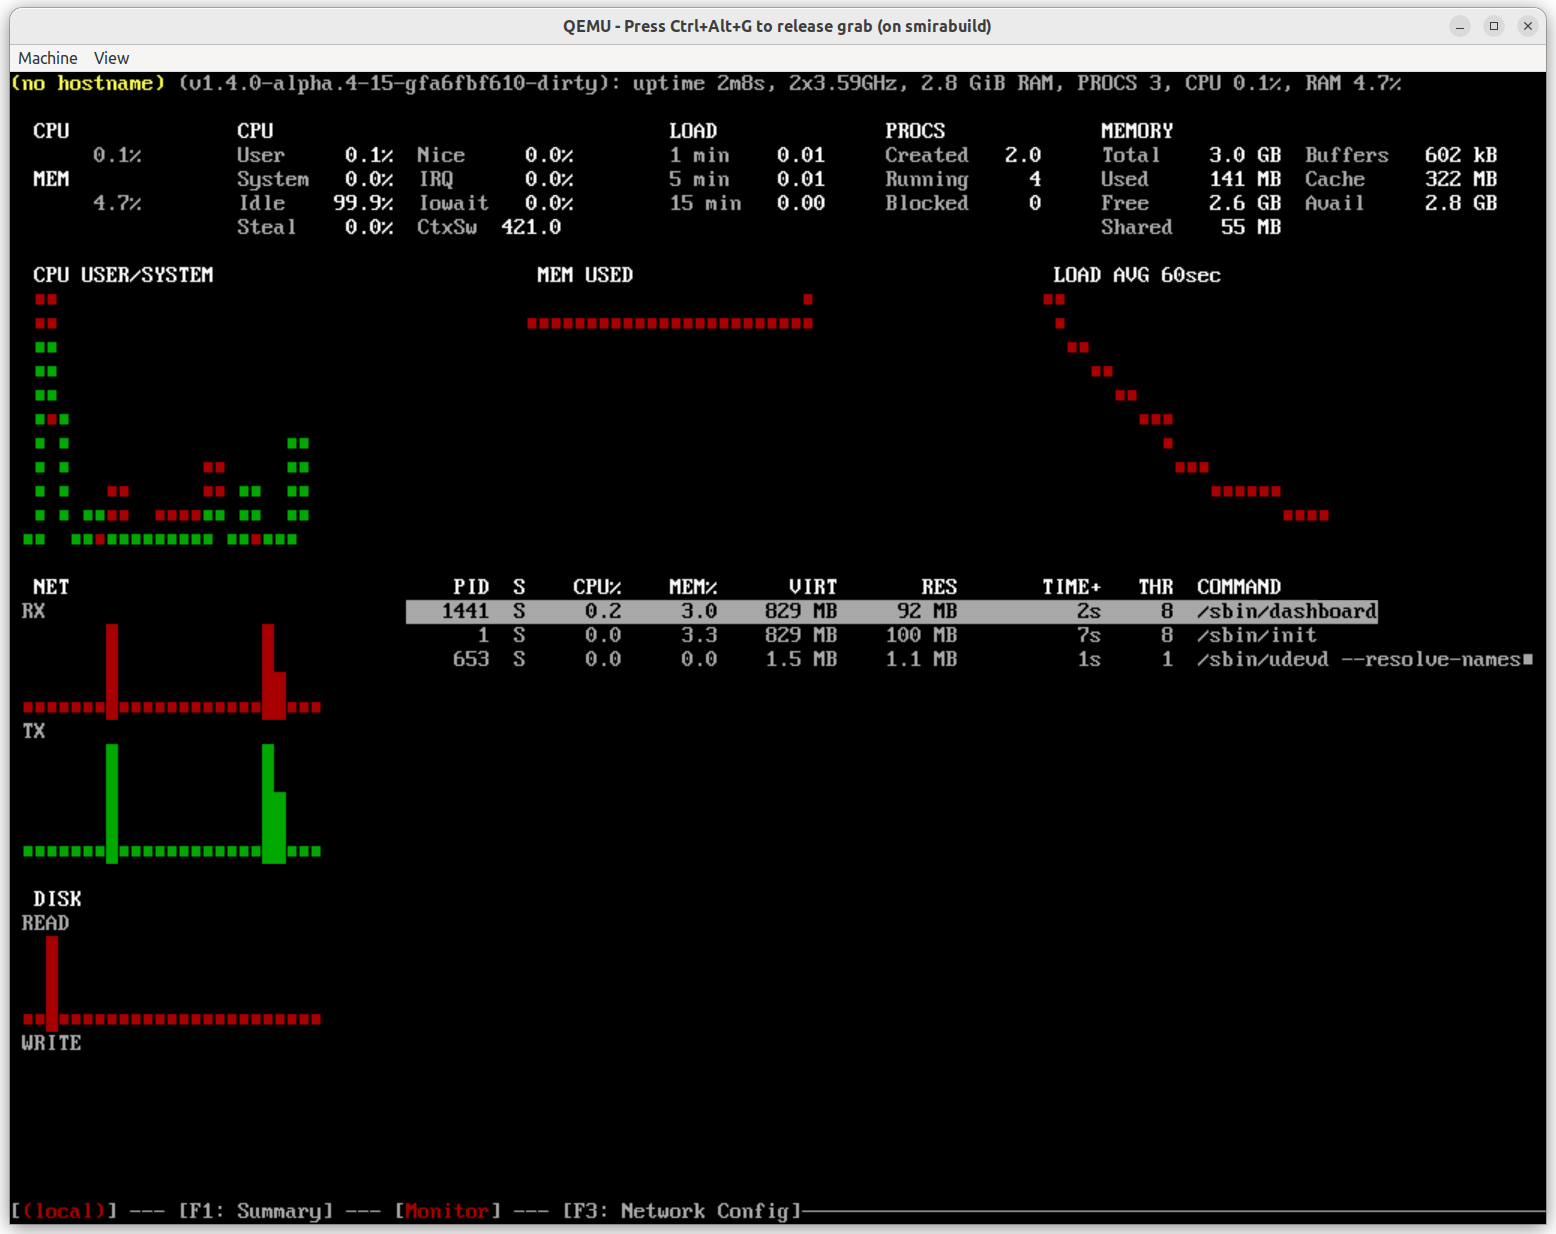
Monitor Screen (F2)
Network Config Screen (F3)
Note: network config screen is only available for metal platform.
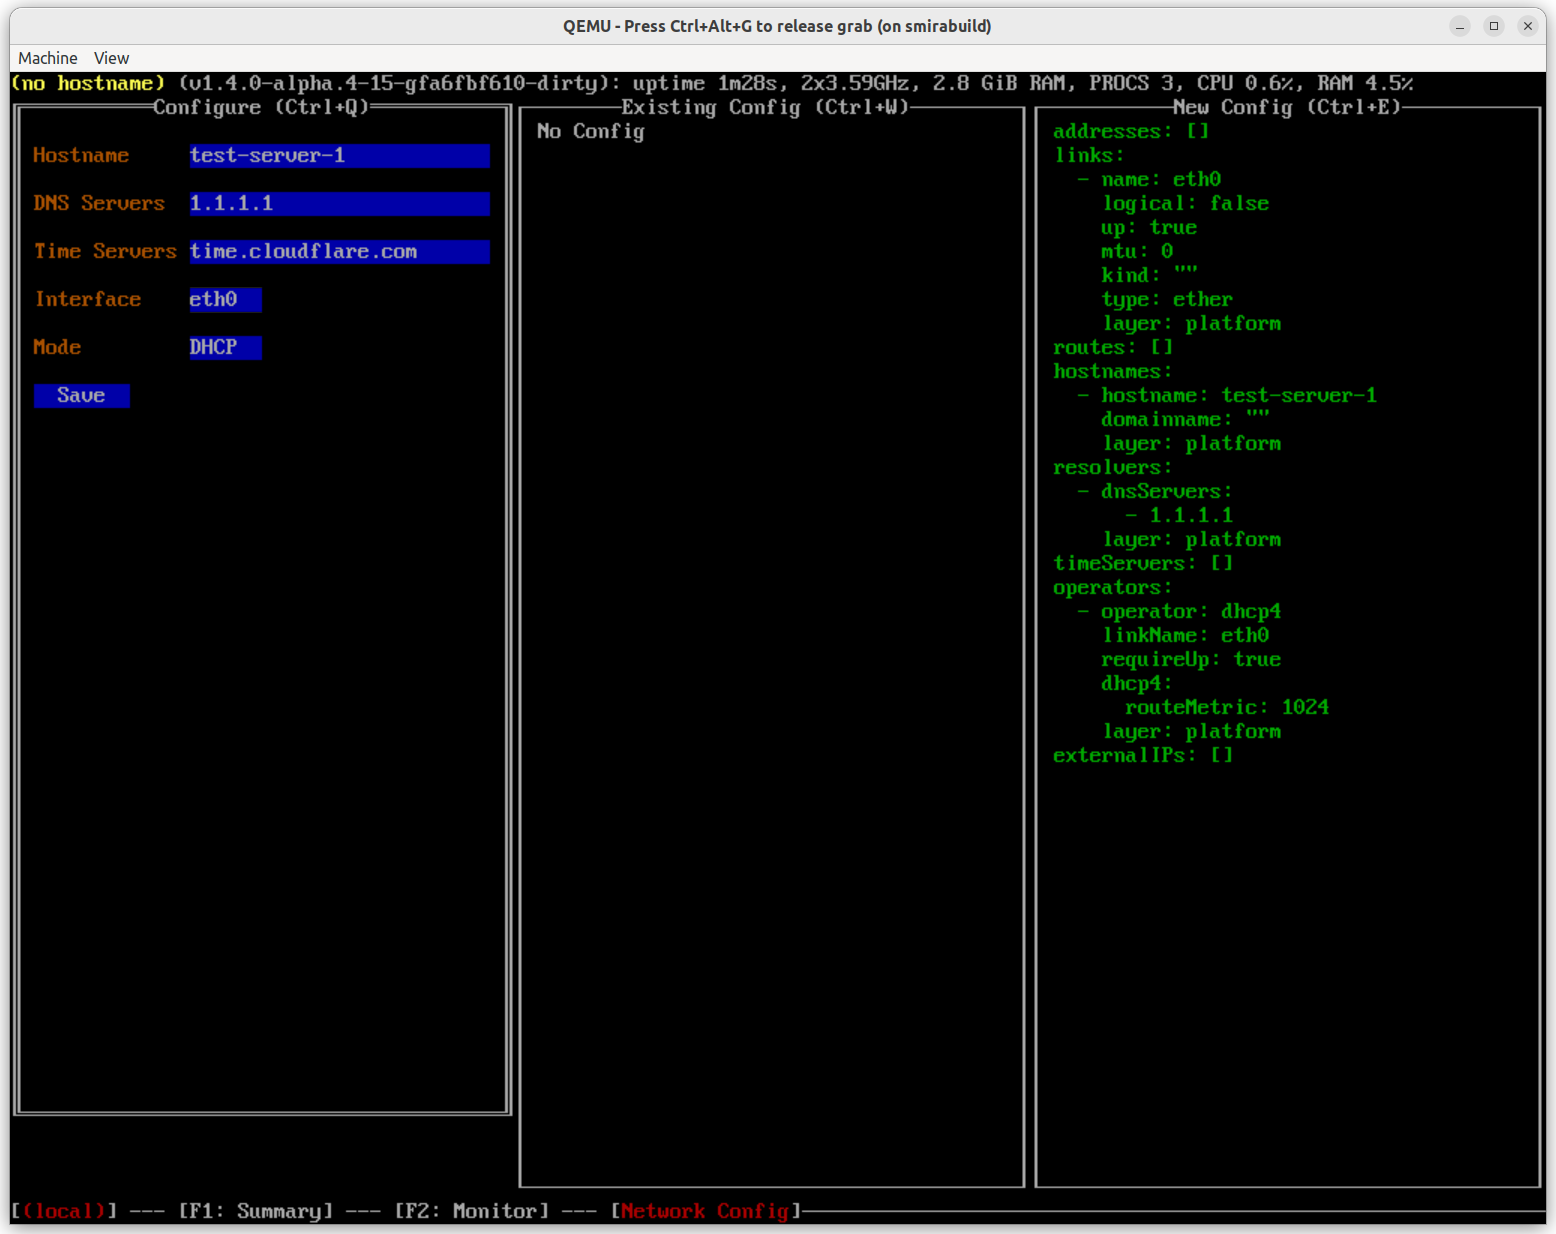
metal platform network configuration.
The screen is split into three sections:
- the leftmost section provides a way to enter network configuration: hostname, DNS and NTP servers, configure the network interface either via DHCP or static IP address, etc.
- the middle section shows the current network configuration.
- the rightmost section shows the network configuration which will be applied after pressing “Save” button.