

 Talos
Talos Omni
Omni Kubernetes Guides
Video walkthrough
To see a live demo of this guide, visit Youtube here:Prerequisites
Before you begin, make sure the following are in place. The QEMU guest agent section is optional, only follow it if you need guest VM shutdown support.- Proxmox: This guide assumes you have already installed Proxmox on the server where you want to create Talos VMs. Visit the Proxmox downloads page if you haven’t done this yet.
-
talosctl: Install
talosctlon macOS or Linux with:For manual installation and other platforms, see the talosctl installation guide. -
ISO image: Download the Talos ISO from Image Factory with this command:
For example version, for linux platform:
Optional: QEMU guest agent ISO
QEMU guest agent support for guest VM shutdowns requires a custom ISO and installer image. Skip this section if that doesn’t apply to you.-
Build the custom ISO: Go to the Image Factory and complete these steps to build a custom ISO:
- Select your Talos version
- Check the box for
siderolabs/qemu-guest-agentand submit. This action will provide you with a link similar to: - Download the above ISO and take note of the installer image URL, you will need it later
- Enable QEMU Guest Agent in Proxmox: Once your VM is created, go to VM → Options and set QEMU Guest Agent to Enabled.
VM resource requirements
Before creating VMs, familiarise yourself with the system requirements for Talos and use the following as a baseline for all Talos nodes on Proxmox:| Setting | Recommended value | Notes |
|---|---|---|
| BIOS | ovmf (UEFI) | Modern firmware, Secure Boot support, better hardware compatibility |
| Machine | q35 | Modern PCIe-based machine type with better device support |
| CPU type | host | Enables advanced instruction sets (AVX-512, etc.). Use kvm64 with feature flags for Proxmox < 8.0 |
| CPU cores | 2+ (control plane), 4+ (workers) | Minimum 2 cores required |
| Memory | 4GB+ (control plane), 8GB+ (workers) | Minimum 2GB required |
| Disk controller | VirtIO SCSI | Do NOT use VirtIO SCSI Single — causes bootstrap hangs (#11173) |
| Disk format | Raw or QCOW2 | Raw preferred for performance; QCOW2 for snapshots |
| Disk cache | Write Through | Use None for clustered environments |
| Network model | virtio | Paravirtualized driver, best performance (up to 10 Gbit) |
| EFI disk | 4MB | Required for UEFI firmware, stores Secure Boot keys |
| Ballooning | Disabled | Talos does not support memory hotplug |
| RNG device | VirtIO RNG (optional) | Better entropy for cryptographic operations |
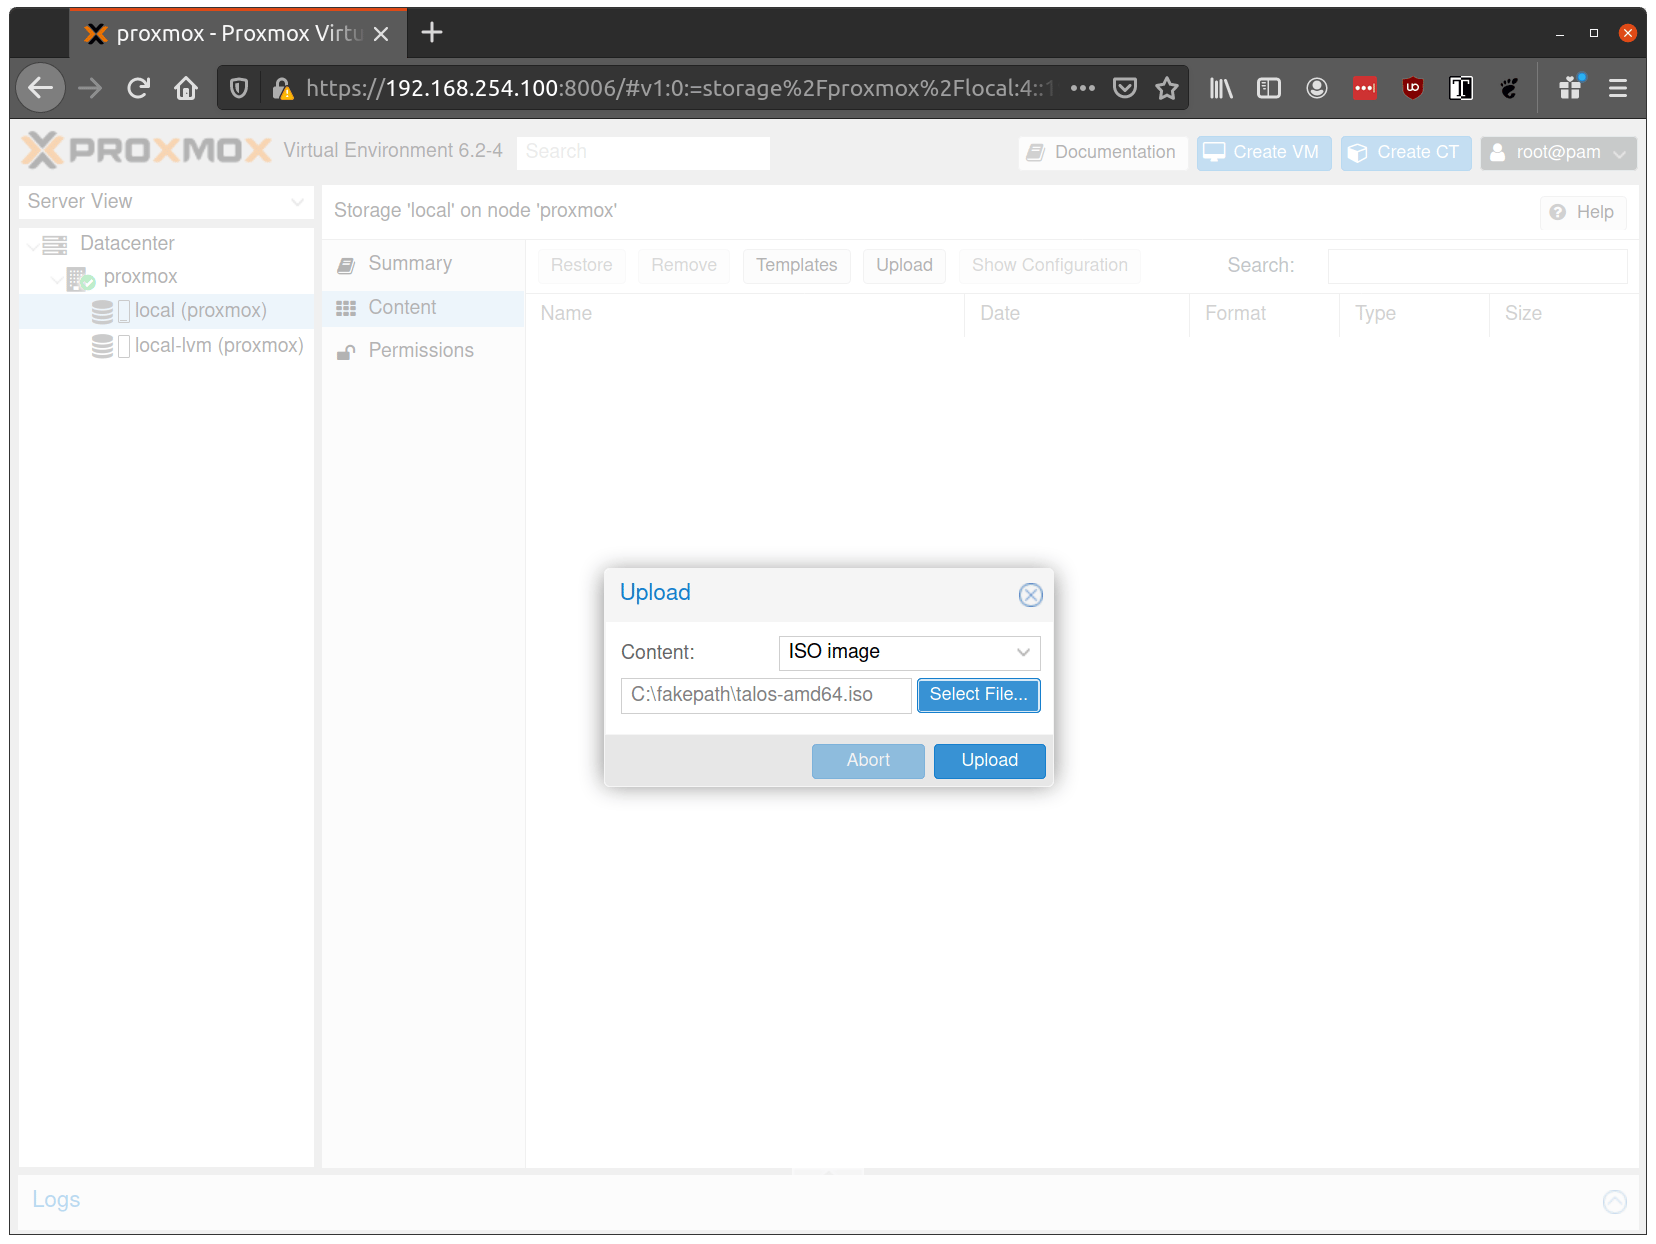
Step 1: Upload the ISO
From the Proxmox UI, select the local storage and enter the Content section. Click the Upload button: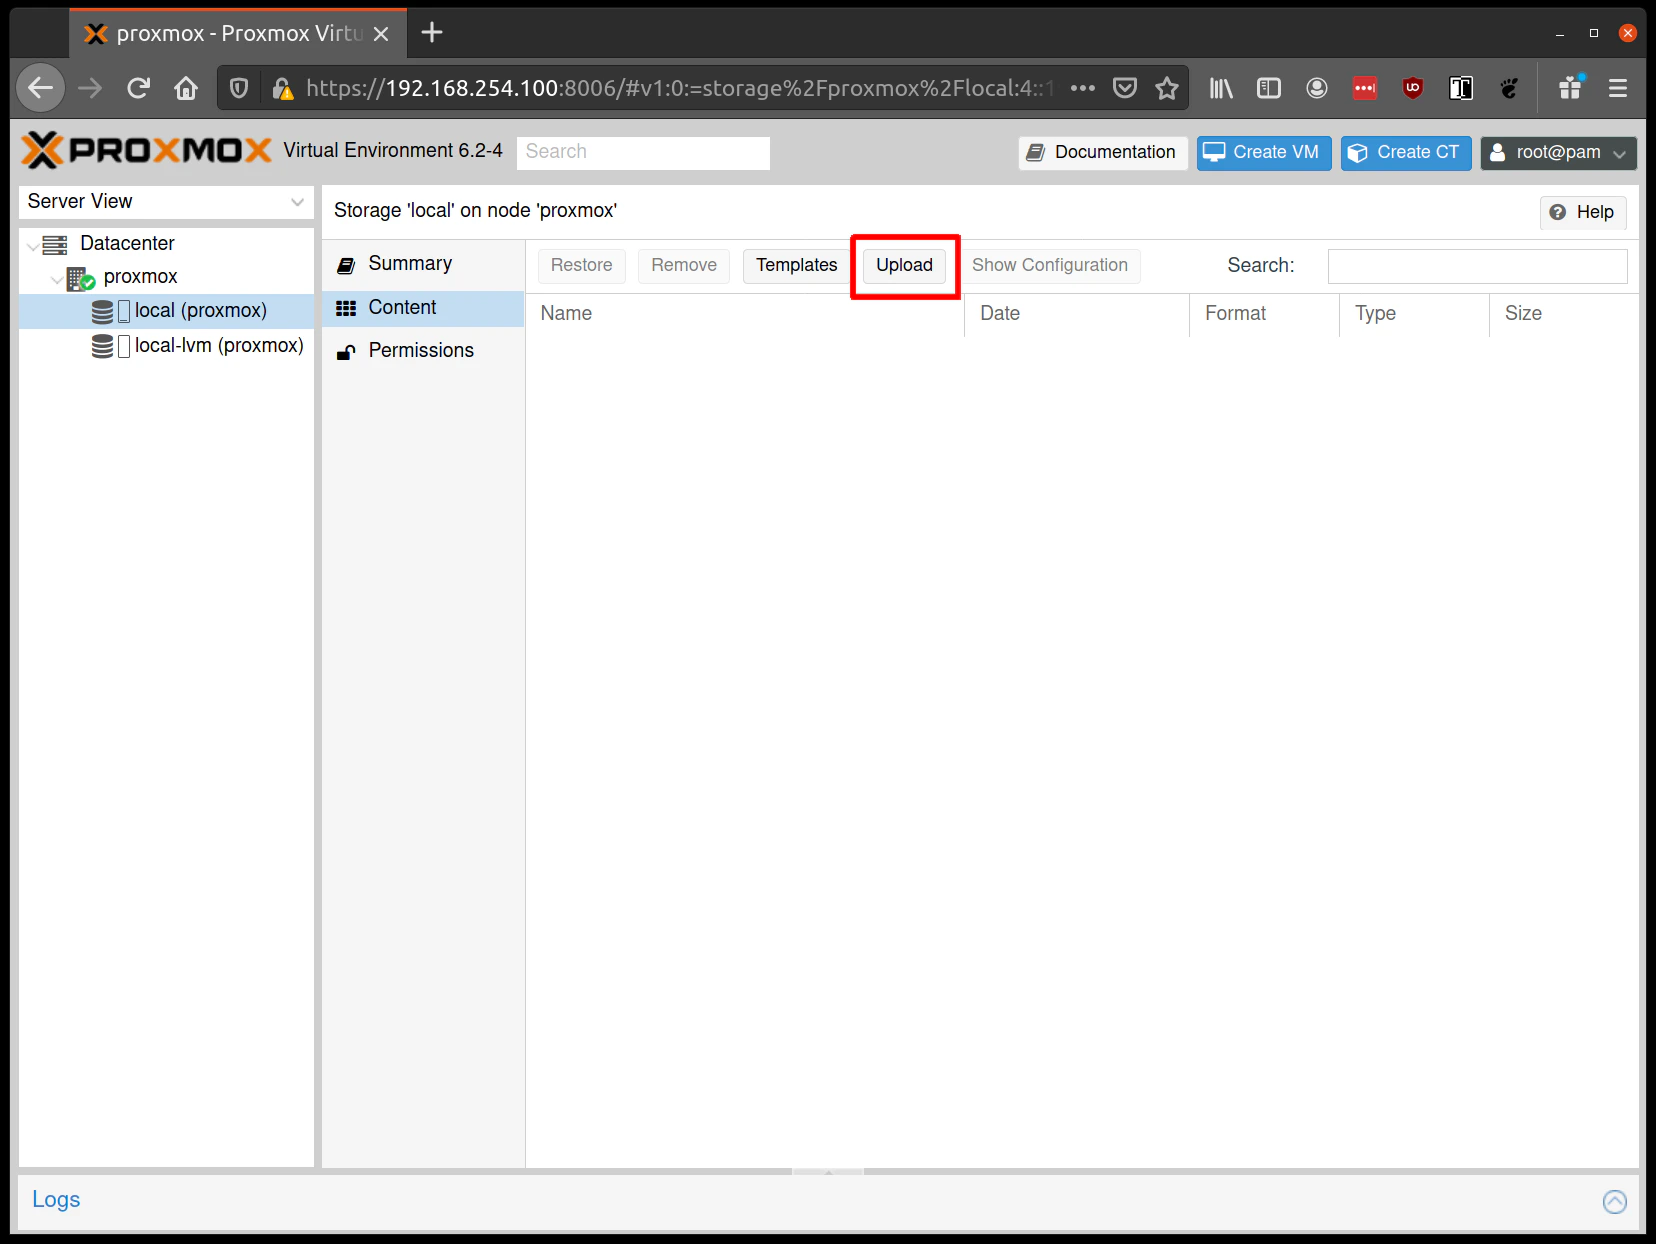
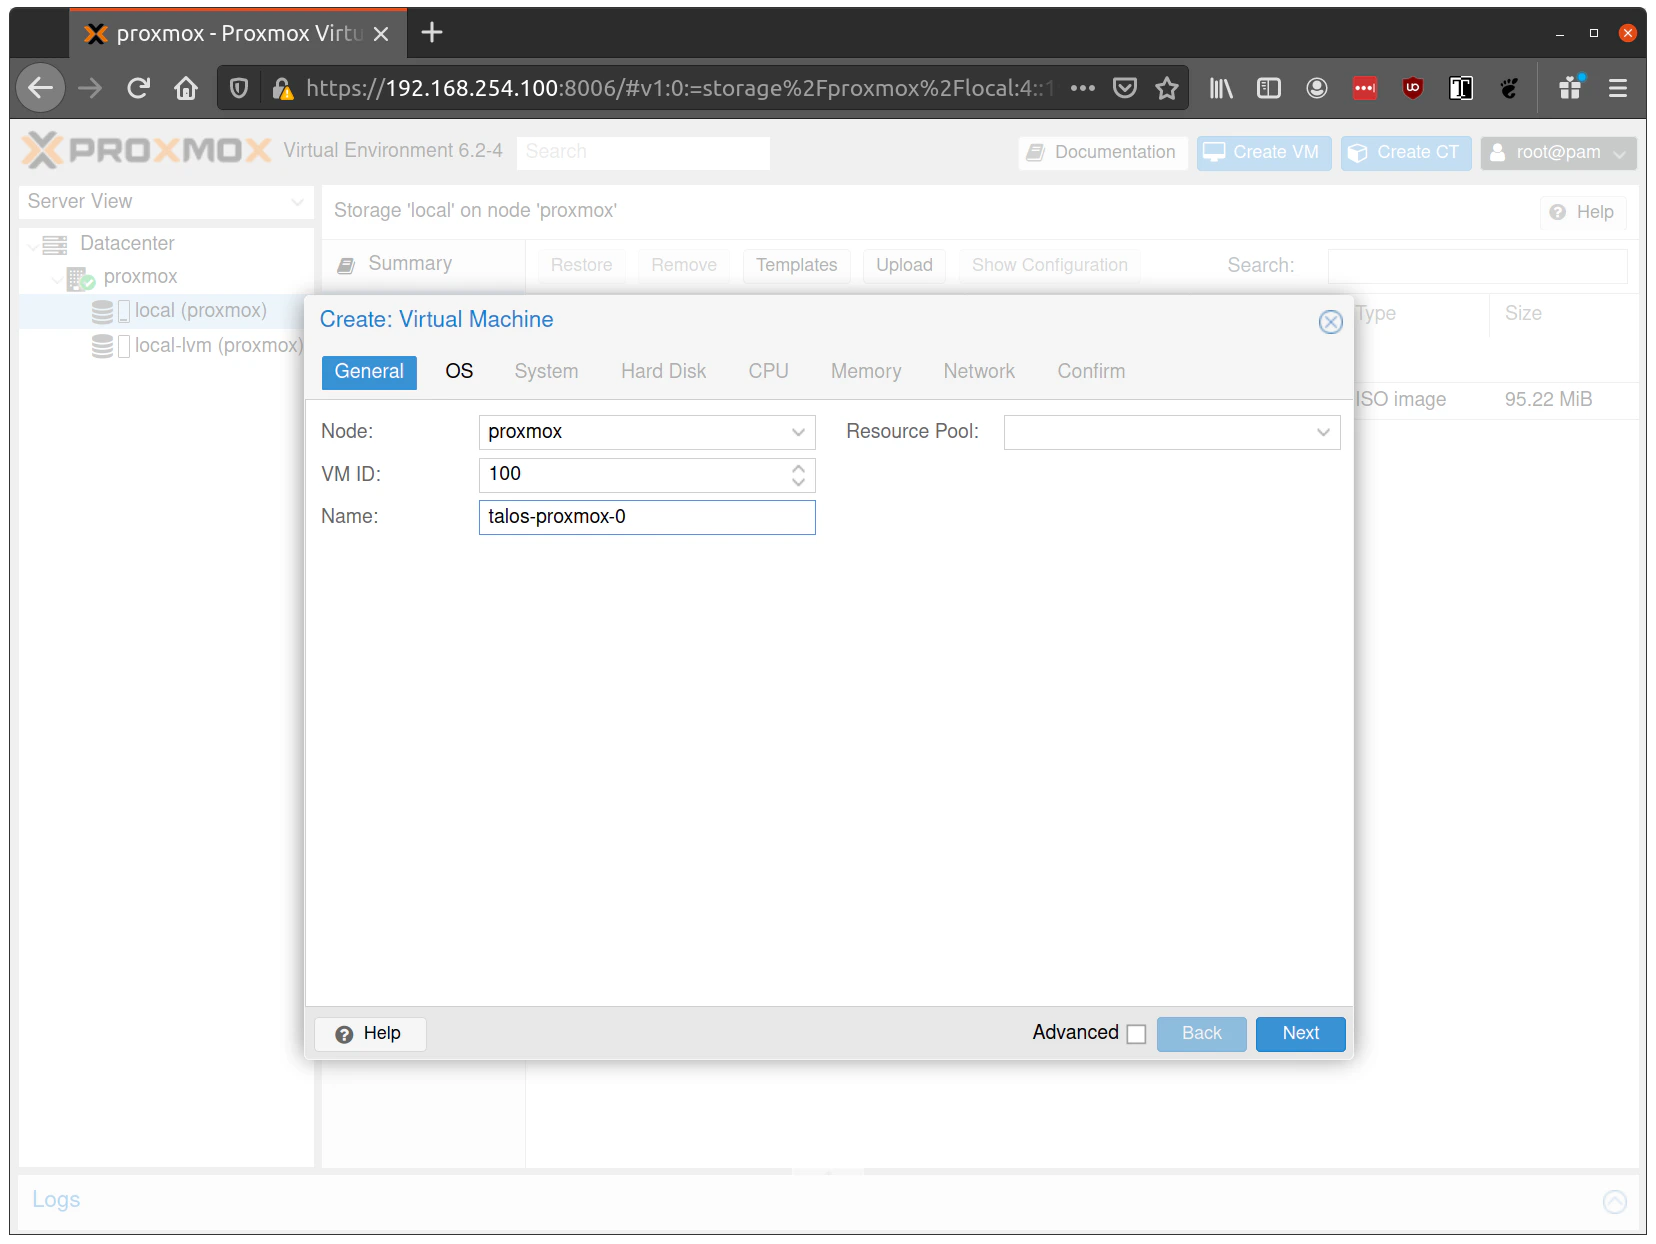
Step 2: Create VMs
Create a new VM by clicking Create VM in the Proxmox UI: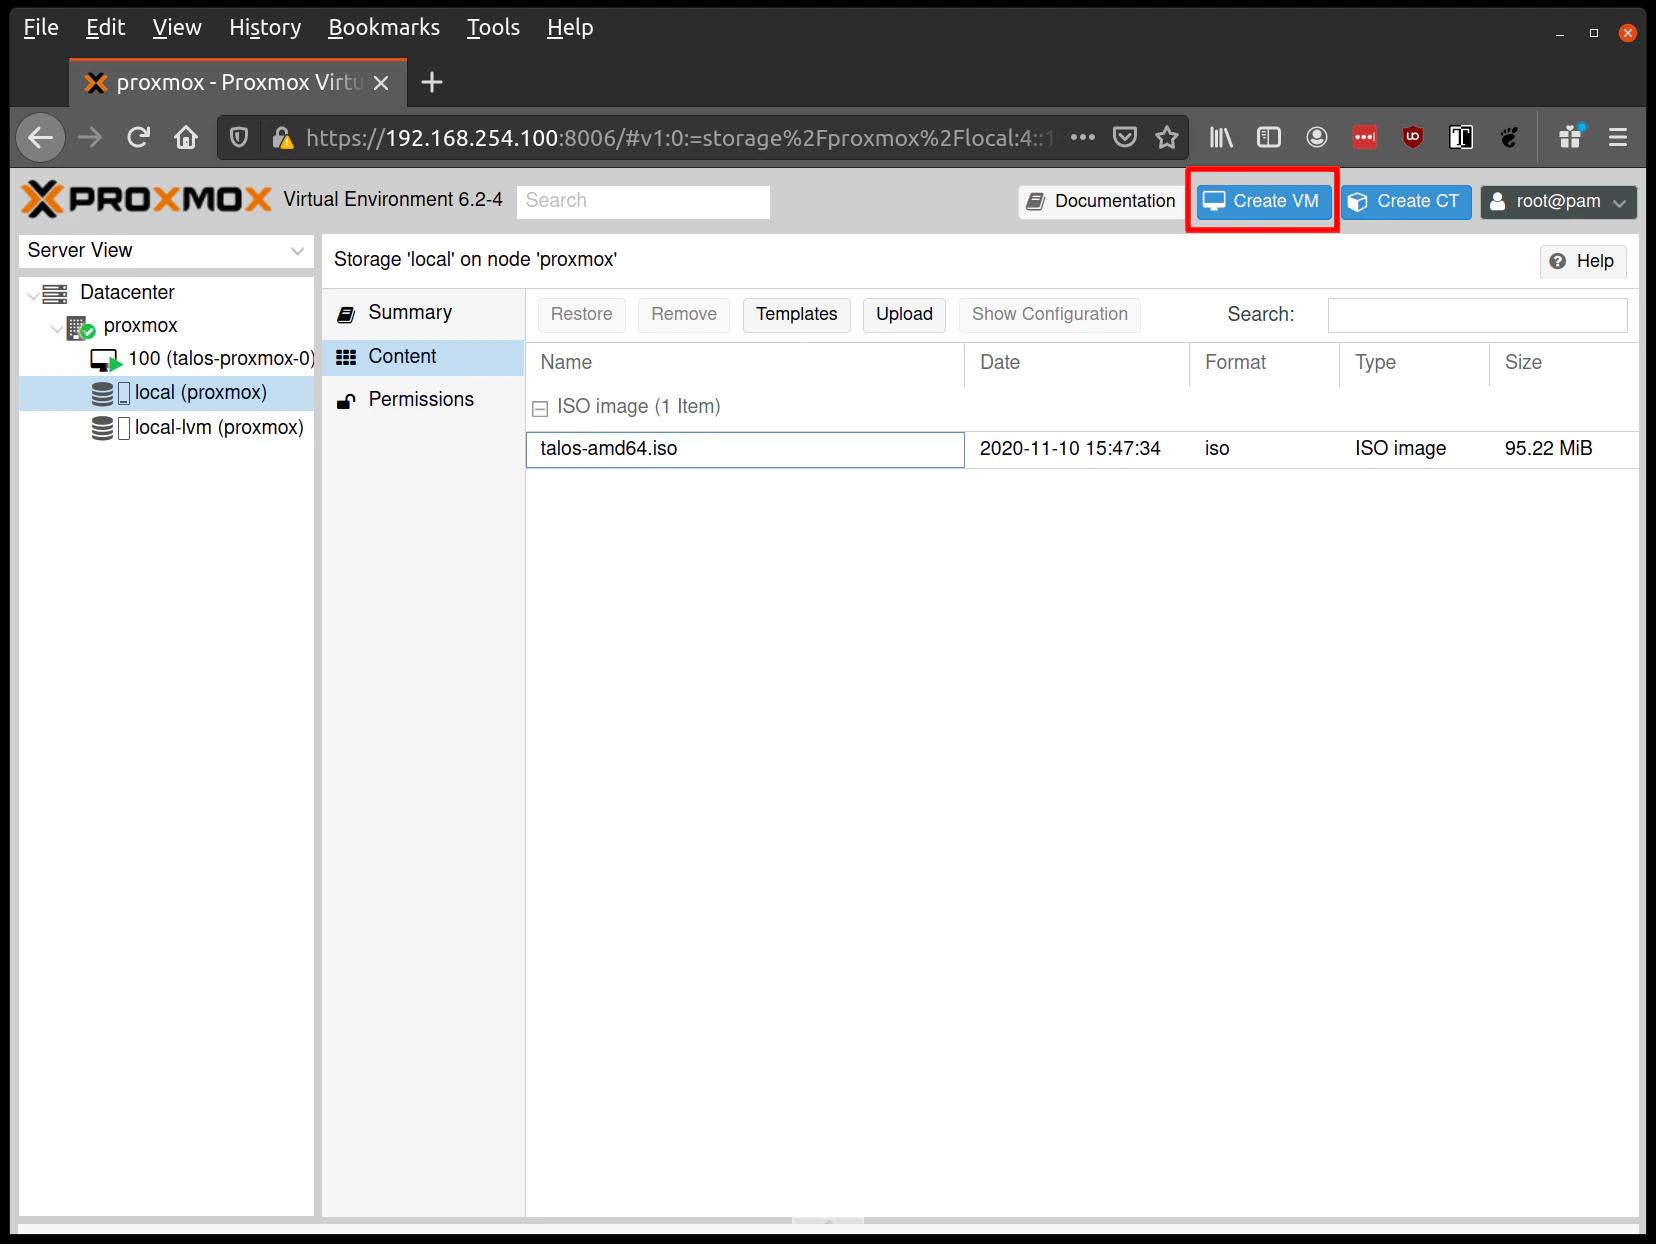
- Name tab: Fill out a name for the VM:
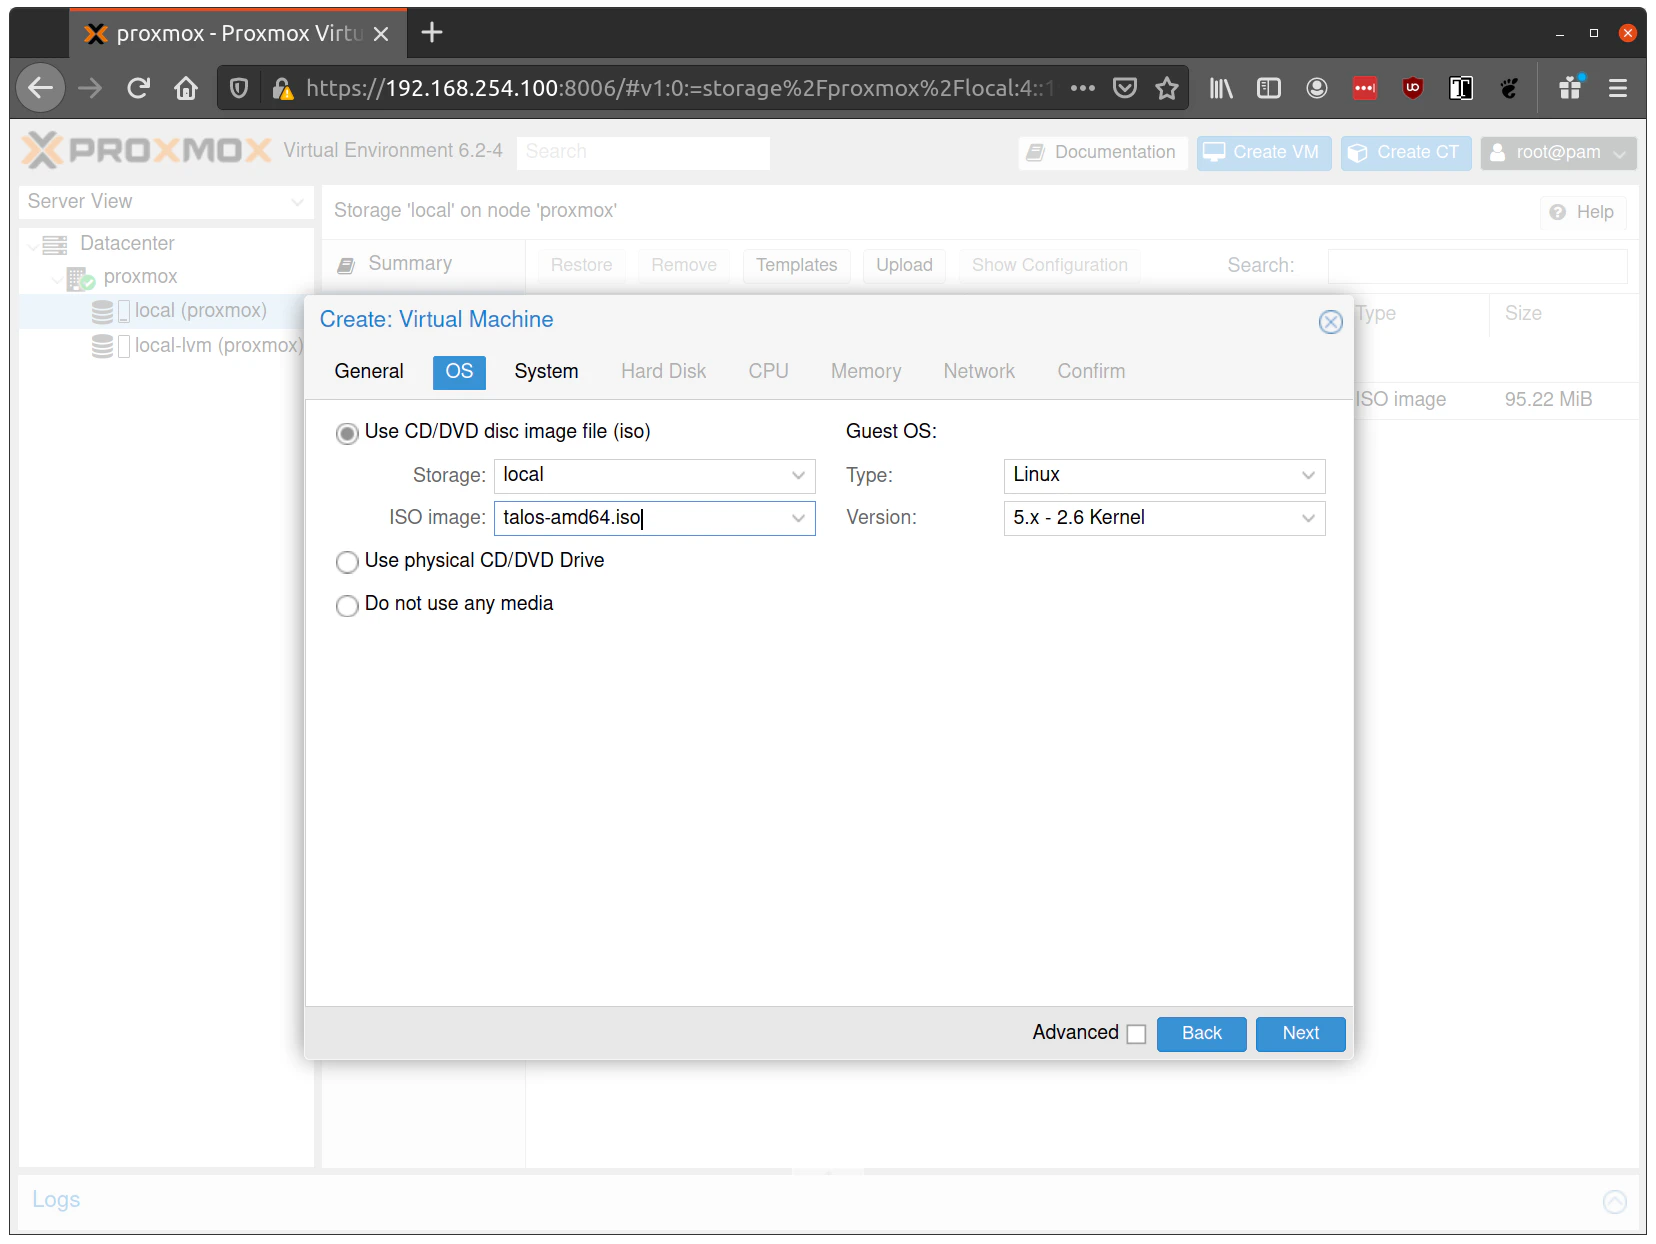
- OS tab: Select the ISO uploaded in Step 1:
-
System tab:
- Set BIOS to
ovmf(UEFI) - Set Machine to
q35 - Add an EFI Disk (4MB) for persistent UEFI settings and Secure Boot key storage
- Set BIOS to
-
Hard Disk tab:
- Set Bus/Device to
VirtIO SCSI(NOT VirtIO SCSI Single) - Set Storage to your main storage pool
- Set Format to
Raw(performance) orQCOW2(snapshots) - Set Cache to
Write Through, orNonefor clustered environments - Enable Discard and SSD emulation if using SSD storage
- Set Bus/Device to
-
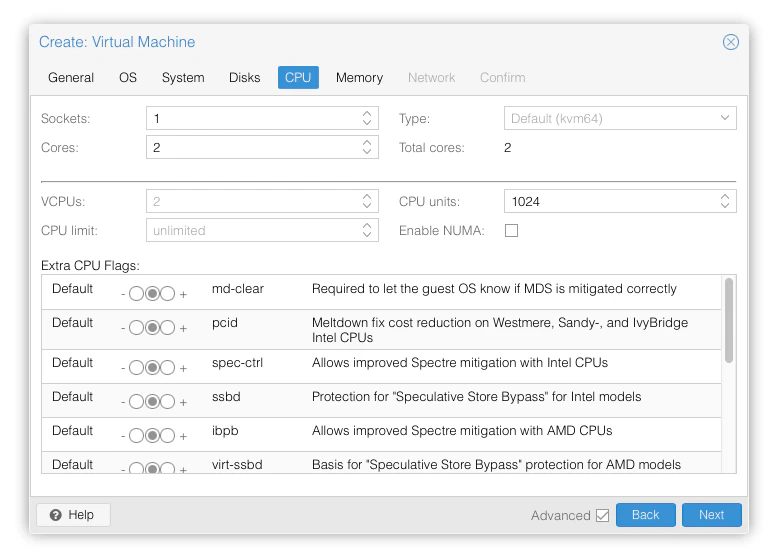
CPU tab:
- Set Cores to 2+ for control planes, 4+ for workers
- Set Type to
hostfor best performance
kvm64with feature flags instead. Add the following to/etc/pve/qemu-server/<vmid>.conf:Note:
hostCPU type prevents live VM migration.
-
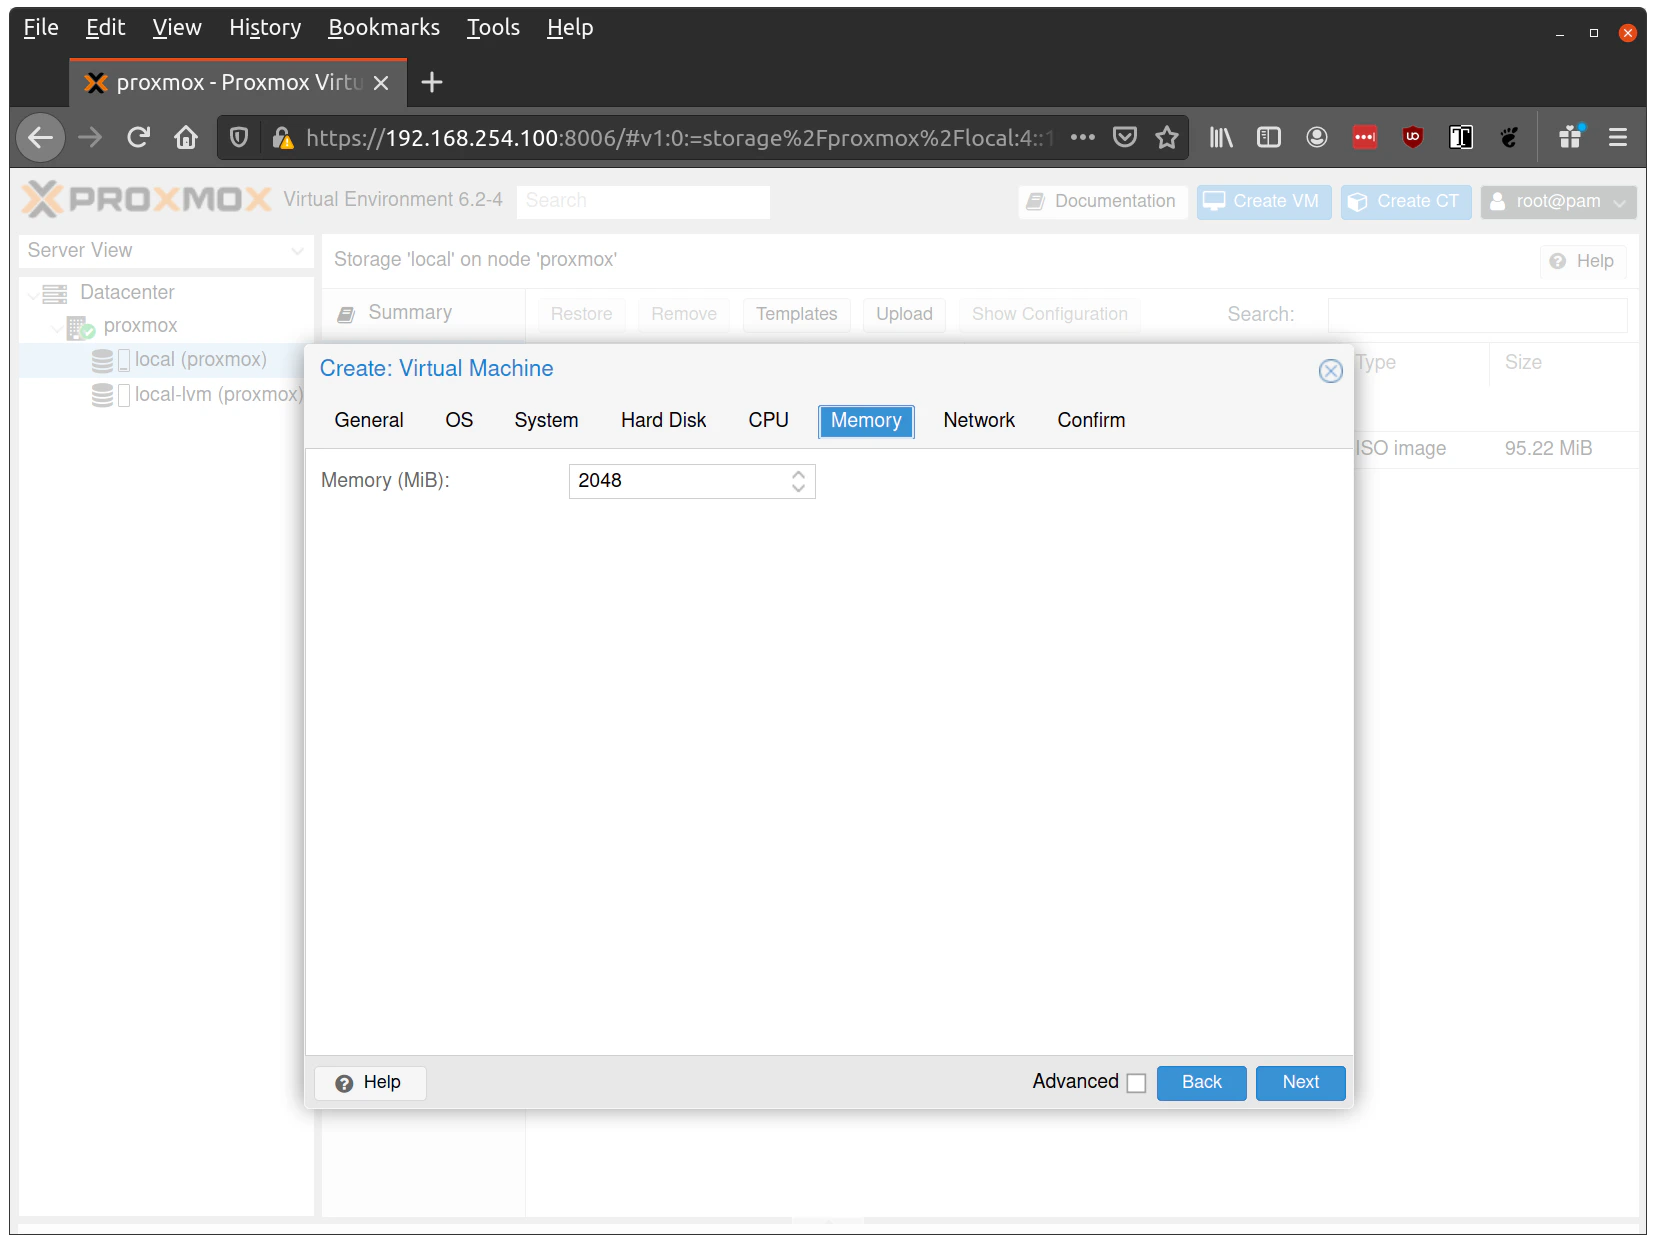
Memory tab:
- Set Memory to 4GB+ for control planes, 8GB+ for workers
- Disable Ballooning — Talos does not support memory hotplug, and enabling it will prevent Talos from seeing all available memory
-
Network tab:
- Set Model to
virtio - Set Bridge to your network bridge (e.g.,
vmbr0)
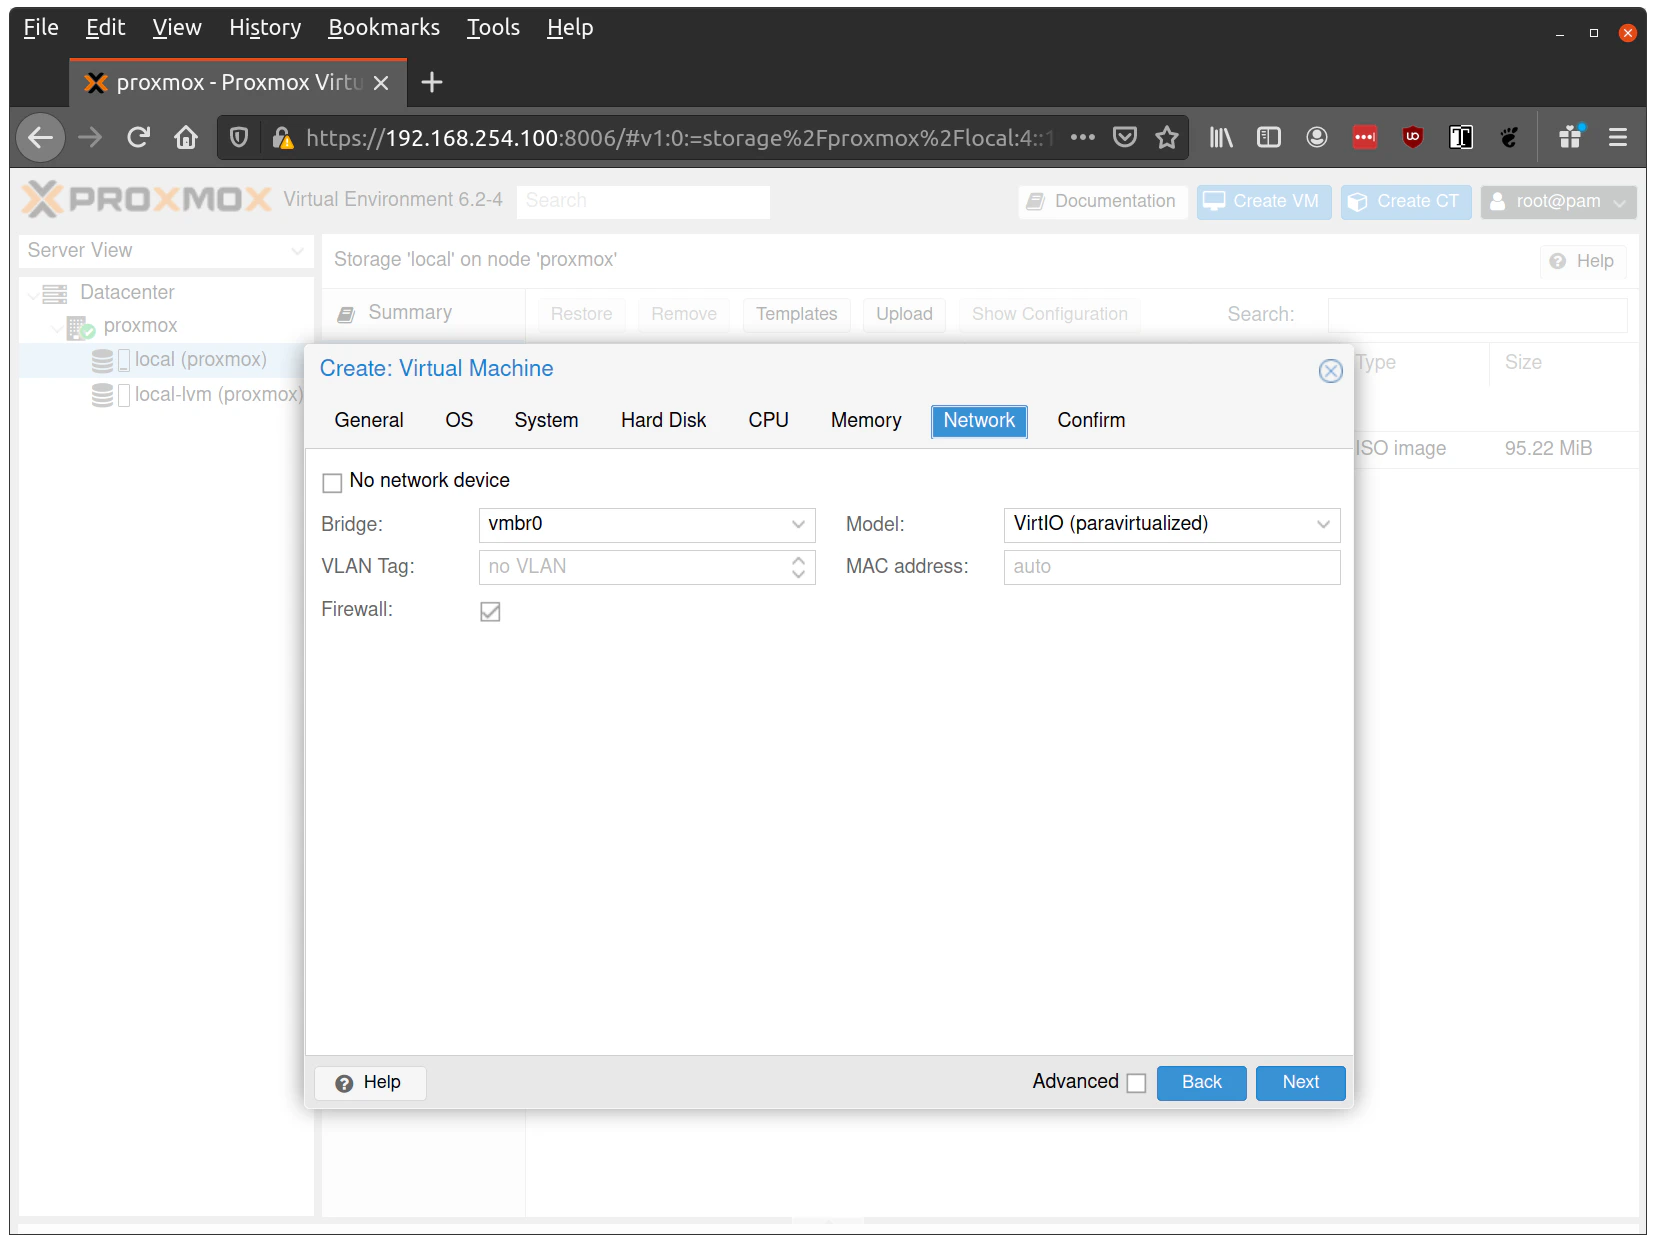
- Set Model to
Enable a serial console (
ttyS0) in Proxmox VM settings to see early boot logs and troubleshoot network issues. This is especially useful when debugging DHCP timing or bridge configuration problems.- Confirm tab: Finish creating the VM by clicking through the Confirm tab and then Finish.
Step 3: Start the control plane node
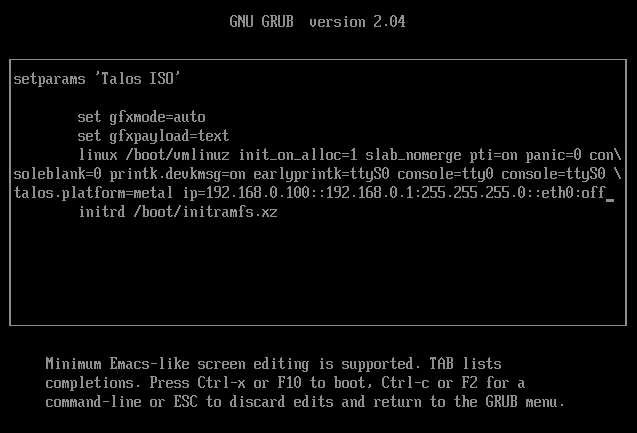
Start the VM designated as the first control plane node. It will boot from the ISO and enter maintenance mode.- With DHCP
- Without DHCP
Once the machine enters maintenance mode, the console will display the IP address the node received. Take note of this IP — it will be referred to as 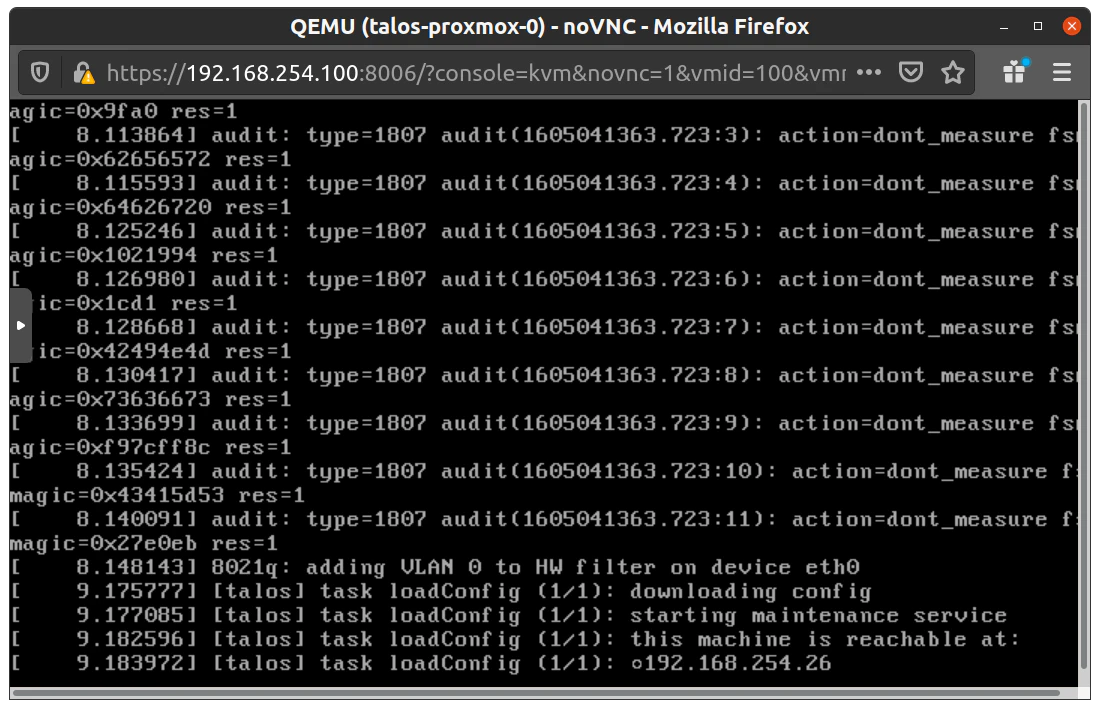
$CONTROL_PLANE_IP for the rest of this guide: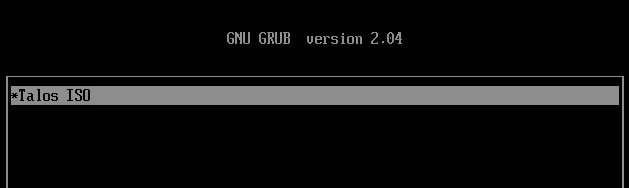
Step 4: Generate machine configurations
With$CONTROL_PLANE_IP set, generate the machine configurations for your cluster.
Choose the tab that matches your ISO.
- Talos ISO
- QEMU guest agent ISO
_out/: controlplane.yaml, worker.yaml, and talosconfig.
The default config installs Talos to Update
/dev/sda. Depending on your setup, the virtual disk may be at a different path (e.g., /dev/vda). Check available disks with:install.disk in controlplane.yaml and worker.yaml if needed.Step 5: Apply configuration to the control plane
Apply the control plane configuration to the node. If you are setting up an HA control plane, repeat this step for each additional control plane node.Booting until the cluster is bootstrapped in the next steps.
Step 6: Apply configuration to worker nodes
Start each worker VM and wait for it to enter maintenance mode. Repeat this step for each worker node, substituting$WORKER_IP with each node’s IP address.
Step 7: Bootstrap the cluster
With the control plane and worker nodes configured, complete the cluster setup by running the following commands in order:- Configure talosctl to talk to your control plane node:
- Bootstrap etcd:
- Retrieve the kubeconfig:
- Verify that your cluster is ready:
Troubleshooting
This section covers common issues you may encounter when setting up Talos VMs on Proxmox, along with steps to resolve them.Cluster creation issues
Iftalosctl cluster create fails with disk controller errors, the most likely cause is an unsupported disk controller type. For example:
-
virtio-scsi-single disk controller is not supported: This disk controller type causes Talos bootstrap to hang. Usevirtioorscsiinstead:
Network connectivity issues
If nodes fail to obtain IP addresses or show “network is unreachable” errors, work through the following checks:- Verify bridge interface: Ensure the bridge interface (e.g.,
vmbr0) exists and is UP before starting VMs:
- Check DHCP server: Ensure DHCP server is running and reachable from the bridge network
- Firewall rules: If Proxmox VM firewall is enabled, allow DHCP traffic (UDP ports 67/68). If you enforce further filtering, ensure control-plane/API connectivity per your environment’s policy (see Talos networking docs).
- VLAN configuration: Ensure VLAN tags match between bridge configuration, VM network settings, and switch configuration
- Serial console: Enable serial console to view early boot logs and network initialization messages
Disk controller issues
If you run into disk-related problems during setup, the following may help:- Configuration rejected: If you see “virtio-scsi-single disk controller is not supported”, use
--disks virtio:10GiBinstead of--disks virtio-scsi-single:10GiB - Bootstrap hangs: If bootstrap hangs or disks aren’t discovered, verify you’re using VirtIO SCSI (not “VirtIO SCSI Single”)
- Disk not found: Check disk path using
talosctl get disks --insecure --nodes $CONTROL_PLANE_IPand updateinstall.diskin machine config if needed (e.g.,install.disk: /dev/vda)