

 Talos
Talos Omni
Omni Kubernetes Guides
Configure Oracle Cloud Identity Domains
This section walks through creating a SAML application in Oracle Cloud and collecting the IdP metadata file needed to complete the Omni configuration.Step 1: Navigate to your domain
To get started, log in to Oracle Cloud and navigate to your identity domain.- Log in to Oracle Cloud.
- On the left menu, select Identity & Security > Domains.
- Click your desired domain, then select Integrated Applications.
Step 2: Create a SAML application
Create a new SAML application to represent your Omni instance.- Click Add Application > SAML Application > Launch Workflow.
- Give the application a name, for example “Omni”.
- Leave all other fields blank, then click Submit.
Step 3: Configure SSO settings
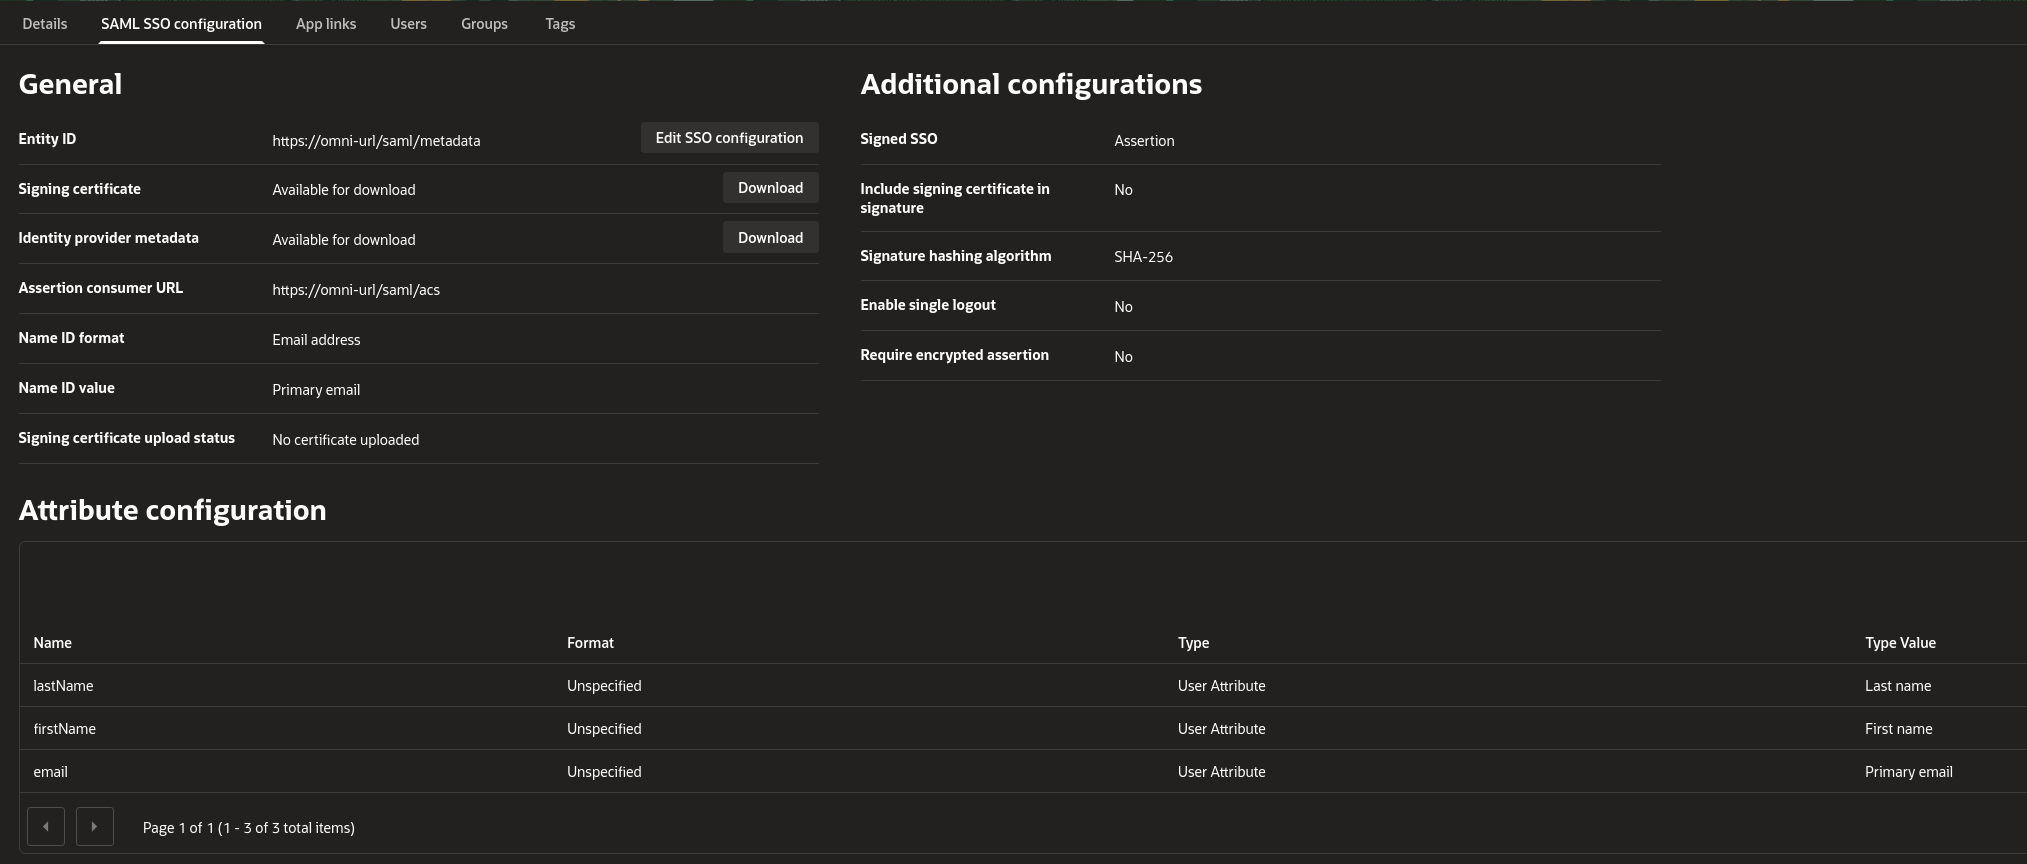
Open the SSO configuration for the application you just created and update the fields below. Leave all other fields at their defaults.- Select the application, then click SAML SSO Configuration > Edit SSO Configuration.
- Update only the fields listed in the table below.
| Option | Value | Description |
|---|---|---|
| Entity ID | https://<omni-fqdn>/saml/metadata | The fully-qualified domain name for metadata retrieval |
| Assertion Consumer URL | https://<omni-fqdn>/saml/acs | The fully-qualified domain name for the ACS endpoint |
| Name ID Format | Email address | The format used to identify the user |
| Name ID Value | Primary email | The value sent as the Name ID in the assertion |
| Enable single logout | Disabled | Leave single logout disabled |
Step 4: Map attributes
At the bottom of the SAML SSO Configuration page, configure the attribute mappings that allow Omni to identify users by name and email.- Locate the Attribute Configuration block.
- Use the Add Attribute button to create the following mappings.
| Name | Name Format | Value | Description |
|---|---|---|---|
| Unspecified | Primary email | The user’s email address | |
| firstName | Unspecified | First name | The user’s first name |
| lastName | Unspecified | Last name | The user’s last name |
Step 5: Assign users
Add the users who should have access to Omni. You can add more users at any time by returning to this section.- Navigate to the Users section of the application.
- Add any users that should have access to Omni.
Step 6: Download the IdP metadata file
Download the IdP metadata file and place it on the host that will run the Omni container. The remaining steps in this guide assume the file is saved at~/oraclemetadata.xml.
- Head back to the SAML SSO Configuration tab.
- Click Download next to the Identity Provider Metadata field.
- Copy or upload the file to the following path on your container host:
Configure Omni to use Oracle Cloud
To enable SAML authentication, pass the required flags to the Omni container at startup. Alternatively, you can set these values using the Omni configuration file instead of CLI flags.Step 1: Review the required flags
Before starting the container, familiarize yourself with the flags needed for both Docker and Omni. The Docker flag mounts the IdP metadata file into the container, and the Omni flags enable and configure SAML authentication.| Scope | Flag | Description |
|---|---|---|
| Docker | -v $PWD/oraclemetadata.xml:/oraclemetadata.xml | Mounts the IdP metadata file into the container |
| Omni | --auth-saml-enabled=true | Enables SAML authentication |
| Omni | --auth-saml-metadata=/oraclemetadata.xml | Path to the IdP metadata file inside the container |
| Omni | --auth-saml-name-id-format=urn:oasis:names:tc:SAML:1.1:nameid-format:emailAddress | Ensures Omni processes the email address correctly |
Step 2: Start the container
Run the Omni container with the flags from Step 1. The example below shows a minimaldocker run command with the required flags in place.