

- Configure a SAML app in the UIIE Manager portal.
- Configure Omni for SAML with UIIE
Configure a SAML app in the UIIE Manager portal
Follow these steps to create and configure a SAML app in the UIIE Manager portal.Step 1: Create a new SAML app
Start by creating a custom SAML app in the UIIE Manager portal.- Log in to the UIIE Manager portal and navigate to SSO Apps in the left menu.
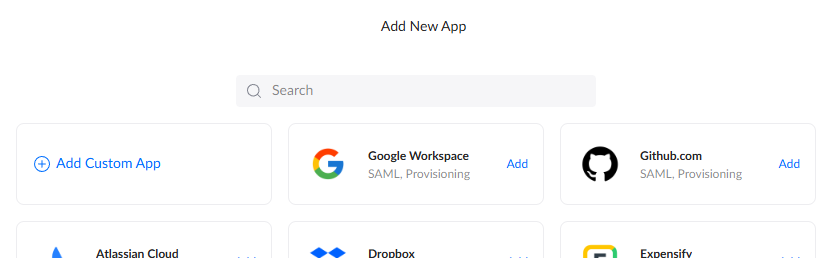
- Click Add a new app and select Add Custom App.
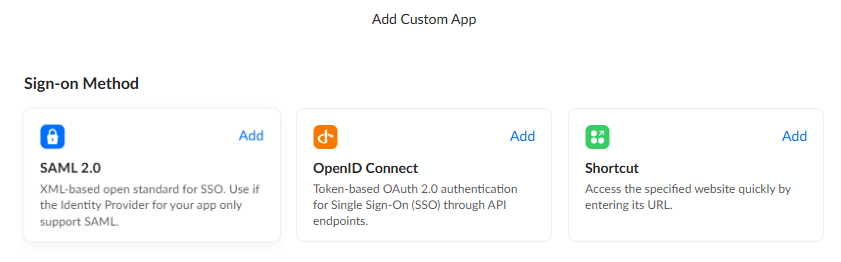
- Select Add on the SAML 2.0 option for Sign-on Method.
Step 2: Configure the SAML app settings
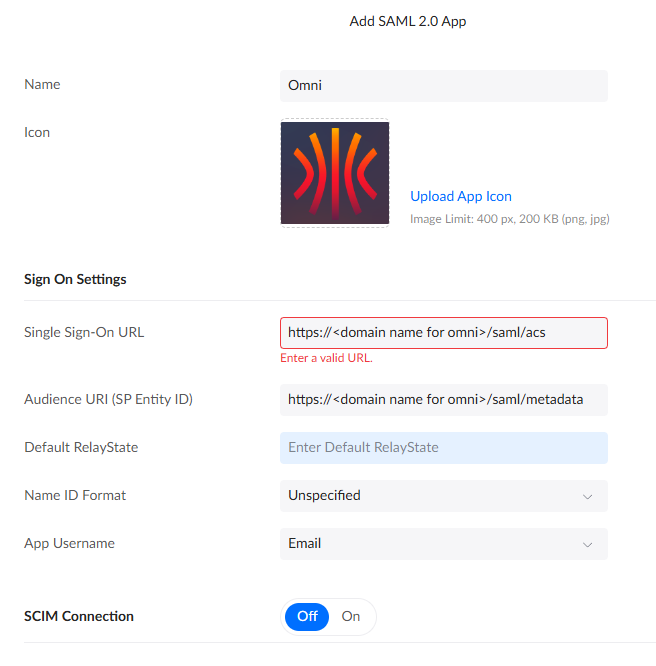
You will now be on the Add SAML 2.0 App screen. Fill in the fields as follows, replacing<fqdn for omni> with the fully-qualified domain name of your Omni instance:
Step 3: Assign users
Assign the users or groups who should be able to log in to Omni. You can do this from the app management screen you are taken to after clicking Done.The first user to log in to Omni is automatically granted the
Admin role. It is best practice to assign only your primary admin first, have them log in to Omni, and then return here to assign any additional users.Step 4: Configure attribute statements
Attribute statements tell UIIE which user attributes to pass to Omni in the SAML assertion. You need to add mappings for email, first name, and last name.- Click the Settings tab at the top of the screen.

- Scroll to the bottom of the Settings page and expand the Sign On section by clicking Show More.

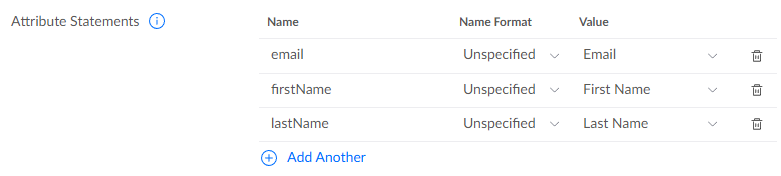
- In the Attribute Statements block, add the following mappings. Use the Add Another button to add each row:
Step 5: Download the IDP metadata file
The IDP metadata file contains the information Omni needs to trust and communicate with UIIE. You will need to copy this file to the host that will run the Omni container.- Further up the Sign On page, locate the View Setup Instructions link or the Identity Provider metadata link.
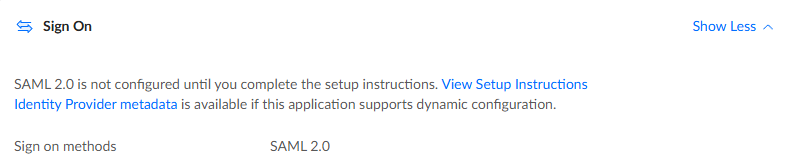
- Download the IDP metadata file as an XML file and copy it to your container host. The remaining steps in this guide assume the file is saved at
~/uiieIDPmetadata.xml.
Configure Omni for SAML with UIIE
To configure Omni to use UIIE as its SAML provider, pass the following flags when launching the Omni container with Docker. The Docker flag mounts the IDP metadata file into the container, and the Omni flags enable SAML and point Omni to the metadata file.
For example:
UIIE does not expose group attributes, so you will need to manually assign Omni roles to users after they log in for the first time.