> ## Documentation Index
> Fetch the complete documentation index at: https://docs.siderolabs.com/llms.txt
> Use this file to discover all available pages before exploring further.

# Proxmox

> Creating Talos Kubernetes cluster using Proxmox.

export const release_v1_7 = 'v1.7.6';

export const VersionWarningBanner = () => {
  const latestVersion = "v1.13";
  const [latestUrl, setLatestUrl] = useState(null);
  const [currentVersion, setCurrentVersion] = useState(null);
  const [isBeta, setIsBeta] = useState(false);
  const parseVersion = v => v.replace("v", "").split(".").map(Number);
  const isGreaterVersion = (a, b) => {
    const [aMajor, aMinor] = parseVersion(a);
    const [bMajor, bMinor] = parseVersion(b);
    if (aMajor > bMajor) return true;
    if (aMajor === bMajor && aMinor > bMinor) return true;
    return false;
  };
  useEffect(() => {
    if (typeof window === "undefined") return;
    const {pathname, hash, search} = window.location;
    const match = pathname.match(/\/talos\/(v\d+\.\d+)\//);
    if (!match) return;
    const detectedVersion = match[1];
    if (detectedVersion === latestVersion) return;
    setCurrentVersion(detectedVersion);
    if (isGreaterVersion(detectedVersion, latestVersion)) {
      setIsBeta(true);
    }
    const newPath = pathname.replace(`/talos/${detectedVersion}/`, `/talos/${latestVersion}/`);
    setLatestUrl(`${newPath}${search}${hash}`);
  }, []);
  if (!latestUrl || !currentVersion) return null;
  return <div className="not-prose sticky top-6 z-50 my-6">
      <div className="border border-yellow-500/30 bg-yellow-500/10 px-4 py-3 rounded-xl">
        <div className="text-sm">
          {isBeta ? <>
              ⚠️ You are viewing a <strong>beta version</strong> of Talos ({currentVersion}).
              This version may be unstable.
              <a href={latestUrl} className="ml-2 underline text-yellow-400 hover:text-yellow-300 font-medium">
                View latest stable version {latestVersion} →
              </a>
            </> : <>
              ⚠️ You are viewing an older version of Talos ({currentVersion}).
              <a href={latestUrl} className="ml-2 underline text-yellow-400 hover:text-yellow-300 font-medium">
                View the latest version {latestVersion} →
              </a>
            </>}
        </div>
      </div>
    </div>;
};

<VersionWarningBanner />

In this guide we will create a Kubernetes cluster using Proxmox.

## Video Walkthrough

To see a live demo of this writeup, visit Youtube here:

<iframe width="560" height="315" src="https://www.youtube.com/embed/MyxigW4_QFM" frameborder="0" allow="accelerometer; autoplay; clipboard-write; encrypted-media; gyroscope; picture-in-picture" allowfullscreen />

## Installation

### How to Get Proxmox

It is assumed that you have already installed Proxmox onto the server you wish to create Talos VMs on.
Visit the [Proxmox](https://www.proxmox.com/en/downloads) downloads page if necessary.

### Install talosctl

You can download `talosctl` on MacOS and Linux via:

```bash theme={null}
brew install siderolabs/tap/talosctl
```

For manual installation and other platforms please see the [talosctl installation guide](../../getting-started/talosctl).

### Download ISO Image

In order to install Talos in Proxmox, you will need the ISO image from [Image Factory](https://www.talos.dev/latest/talos-guides/install/boot-assets/#image-factory).

```bash theme={null}
mkdir -p _out/
curl https://factory.talos.dev/image/376567988ad370138ad8b2698212367b8edcb69b5fd68c80be1f2ec7d603b4ba/<version>/metal-<arch>.iso -L -o _out/metal-<arch>.iso
```

For example version {release_v1_7  } for `linux` platform:

<CodeBlock lang="sh">
  {`
    mkdir -p _out/
    curl https://factory.talos.dev/image/376567988ad370138ad8b2698212367b8edcb69b5fd68c80be1f2ec7d603b4ba/${release_v1_7 }/metal-amd64.iso -L -o _out/metal-amd64.iso
    `}
</CodeBlock>

### QEMU guest agent support (iso)

* If you need the QEMU guest agent so you can do guest VM shutdowns of your Talos VMs, then you will need a custom ISO
* To get this, navigate to [https://factory.talos.dev/](https://factory.talos.dev/)
* Scroll down and select your Talos version ( {release_v1_7 } for example)
* Then tick the box for `siderolabs/qemu-guest-agent` and submit
* This will provide you with a link to the bare metal ISO
* The lines we're interested in are as follows

<CodeBlock lang="sh">
  {`
    Metal ISO

    amd64 ISO
      https://factory.talos.dev/image/ce4c980550dd2ab1b17bbf2b08801c7eb59418eafe8f279833297925d67c7515/${release_v1_7 }/metal-amd64.iso
    arm64 ISO
      https://factory.talos.dev/image/ce4c980550dd2ab1b17bbf2b08801c7eb59418eafe8f279833297925d67c7515/${release_v1_7 }/metal-arm64.iso

    Installer Image

    For the initial Talos install or upgrade use the following installer image:
    factory.talos.dev/installer/ce4c980550dd2ab1b17bbf2b08801c7eb59418eafe8f279833297925d67c7515:${release_v1_7 }
    `}
</CodeBlock>

* Download the above ISO (this will most likely be `amd64` for you)
* Take note of the `factory.talos.dev/installer` URL as you'll need it later

## Upload ISO

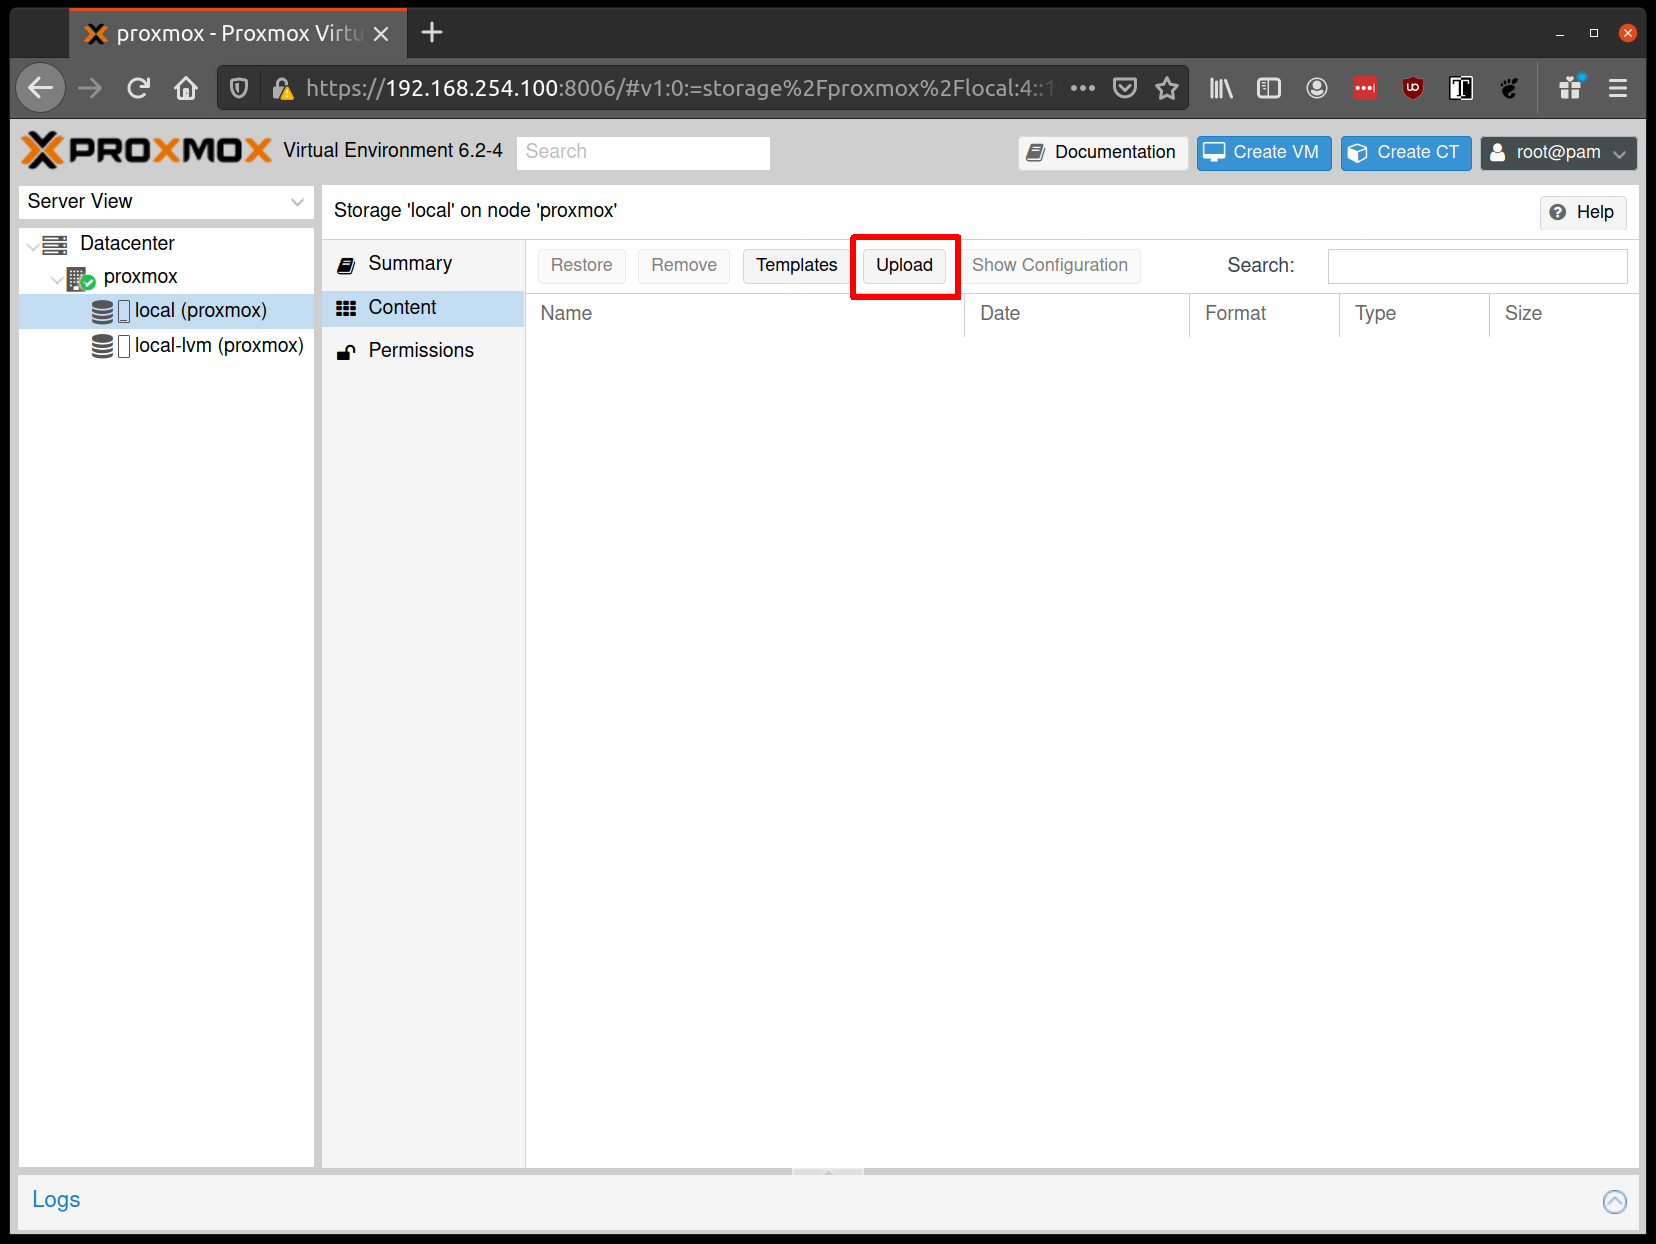
From the Proxmox UI, select the "local" storage and enter the "Content" section.
Click the "Upload" button:

<img src="https://mintcdn.com/siderolabs-fe86397c/IZowgH7onBncJfmz/talos/v1.7/platform-specific-installations/virtualized-platforms/images/proxmox-click-upload.png?fit=max&auto=format&n=IZowgH7onBncJfmz&q=85&s=f6c73bc501fd71ea98a30b929c69003c" width="500px" data-path="talos/v1.7/platform-specific-installations/virtualized-platforms/images/proxmox-click-upload.png" />

Select the ISO you downloaded previously, then hit "Upload"
<img src="https://mintcdn.com/siderolabs-fe86397c/IZowgH7onBncJfmz/talos/v1.7/platform-specific-installations/virtualized-platforms/images/proxmox-create-vm.png?fit=max&auto=format&n=IZowgH7onBncJfmz&q=85&s=ff4d66ccc8dcf32693349137165cfe90" width="500px" data-path="talos/v1.7/platform-specific-installations/virtualized-platforms/images/proxmox-create-vm.png" />

## Create VMs

Before starting, familiarise yourself with the
[system requirements](../../getting-started/system-requirements) for Talos and assign VM
resources accordingly.

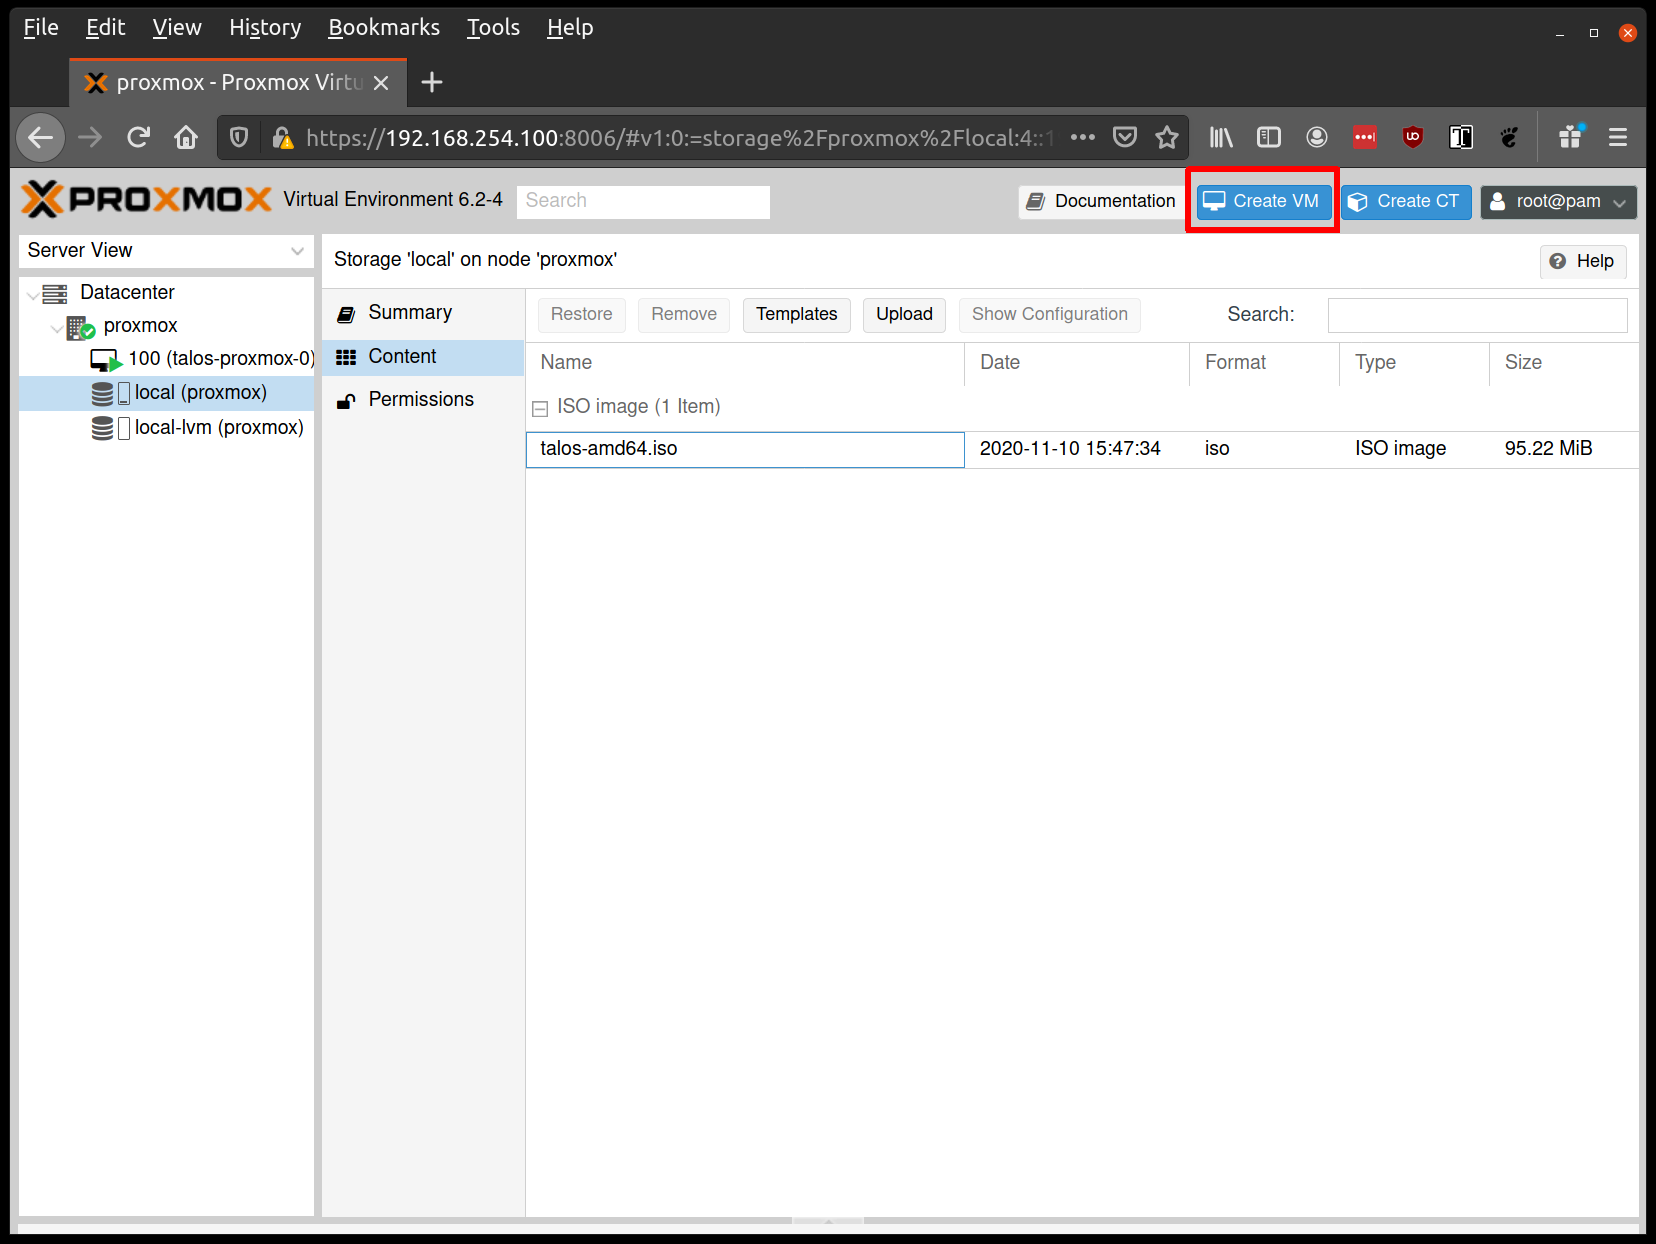
Create a new VM by clicking the "Create VM" button in the Proxmox UI:

<img src="https://mintcdn.com/siderolabs-fe86397c/IZowgH7onBncJfmz/talos/v1.7/platform-specific-installations/virtualized-platforms/images/proxmox-create-vm.png?fit=max&auto=format&n=IZowgH7onBncJfmz&q=85&s=ff4d66ccc8dcf32693349137165cfe90" width="500px" data-path="talos/v1.7/platform-specific-installations/virtualized-platforms/images/proxmox-create-vm.png" />

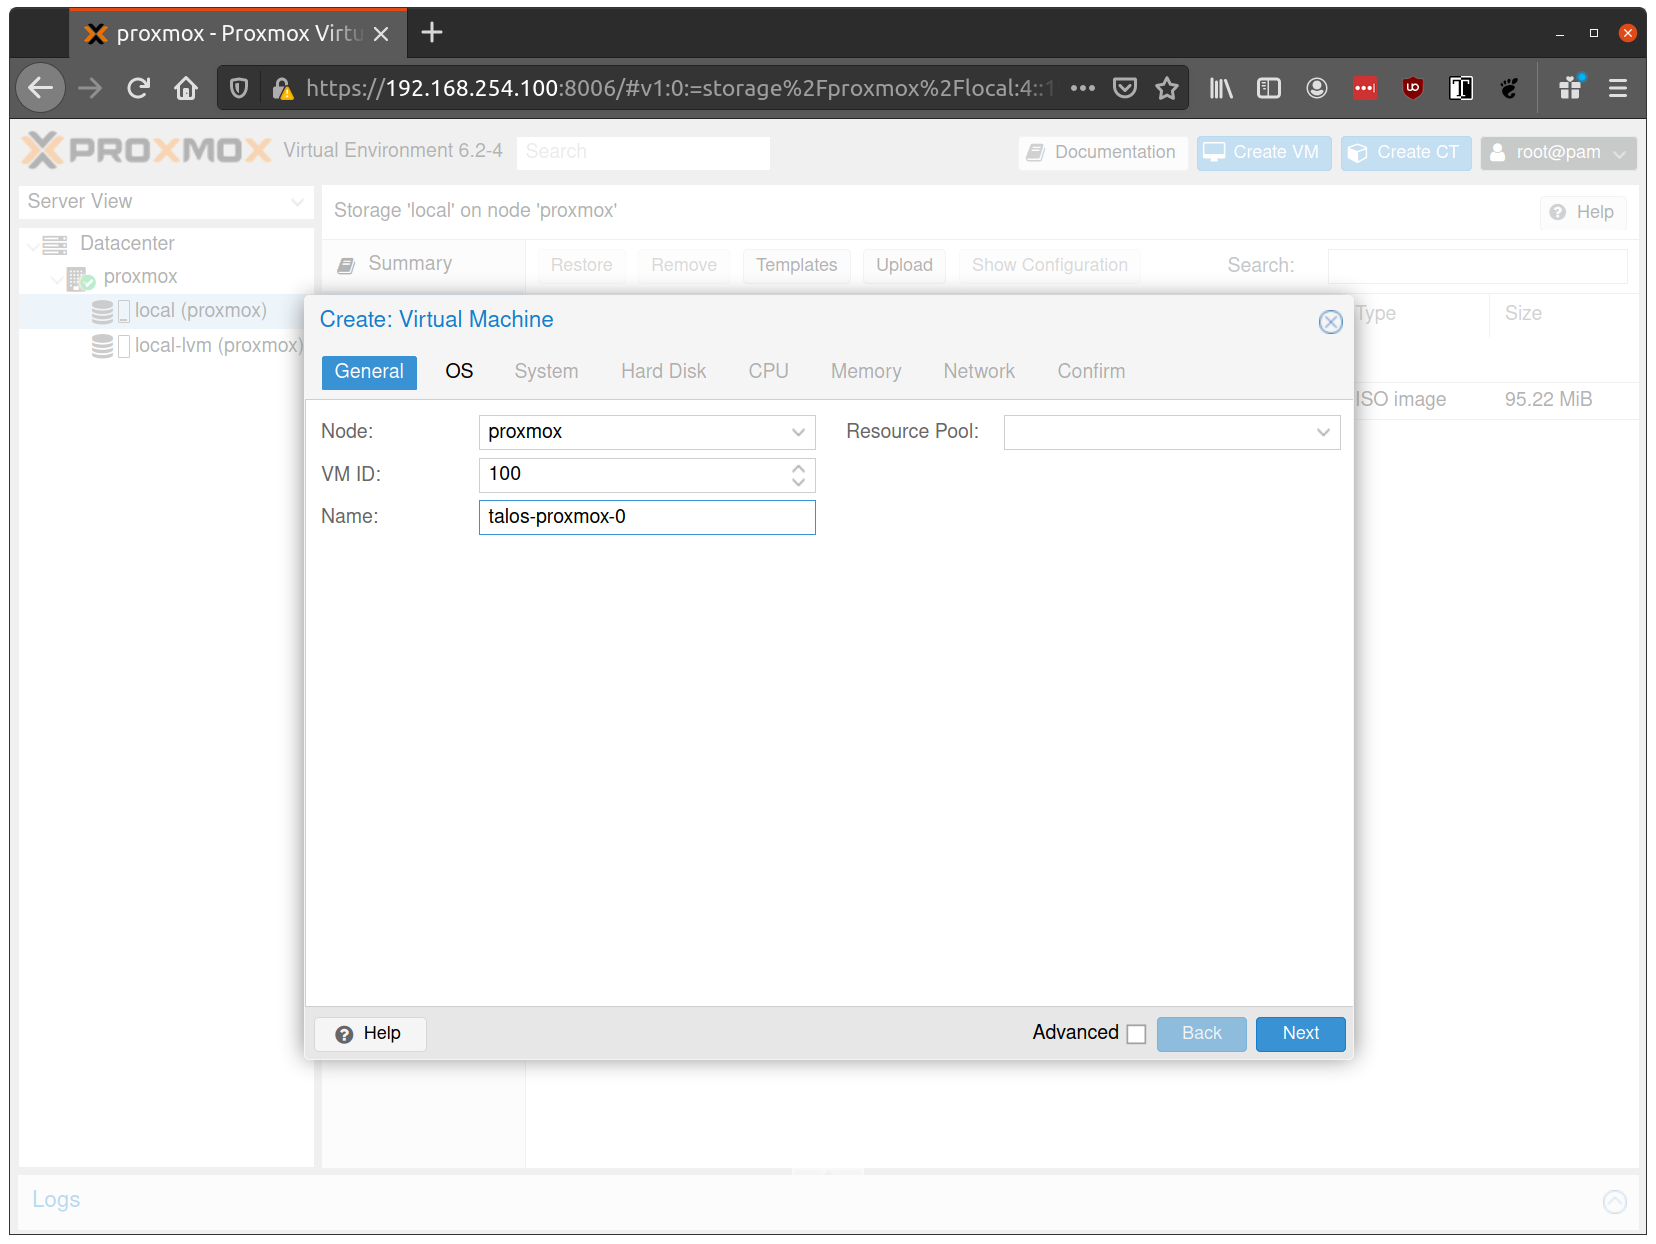
Fill out a name for the new VM:

<img src="https://mintcdn.com/siderolabs-fe86397c/IZowgH7onBncJfmz/talos/v1.7/platform-specific-installations/virtualized-platforms/images/proxmox-edit-vm-name.png?fit=max&auto=format&n=IZowgH7onBncJfmz&q=85&s=139d7950afc3a908eeeab627e0bedd8d" width="500px" data-path="talos/v1.7/platform-specific-installations/virtualized-platforms/images/proxmox-edit-vm-name.png" />

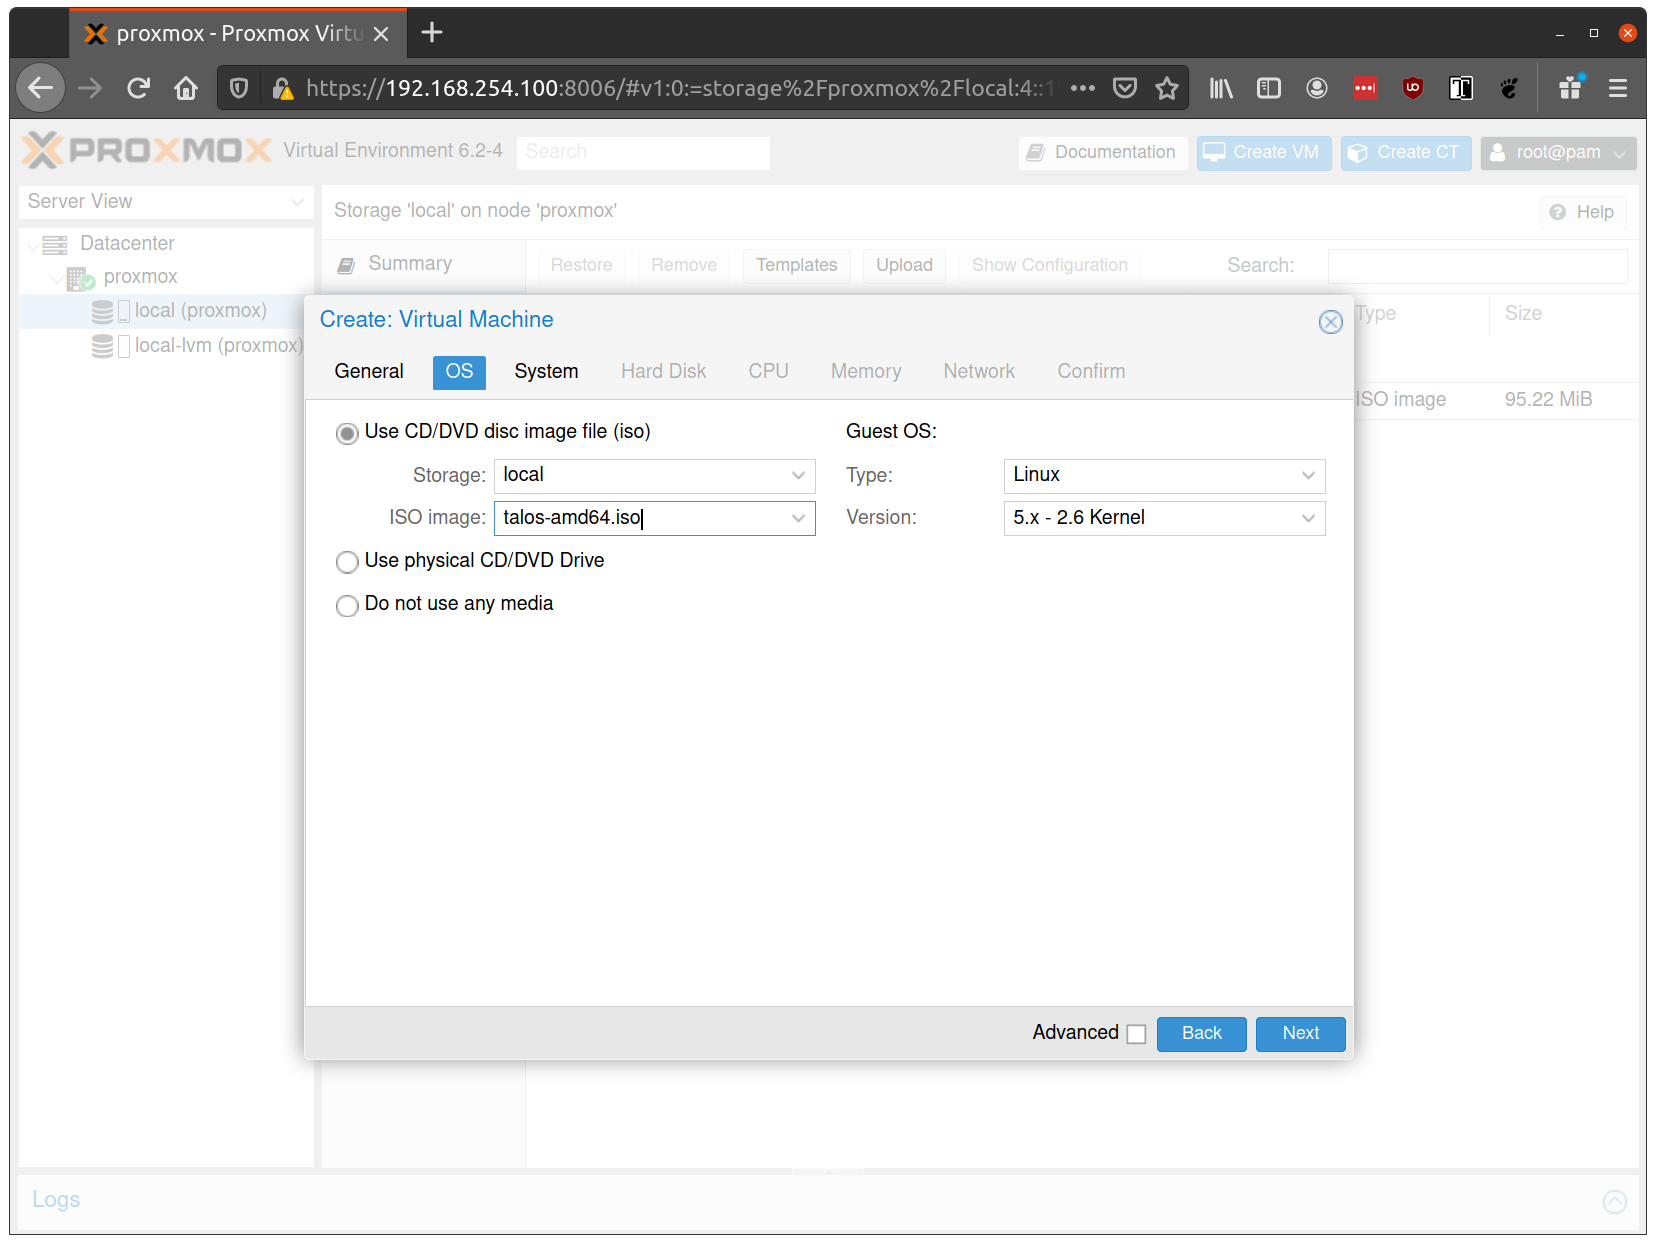
In the OS tab, select the ISO we uploaded earlier:
<img src="https://mintcdn.com/siderolabs-fe86397c/IZowgH7onBncJfmz/talos/v1.7/platform-specific-installations/virtualized-platforms/images/proxmox-edit-os.png?fit=max&auto=format&n=IZowgH7onBncJfmz&q=85&s=2f497d024b6a1ad1d454b777adff2881" width="500px" data-path="talos/v1.7/platform-specific-installations/virtualized-platforms/images/proxmox-edit-os.png" />

Keep the defaults set in the "System" tab.

Keep the defaults in the "Hard Disk" tab as well, only changing the size if desired.

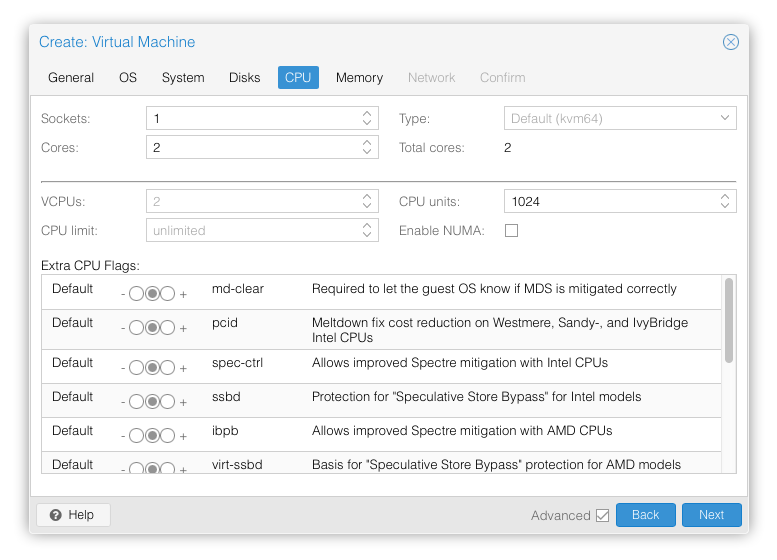
In the "CPU" section, give at least 2 cores to the VM:

> Note: As of Talos v1.0 (which requires the x86-64-v2 microarchitecture), prior to Proxmox V8.0, booting with the
> default Processor Type `kvm64` will not work.
> You can enable the required CPU features after creating the VM by
> adding the following line in the corresponding `/etc/pve/qemu-server/<vmid>.conf` file:
>
> ```text theme={null}
> args: -cpu kvm64,+cx16,+lahf_lm,+popcnt,+sse3,+ssse3,+sse4.1,+sse4.2
> ```
>
> Alternatively, you can set the Processor Type to `host` if your Proxmox host supports these CPU features,
> this however prevents using live VM migration.

<img src="https://mintcdn.com/siderolabs-fe86397c/IZowgH7onBncJfmz/talos/v1.7/platform-specific-installations/virtualized-platforms/images/proxmox-edit-cpu.png?fit=max&auto=format&n=IZowgH7onBncJfmz&q=85&s=467d38c280df4471be47a13bda24db8c" width="500px" data-path="talos/v1.7/platform-specific-installations/virtualized-platforms/images/proxmox-edit-cpu.png" />

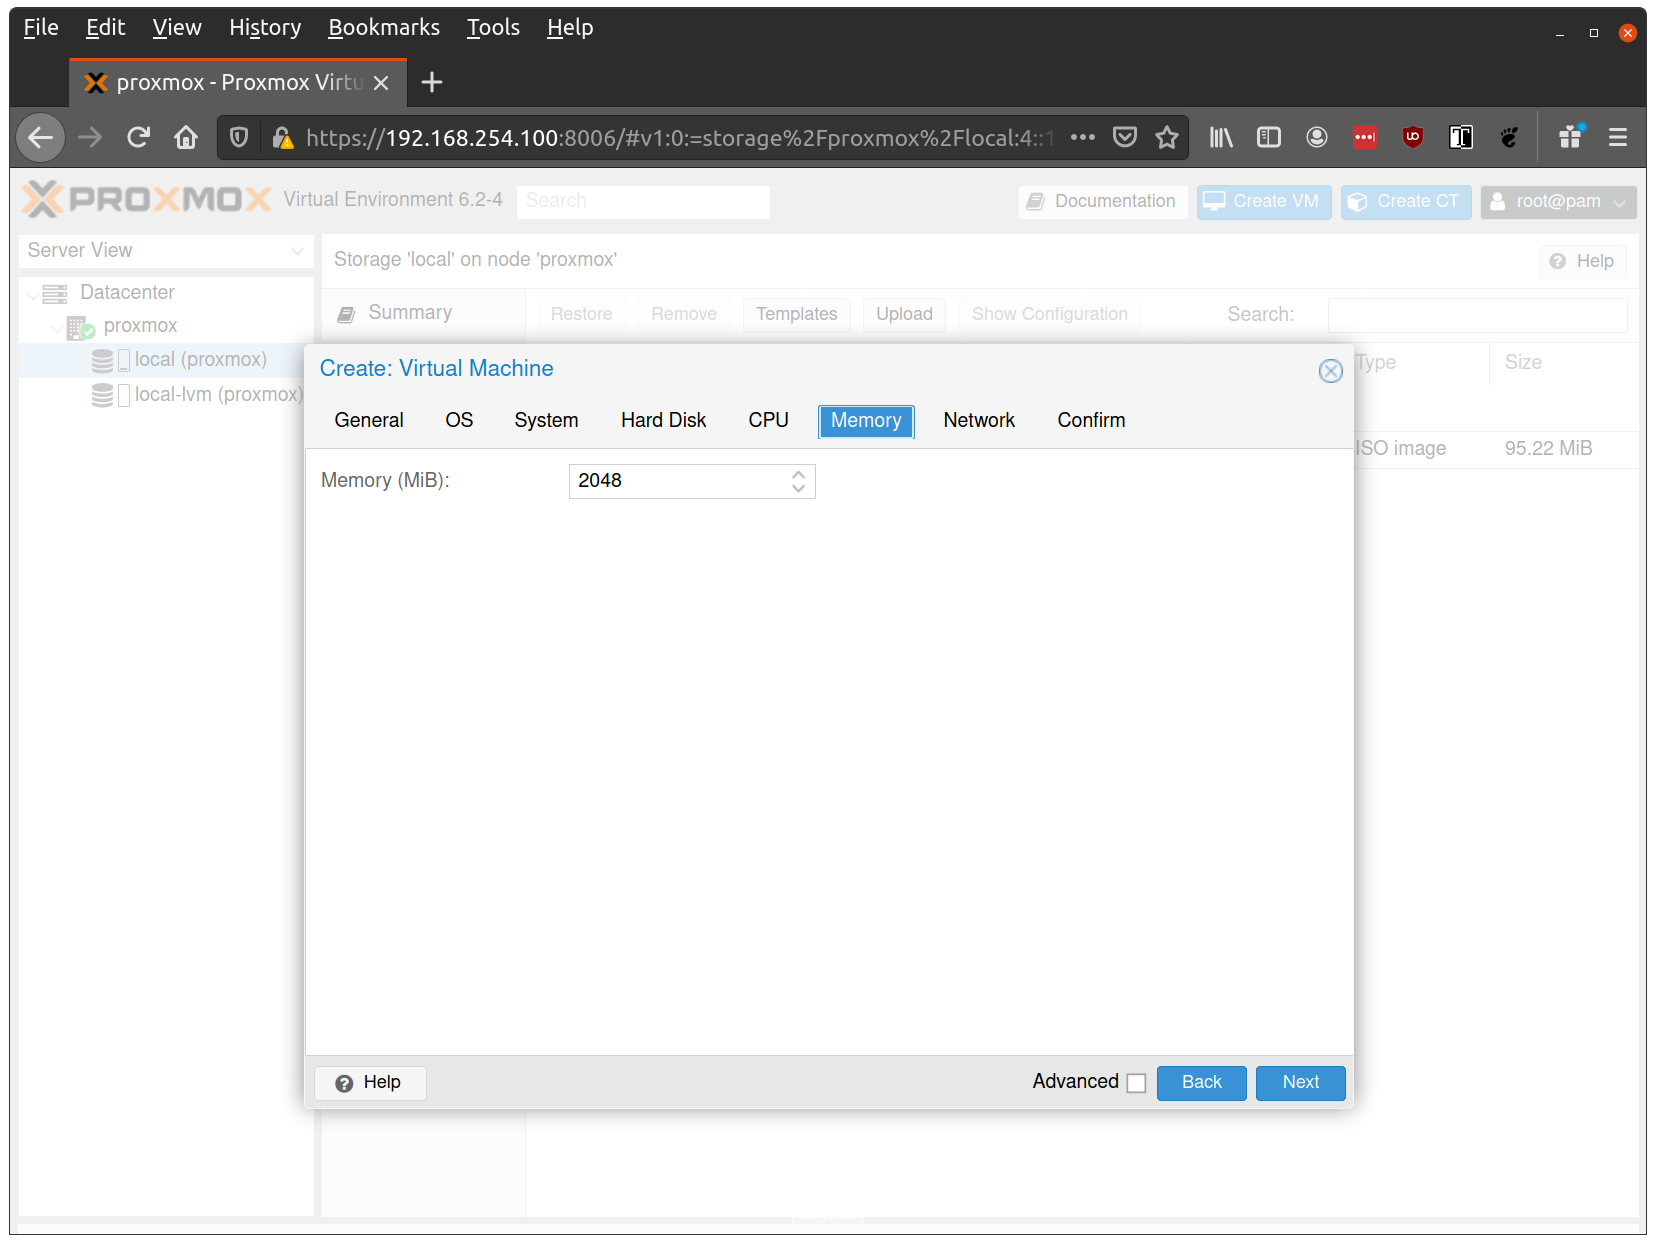
Verify that the RAM is set to at least 2GB:
<img src="https://mintcdn.com/siderolabs-fe86397c/IZowgH7onBncJfmz/talos/v1.7/platform-specific-installations/virtualized-platforms/images/proxmox-edit-ram.png?fit=max&auto=format&n=IZowgH7onBncJfmz&q=85&s=19837468628696f49b00390af0c471f3" width="500px" data-path="talos/v1.7/platform-specific-installations/virtualized-platforms/images/proxmox-edit-ram.png" />

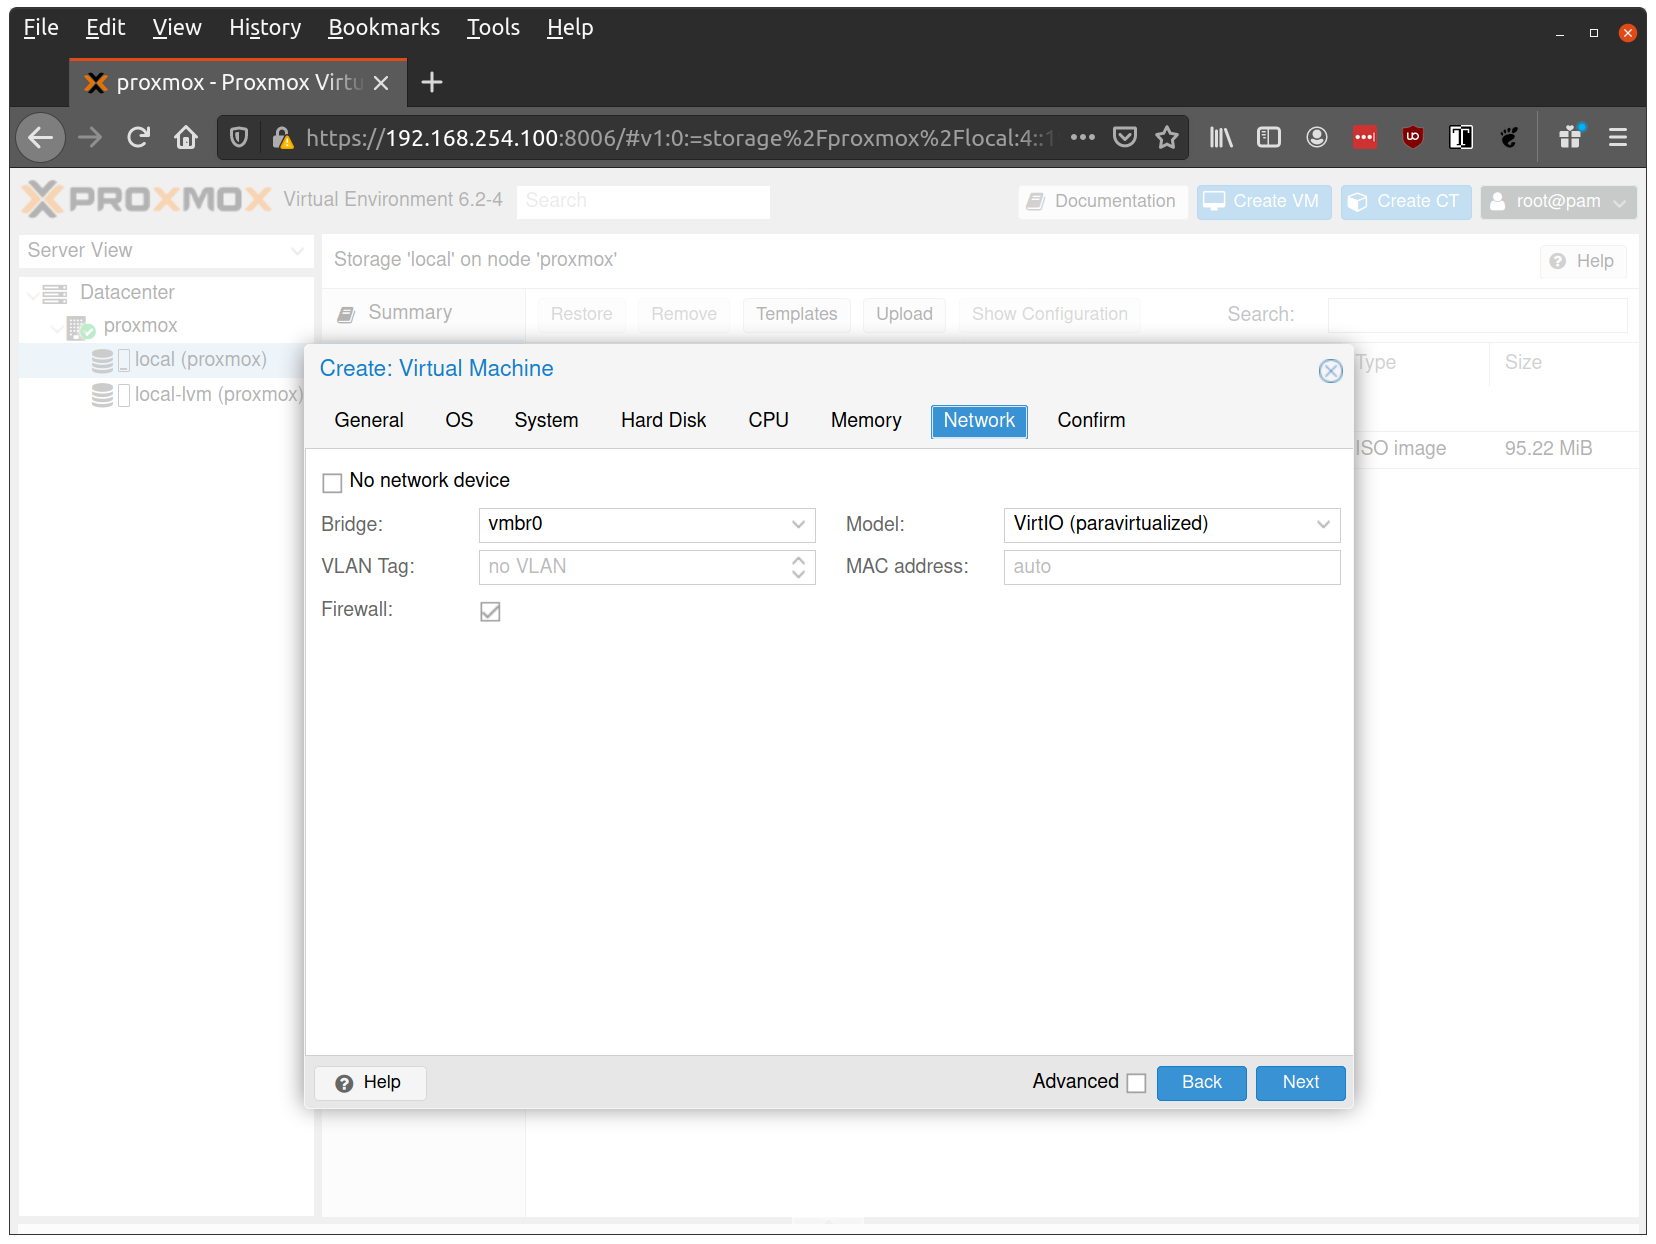
Keep the default values for networking, verifying that the VM is set to come up on the bridge interface:
<img src="https://mintcdn.com/siderolabs-fe86397c/IZowgH7onBncJfmz/talos/v1.7/platform-specific-installations/virtualized-platforms/images/proxmox-edit-nic.png?fit=max&auto=format&n=IZowgH7onBncJfmz&q=85&s=43d94c5647782f1f761864e8629d07a6" width="500px" data-path="talos/v1.7/platform-specific-installations/virtualized-platforms/images/proxmox-edit-nic.png" />

Finish creating the VM by clicking through the "Confirm" tab and then "Finish".

Repeat this process for a second VM to use as a worker node.
You can also repeat this for additional nodes desired.

> Note: Talos doesn't support memory hot plugging, if creating the VM programmatically don't enable memory hotplug on your
> Talos VM's.
> Doing so will cause Talos to be unable to see all available memory and have insufficient memory to complete
> installation of the cluster.

## Start Control Plane Node

Once the VMs have been created and updated, start the VM that will be the first control plane node.
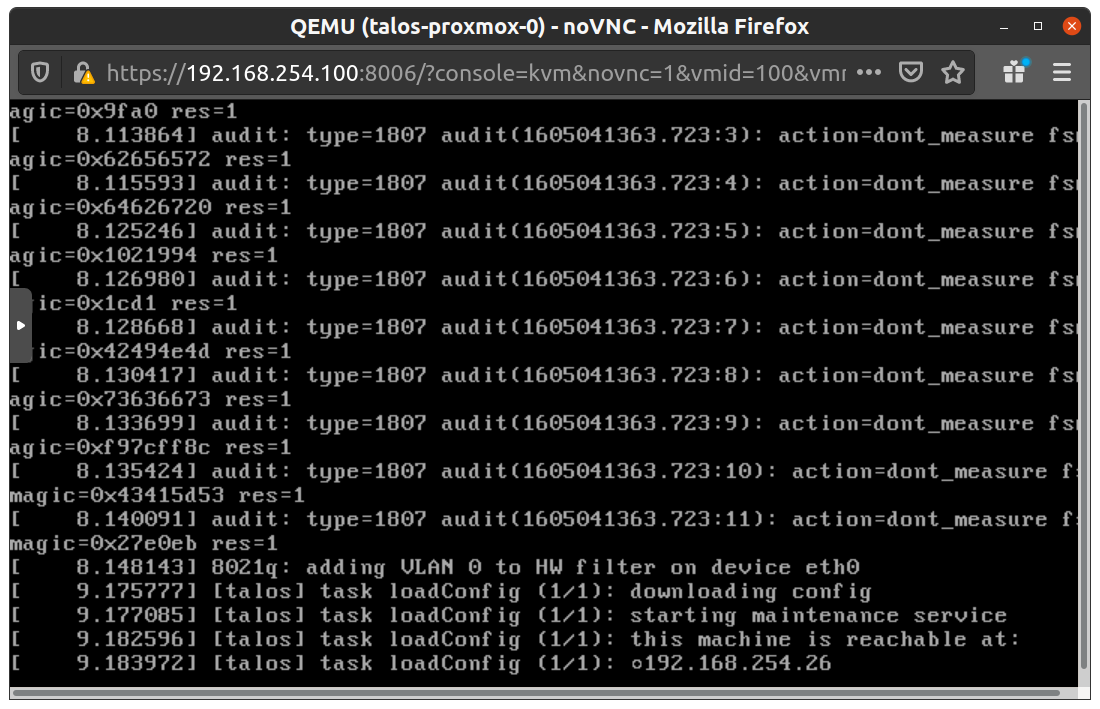
This VM will boot the ISO image specified earlier and enter "maintenance mode".

### With DHCP server

Once the machine has entered maintenance mode, there will be a console log that details the IP address that the node received.
Take note of this IP address, which will be referred to as `$CONTROL_PLANE_IP` for the rest of this guide.
If you wish to export this IP as a bash variable, simply issue a command like `export CONTROL_PLANE_IP=1.2.3.4`.
<img src="https://mintcdn.com/siderolabs-fe86397c/IZowgH7onBncJfmz/talos/v1.7/platform-specific-installations/virtualized-platforms/images/proxmox-maintenance-mode.png?fit=max&auto=format&n=IZowgH7onBncJfmz&q=85&s=01125fd9765e0c31d232deb6441cb08e" width="500px" data-path="talos/v1.7/platform-specific-installations/virtualized-platforms/images/proxmox-maintenance-mode.png" />

### Without DHCP server

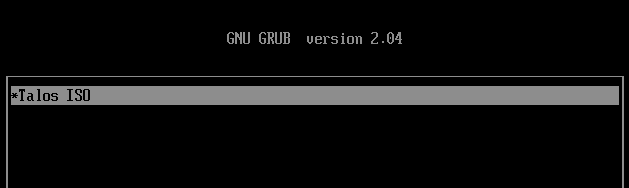
To apply the machine configurations in maintenance mode, VM has to have IP on the network.
So you can set it on boot time manually.
<img src="https://mintcdn.com/siderolabs-fe86397c/IZowgH7onBncJfmz/talos/v1.7/platform-specific-installations/virtualized-platforms/images/proxmox-maintenance-mode-grub-menu.png?fit=max&auto=format&n=IZowgH7onBncJfmz&q=85&s=3e52da29e3931bf56bebd77a26dc8d41" width="600px" data-path="talos/v1.7/platform-specific-installations/virtualized-platforms/images/proxmox-maintenance-mode-grub-menu.png" />

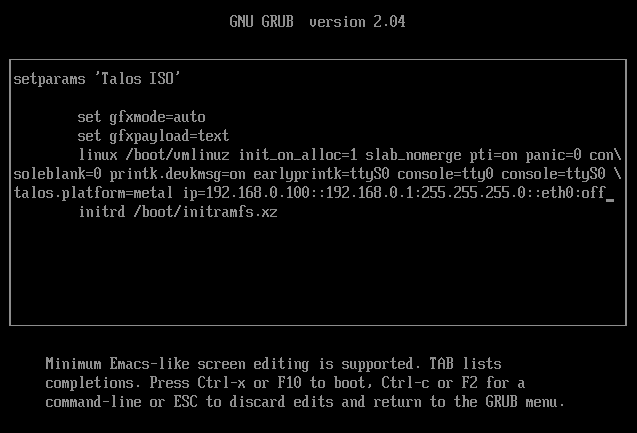
Press `e` on the boot time.
And set the IP parameters for the VM.
[Format is](https://www.kernel.org/doc/Documentation/filesystems/nfs/nfsroot.txt):

```bash theme={null}
ip=<client-ip>:<srv-ip>:<gw-ip>:<netmask>:<host>:<device>:<autoconf>
```

For example `$CONTROL_PLANE_IP` will be 192.168.0.100 and gateway 192.168.0.1

```bash theme={null}
linux /boot/vmlinuz init_on_alloc=1 slab_nomerge pti=on panic=0 consoleblank=0 printk.devkmsg=on earlyprintk=ttyS0 console=tty0 console=ttyS0 talos.platform=metal ip=192.168.0.100::192.168.0.1:255.255.255.0::eth0:off
```

<img src="https://mintcdn.com/siderolabs-fe86397c/IZowgH7onBncJfmz/talos/v1.7/platform-specific-installations/virtualized-platforms/images/proxmox-maintenance-mode-grub-menu-ip.png?fit=max&auto=format&n=IZowgH7onBncJfmz&q=85&s=111e4c6c0bde1b8facc1a72034228c23" width="630px" data-path="talos/v1.7/platform-specific-installations/virtualized-platforms/images/proxmox-maintenance-mode-grub-menu-ip.png" />

Then press Ctrl-x or F10

## Generate Machine Configurations

With the IP address above, you can now generate the machine configurations to use for installing Talos and Kubernetes.
Issue the following command, updating the output directory, cluster name, and control plane IP as you see fit:

```bash theme={null}
talosctl gen config talos-proxmox-cluster https://$CONTROL_PLANE_IP:6443 --output-dir _out
```

This will create several files in the `_out` directory: `controlplane.yaml`, `worker.yaml`, and `talosconfig`.

> Note: The Talos config by default will install to `/dev/sda`.
> Depending on your setup the virtual disk may be mounted differently Eg: `/dev/vda`.
> You can check for disks running the following command:
>
> ```bash theme={null}
> talosctl disks --insecure --nodes $CONTROL_PLANE_IP
> ```
>
> Update `controlplane.yaml` and `worker.yaml` config files to point to the correct disk location.

### QEMU guest agent support

For QEMU guest agent support, you can generate the config with the custom install image:

<CodeBlock lang="sh">
  {`
    talosctl gen config talos-proxmox-cluster https://$CONTROL_PLANE_IP:6443 --output-dir _out --install-image factory.talos.dev/installer/ce4c980550dd2ab1b17bbf2b08801c7eb59418eafe8f279833297925d67c7515:${release_v1_7 }
    `}
</CodeBlock>

* In Proxmox, go to your VM --> Options and ensure that `QEMU Guest Agent` is `Enabled`
* The QEMU agent is now configured

## Create Control Plane Node

Using the `controlplane.yaml` generated above, you can now apply this config using talosctl.
Issue:

```bash theme={null}
talosctl apply-config --insecure --nodes $CONTROL_PLANE_IP --file _out/controlplane.yaml
```

You should now see some action in the Proxmox console for this VM.
Talos will be installed to disk, the VM will reboot, and then Talos will configure the Kubernetes control plane on this VM.
The VM will remain in stage `Booting` until the bootstrap is completed in a later step.

> Note: This process can be repeated multiple times to create an HA control plane.

## Create Worker Node

Create at least a single worker node using a process similar to the control plane creation above.
Start the worker node VM and wait for it to enter "maintenance mode".
Take note of the worker node's IP address, which will be referred to as `$WORKER_IP`

Issue:

```bash theme={null}
talosctl apply-config --insecure --nodes $WORKER_IP --file _out/worker.yaml
```

> Note: This process can be repeated multiple times to add additional workers.

## Using the Cluster

Once the cluster is available, you can make use of `talosctl` and `kubectl` to interact with the cluster.
For example, to view current running containers, run `talosctl containers` for a list of containers in the `system` namespace, or `talosctl containers -k` for the `k8s.io` namespace.
To view the logs of a container, use `talosctl logs <container>` or `talosctl logs -k <container>`.

First, configure talosctl to talk to your control plane node by issuing the following, updating paths and IPs as necessary:

```bash theme={null}
export TALOSCONFIG="_out/talosconfig"
talosctl config endpoint $CONTROL_PLANE_IP
talosctl config node $CONTROL_PLANE_IP
```

### Bootstrap Etcd

```bash theme={null}
talosctl bootstrap
```

### Retrieve the `kubeconfig`

At this point we can retrieve the admin `kubeconfig` by running:

```bash theme={null}
talosctl kubeconfig .
```

## Cleaning Up

To cleanup, simply stop and delete the virtual machines from the Proxmox UI.