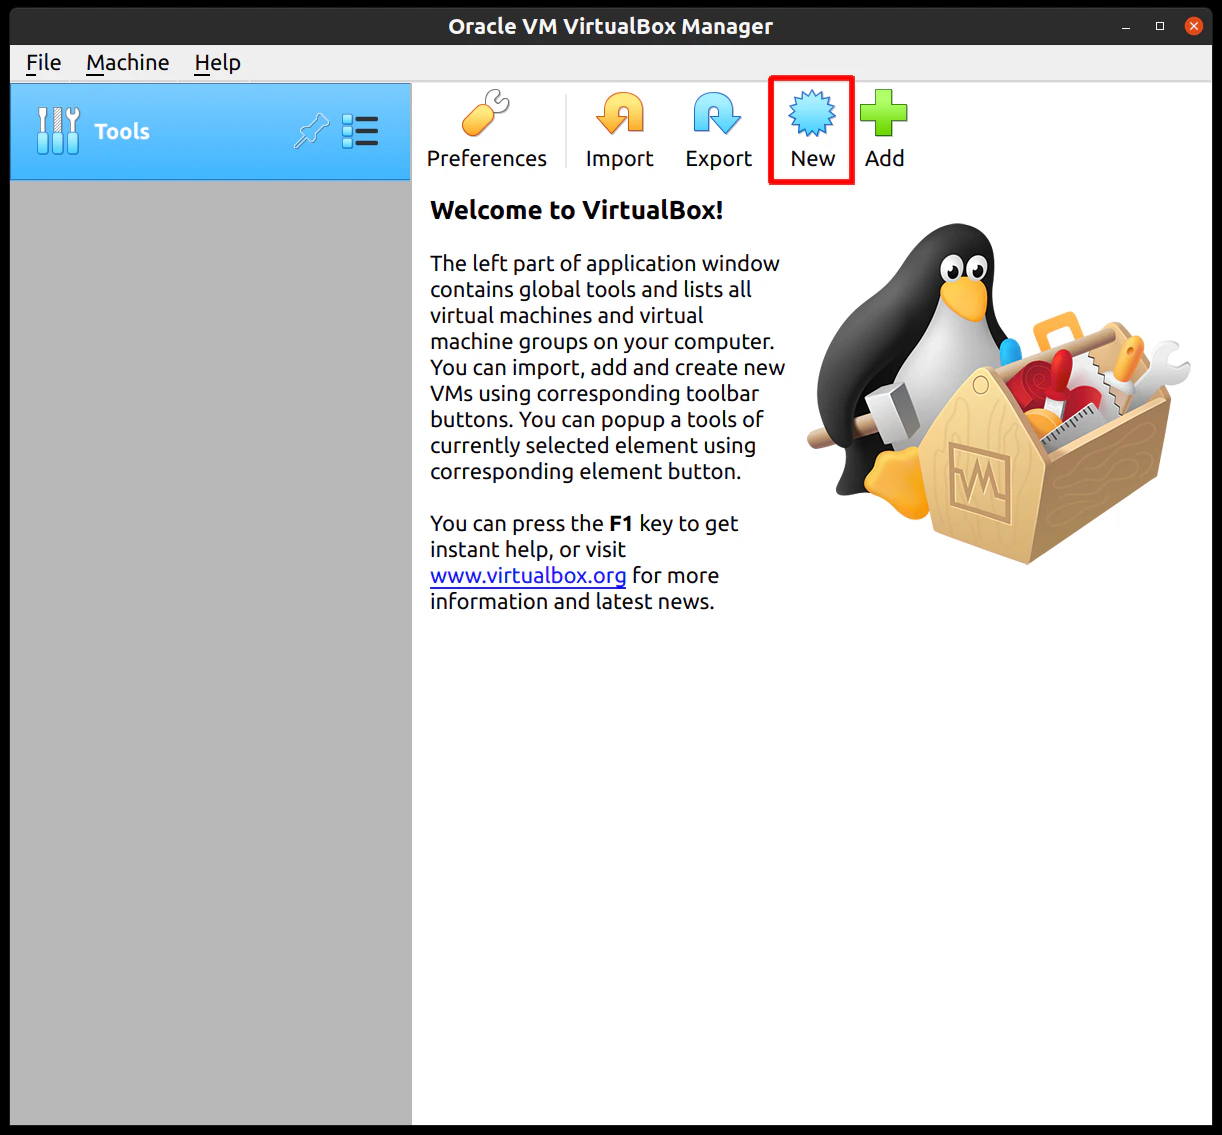
 Supply a name for this VM, and specify the Type and Version:
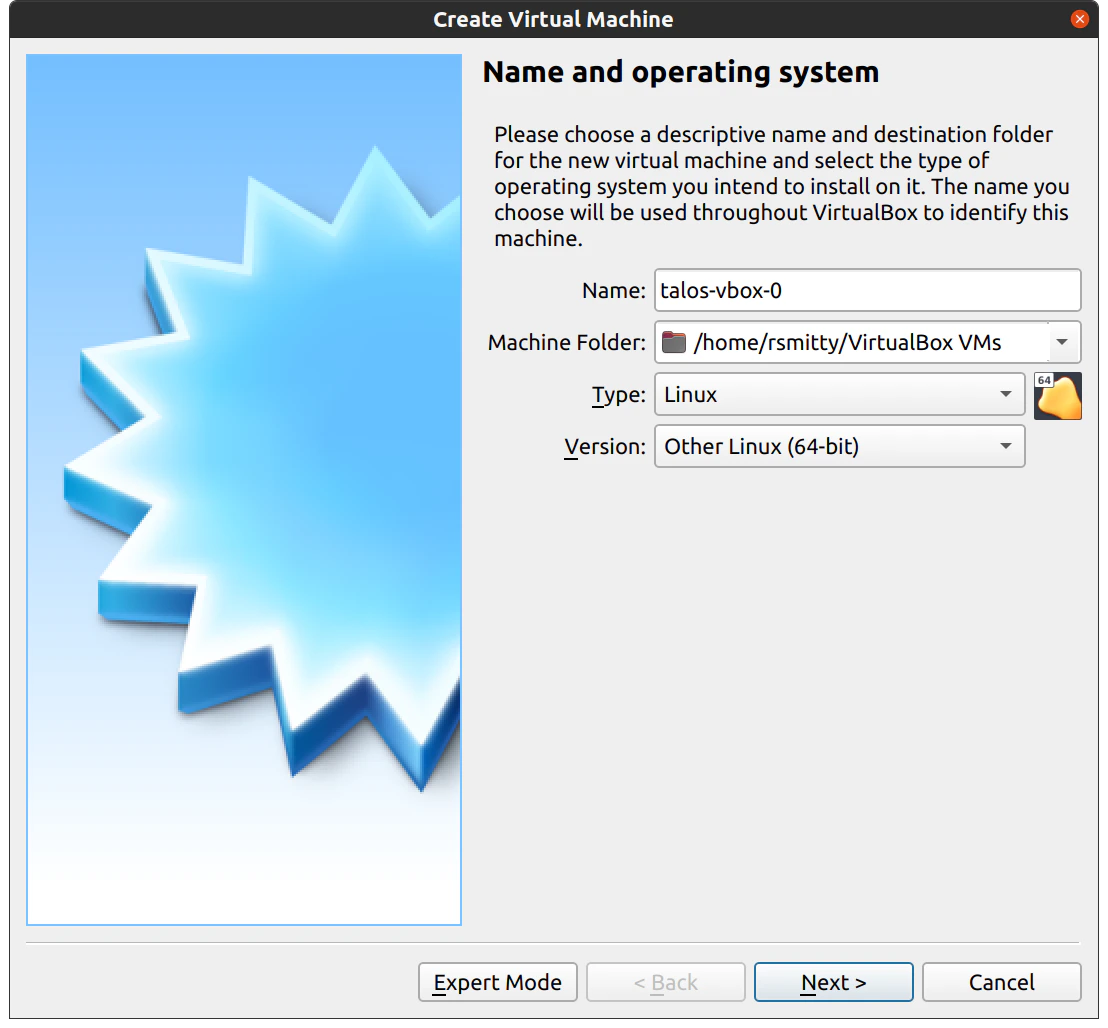 > Note: Make sure type is set as `Linux / Other Linux (64-bit)`.
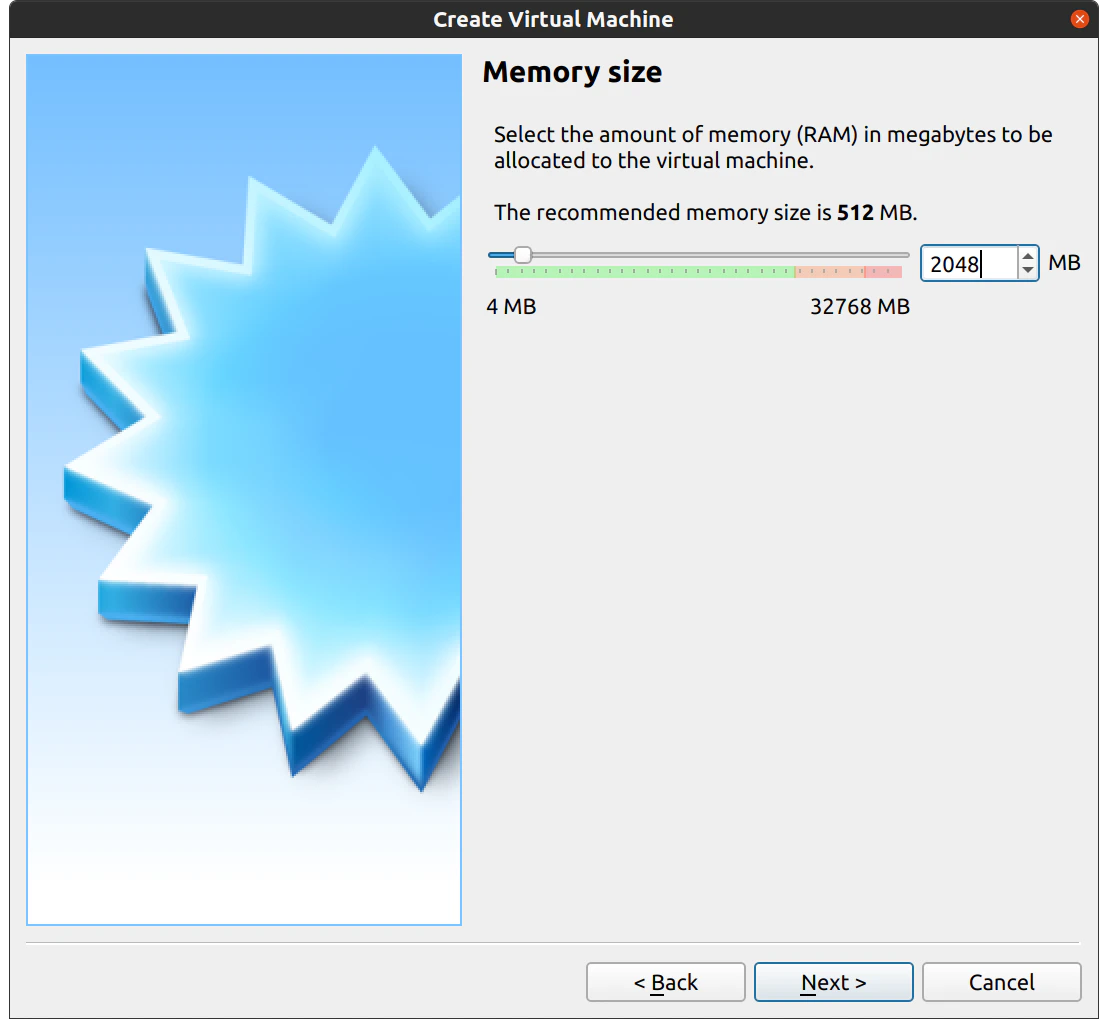
Edit the memory to supply at least 2GB of RAM for the VM:
> Note: Make sure type is set as `Linux / Other Linux (64-bit)`.
Edit the memory to supply at least 2GB of RAM for the VM:
 Proceed through the disk settings, keeping the defaults.
You can increase the disk space if desired.
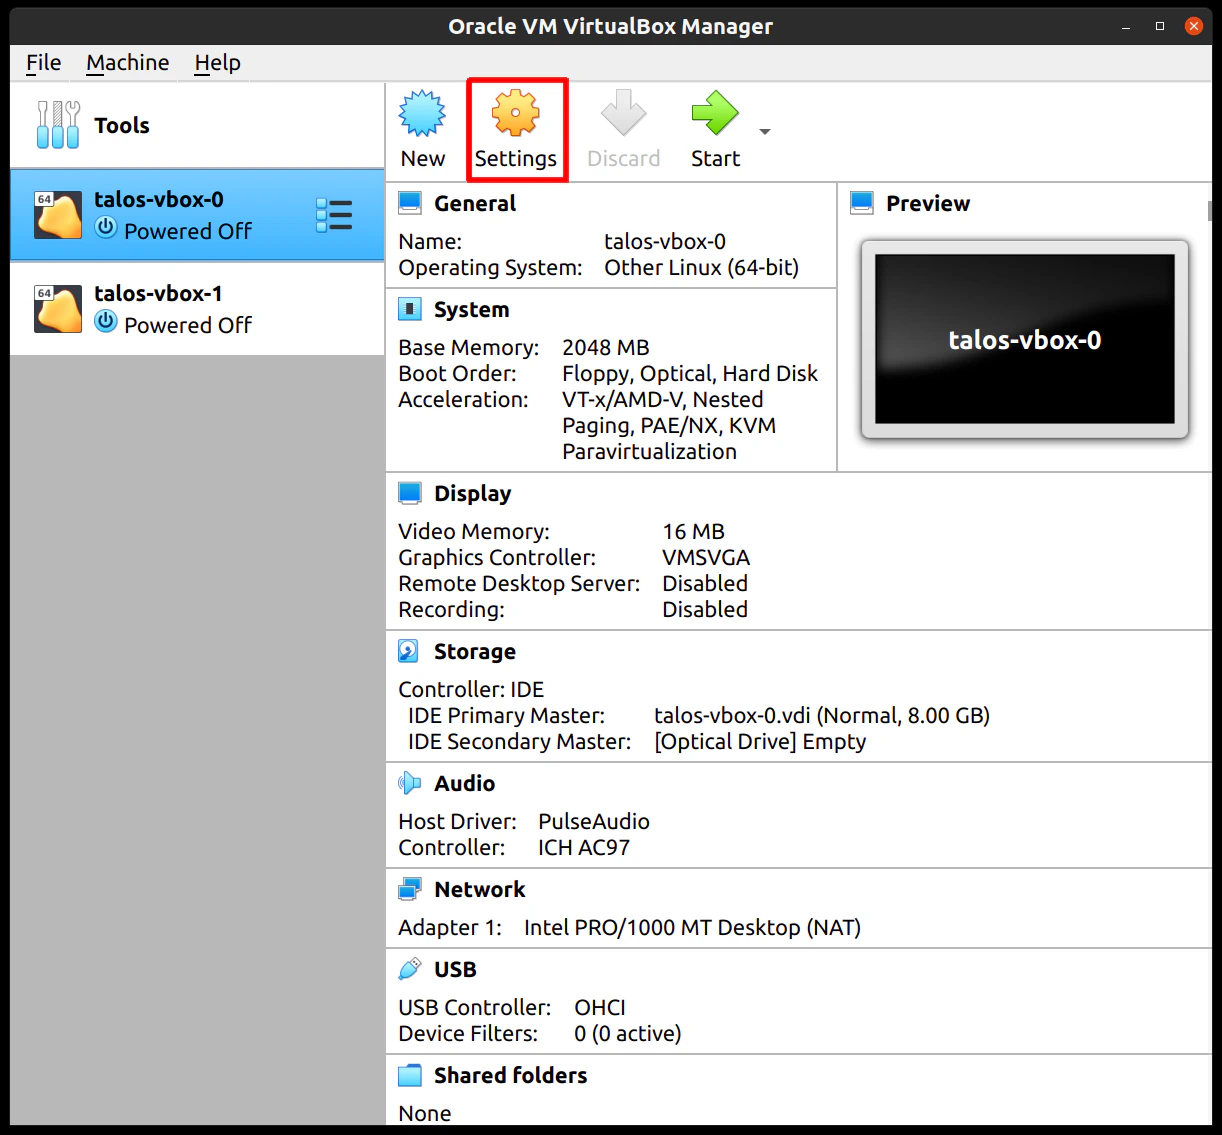
Once created, select the VM and hit "Settings":
Proceed through the disk settings, keeping the defaults.
You can increase the disk space if desired.
Once created, select the VM and hit "Settings":
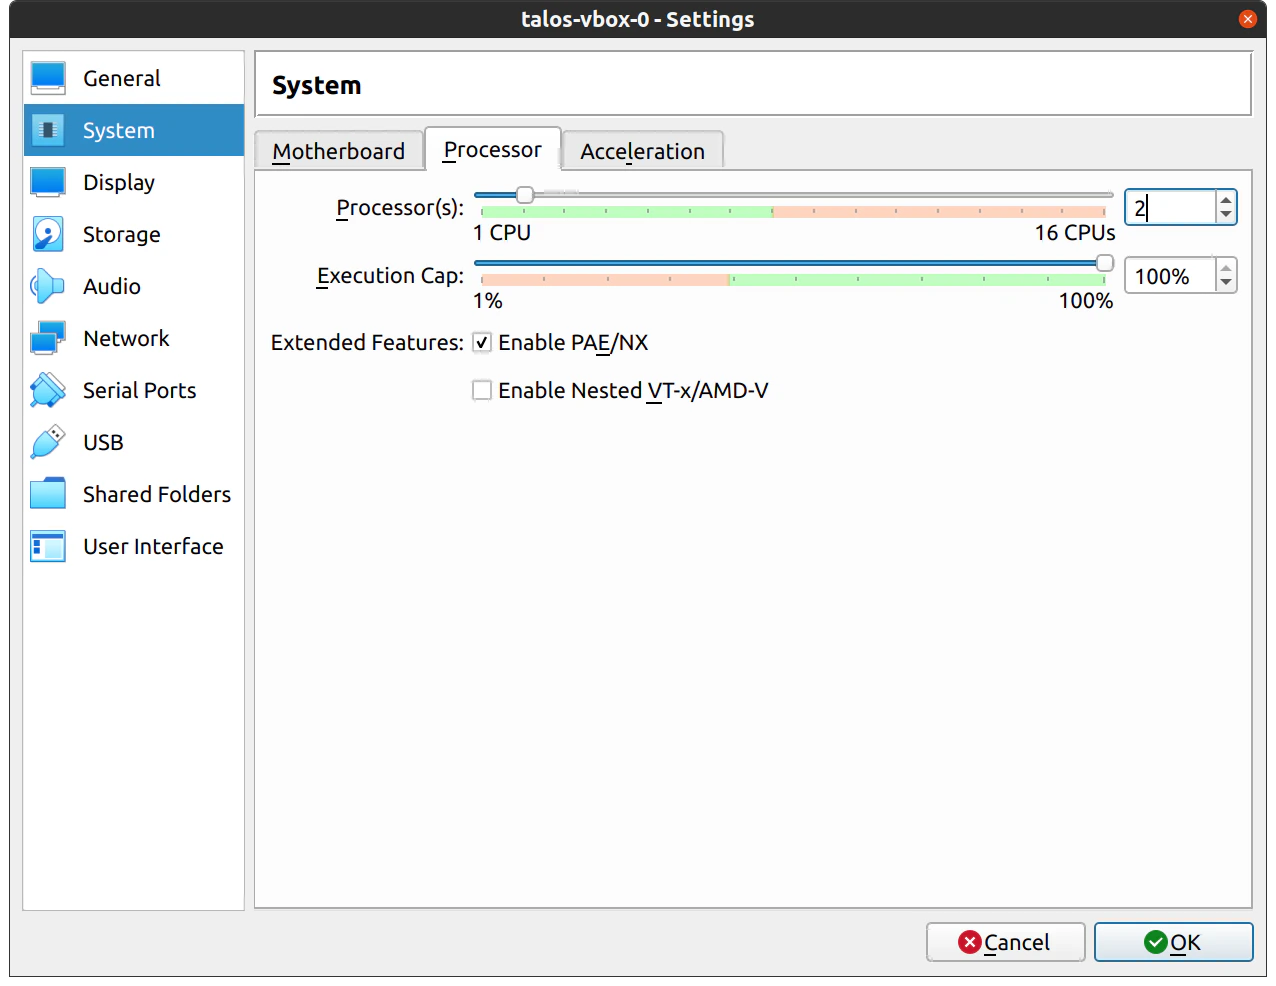
 In the "System" section, supply at least 2 CPUs:
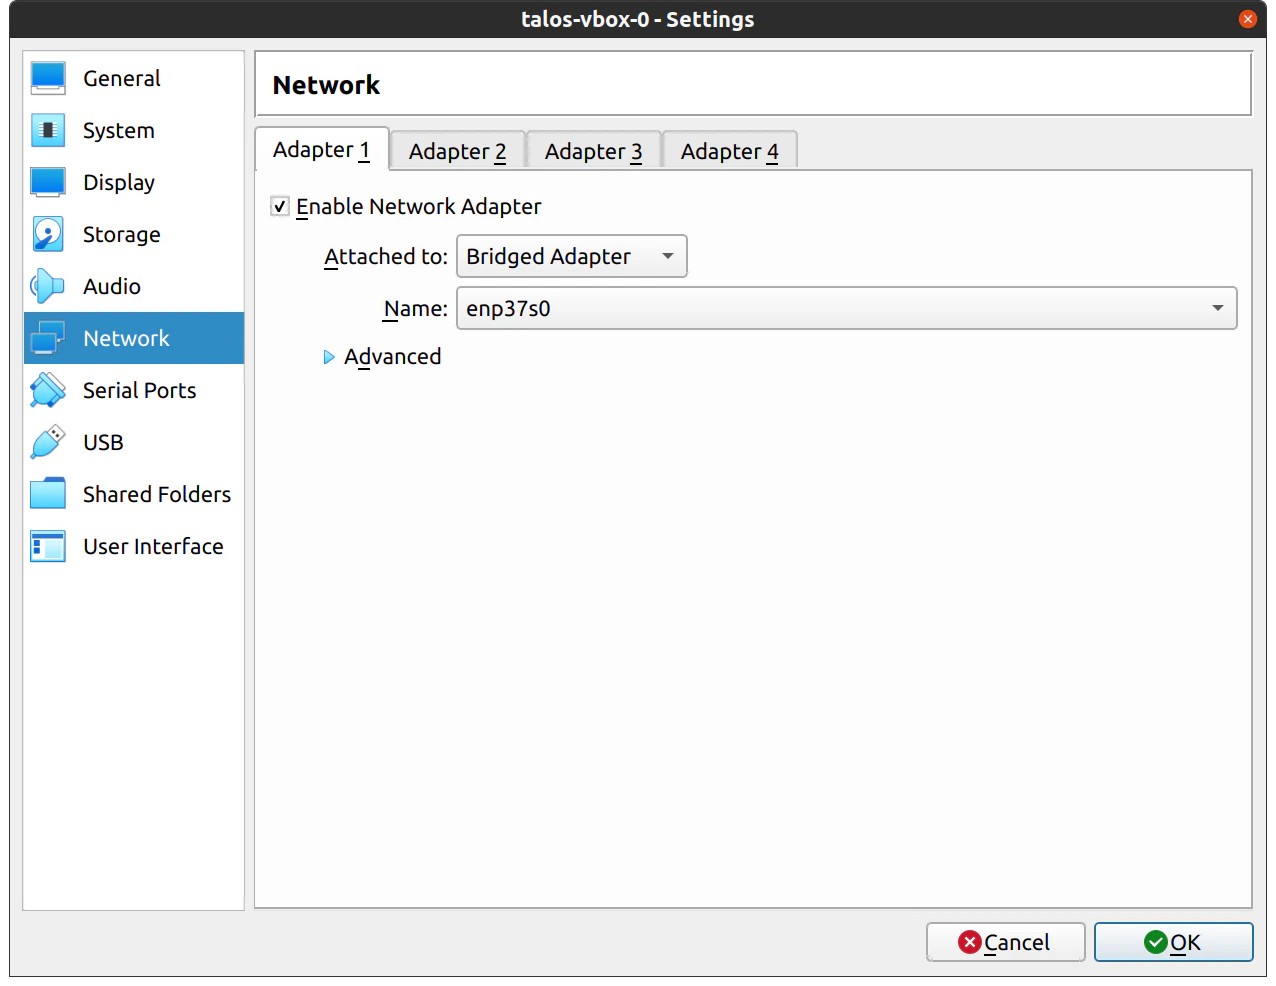
 In the "Network" section, switch the network "Attached To" section to "Bridged Adapter":
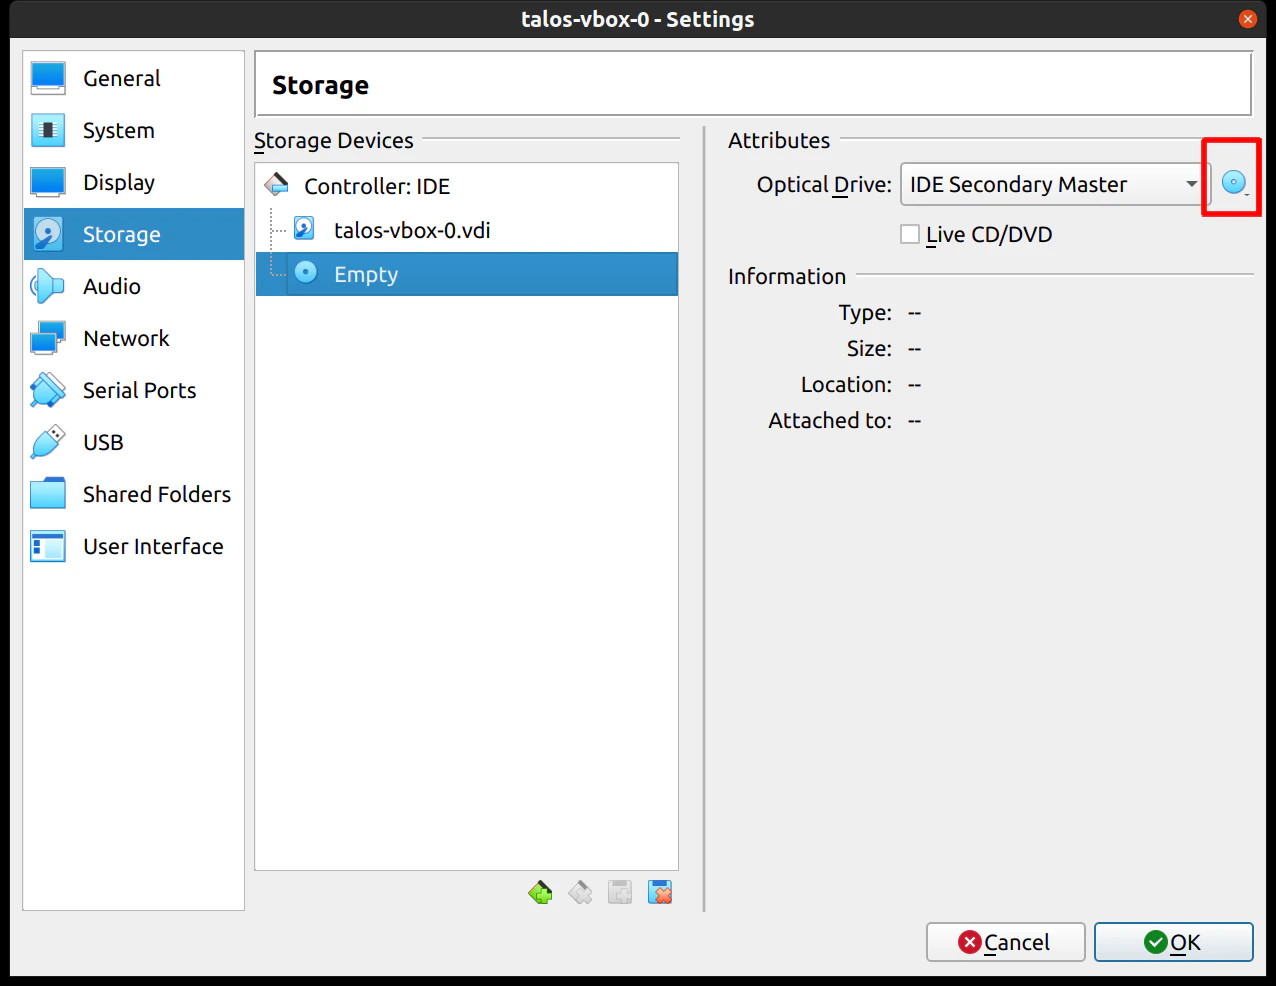
 Finally, in the "Storage" section, select the optical drive and, on the right, select the ISO by browsing your filesystem:
 Repeat this process for a second VM to use as a worker node.
You can also repeat this for additional nodes desired.
## Start control plane node
Once the VMs have been created and updated, start the VM that will be the first control plane node.
This VM will boot the ISO image specified earlier and enter "maintenance mode".
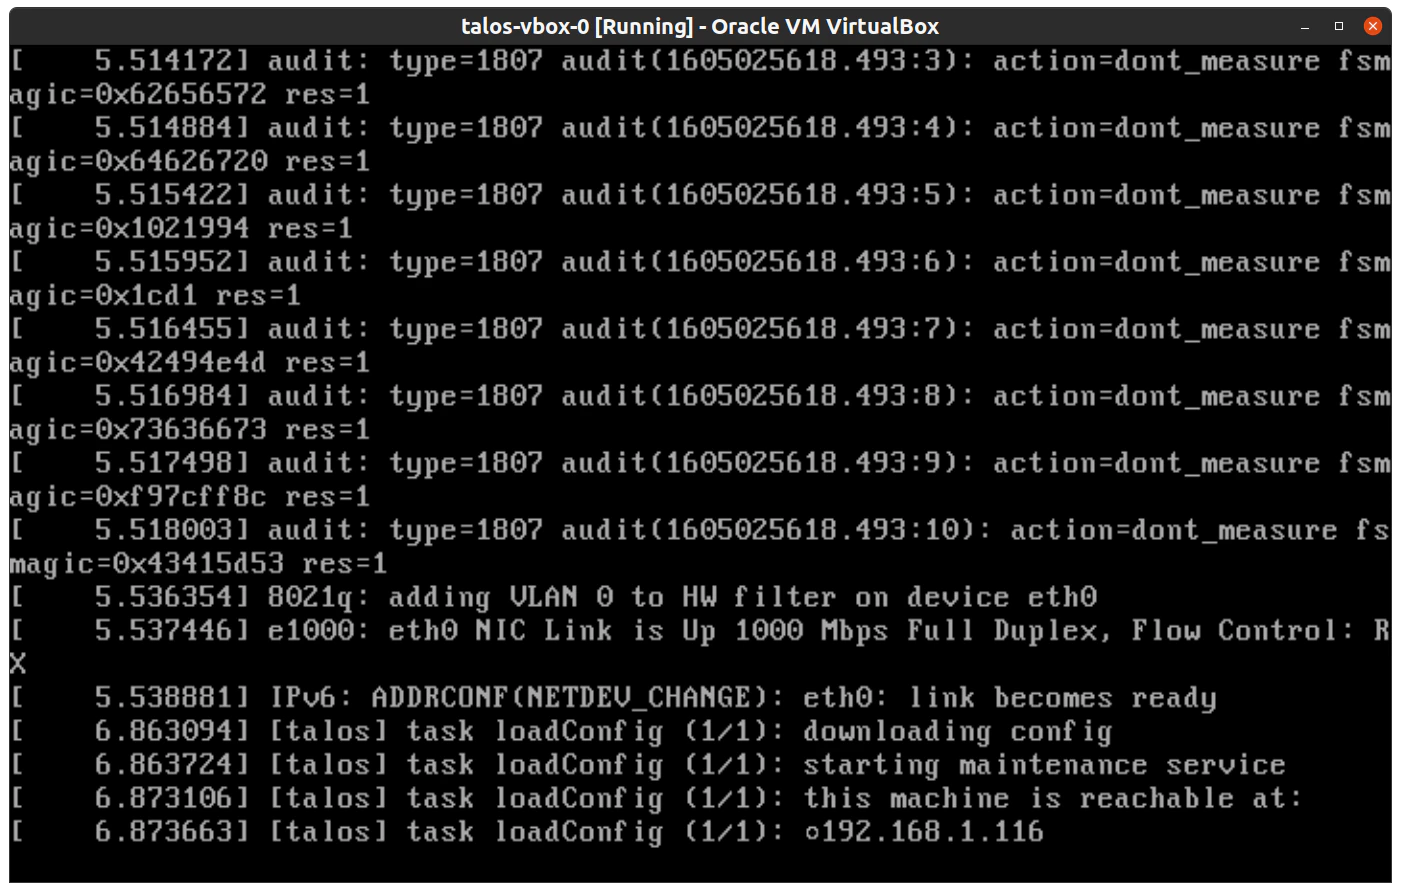
Once the machine has entered maintenance mode, there will be a console log that details the IP address that the node received.
Take note of this IP address, which will be referred to as `$CONTROL_PLANE_IP` for the rest of this guide.
If you wish to export this IP as a bash variable, simply issue a command like `export CONTROL_PLANE_IP=1.2.3.4`.
Repeat this process for a second VM to use as a worker node.
You can also repeat this for additional nodes desired.
## Start control plane node
Once the VMs have been created and updated, start the VM that will be the first control plane node.
This VM will boot the ISO image specified earlier and enter "maintenance mode".
Once the machine has entered maintenance mode, there will be a console log that details the IP address that the node received.
Take note of this IP address, which will be referred to as `$CONTROL_PLANE_IP` for the rest of this guide.
If you wish to export this IP as a bash variable, simply issue a command like `export CONTROL_PLANE_IP=1.2.3.4`.
 ## Generate machine configurations
With the IP address above, you can now generate the machine configurations to use for installing Talos and Kubernetes.
Issue the following command, updating the output directory, cluster name, and control plane IP as you see fit:
```bash theme={null}
talosctl gen config talos-vbox-cluster https://$CONTROL_PLANE_IP:6443 --output-dir _out
```
This will create several files in the `_out` directory: controlplane.yaml, worker.yaml, and talosconfig.
## Create control plane node
Using the `controlplane.yaml` generated above, you can now apply this config using talosctl.
Issue:
```bash theme={null}
talosctl apply-config --insecure --nodes $CONTROL_PLANE_IP --file _out/controlplane.yaml
```
You should now see some action in the VirtualBox console for this VM.
Talos will be installed to disk, the VM will reboot, and then Talos will configure the Kubernetes control plane on this VM.
> Note: This process can be repeated multiple times to create an HA control plane.
>
> Note: If you encounter the following error in the console:
>
> `Talos is already installed to disk but booted from another media and talos.halt_if_installed kernel parameter set. Please reboot from another disk.`
>
> Simply remove the ISO image from the VM and restart it.
## Create worker node
Create at least a single worker node using a process similar to the control plane creation above.
Start the worker node VM and wait for it to enter "maintenance mode".
Take note of the worker node's IP address, which will be referred to as `$WORKER_IP`.
If you wish to export this IP as a bash variable, simply issue a command like `export WORKER_IP=1.2.3.4`.
Issue:
```bash theme={null}
talosctl apply-config --insecure --nodes $WORKER_IP --file _out/worker.yaml
```
> Note: This process can be repeated multiple times to add additional workers.
### Bootstrap `etcd`
Before the cluster is ready, the `etcd` has to be bootstrapped.
The cluster will be in stage `Booting` and `healthy` state until this is stage is completed.
Set the `endpoints` and `nodes`:
```bash theme={null}
talosctl --talosconfig $TALOSCONFIG config endpoint
## Generate machine configurations
With the IP address above, you can now generate the machine configurations to use for installing Talos and Kubernetes.
Issue the following command, updating the output directory, cluster name, and control plane IP as you see fit:
```bash theme={null}
talosctl gen config talos-vbox-cluster https://$CONTROL_PLANE_IP:6443 --output-dir _out
```
This will create several files in the `_out` directory: controlplane.yaml, worker.yaml, and talosconfig.
## Create control plane node
Using the `controlplane.yaml` generated above, you can now apply this config using talosctl.
Issue:
```bash theme={null}
talosctl apply-config --insecure --nodes $CONTROL_PLANE_IP --file _out/controlplane.yaml
```
You should now see some action in the VirtualBox console for this VM.
Talos will be installed to disk, the VM will reboot, and then Talos will configure the Kubernetes control plane on this VM.
> Note: This process can be repeated multiple times to create an HA control plane.
>
> Note: If you encounter the following error in the console:
>
> `Talos is already installed to disk but booted from another media and talos.halt_if_installed kernel parameter set. Please reboot from another disk.`
>
> Simply remove the ISO image from the VM and restart it.
## Create worker node
Create at least a single worker node using a process similar to the control plane creation above.
Start the worker node VM and wait for it to enter "maintenance mode".
Take note of the worker node's IP address, which will be referred to as `$WORKER_IP`.
If you wish to export this IP as a bash variable, simply issue a command like `export WORKER_IP=1.2.3.4`.
Issue:
```bash theme={null}
talosctl apply-config --insecure --nodes $WORKER_IP --file _out/worker.yaml
```
> Note: This process can be repeated multiple times to add additional workers.
### Bootstrap `etcd`
Before the cluster is ready, the `etcd` has to be bootstrapped.
The cluster will be in stage `Booting` and `healthy` state until this is stage is completed.
Set the `endpoints` and `nodes`:
```bash theme={null}
talosctl --talosconfig $TALOSCONFIG config endpoint