> ## Documentation Index
> Fetch the complete documentation index at: https://docs.siderolabs.com/llms.txt
> Use this file to discover all available pages before exploring further.
# Install and Configure Omnictl
> Set up omnictl to manage clusters through Omni.
`omnictl` is the command-line tool for Omni. It lets you authenticate, manage, and interact with Talos-based Kubernetes clusters through Omni’s centralized API.
Follow the steps below to install and configure `omnictl` for your operating system.
## Step 1: Install `omnictl`
You need to install `omnictl` to use Omni from your terminal.
There are two main installation options, depending on your setup:
* macOS and Linux (recommended)
* Manual installation
### macOS and Linux (recommended)
On macOS and Linux, the easiest way to install `omnictl` is using [Homebrew](https://brew.sh/).
This command installs `omnictl` and keeps it up to date. It also installs `talosctl` and the `kubectl oidc-login` plugin.
```
brew install siderolabs/tap/sidero-tools
```
### Manual installation
If you prefer not to use Homebrew, you can install `omnictl` manually by downloading the binary from the Omni dashboard or from GitHub releases.
Navigate to your Omni dashboard and download the binary for your platform.
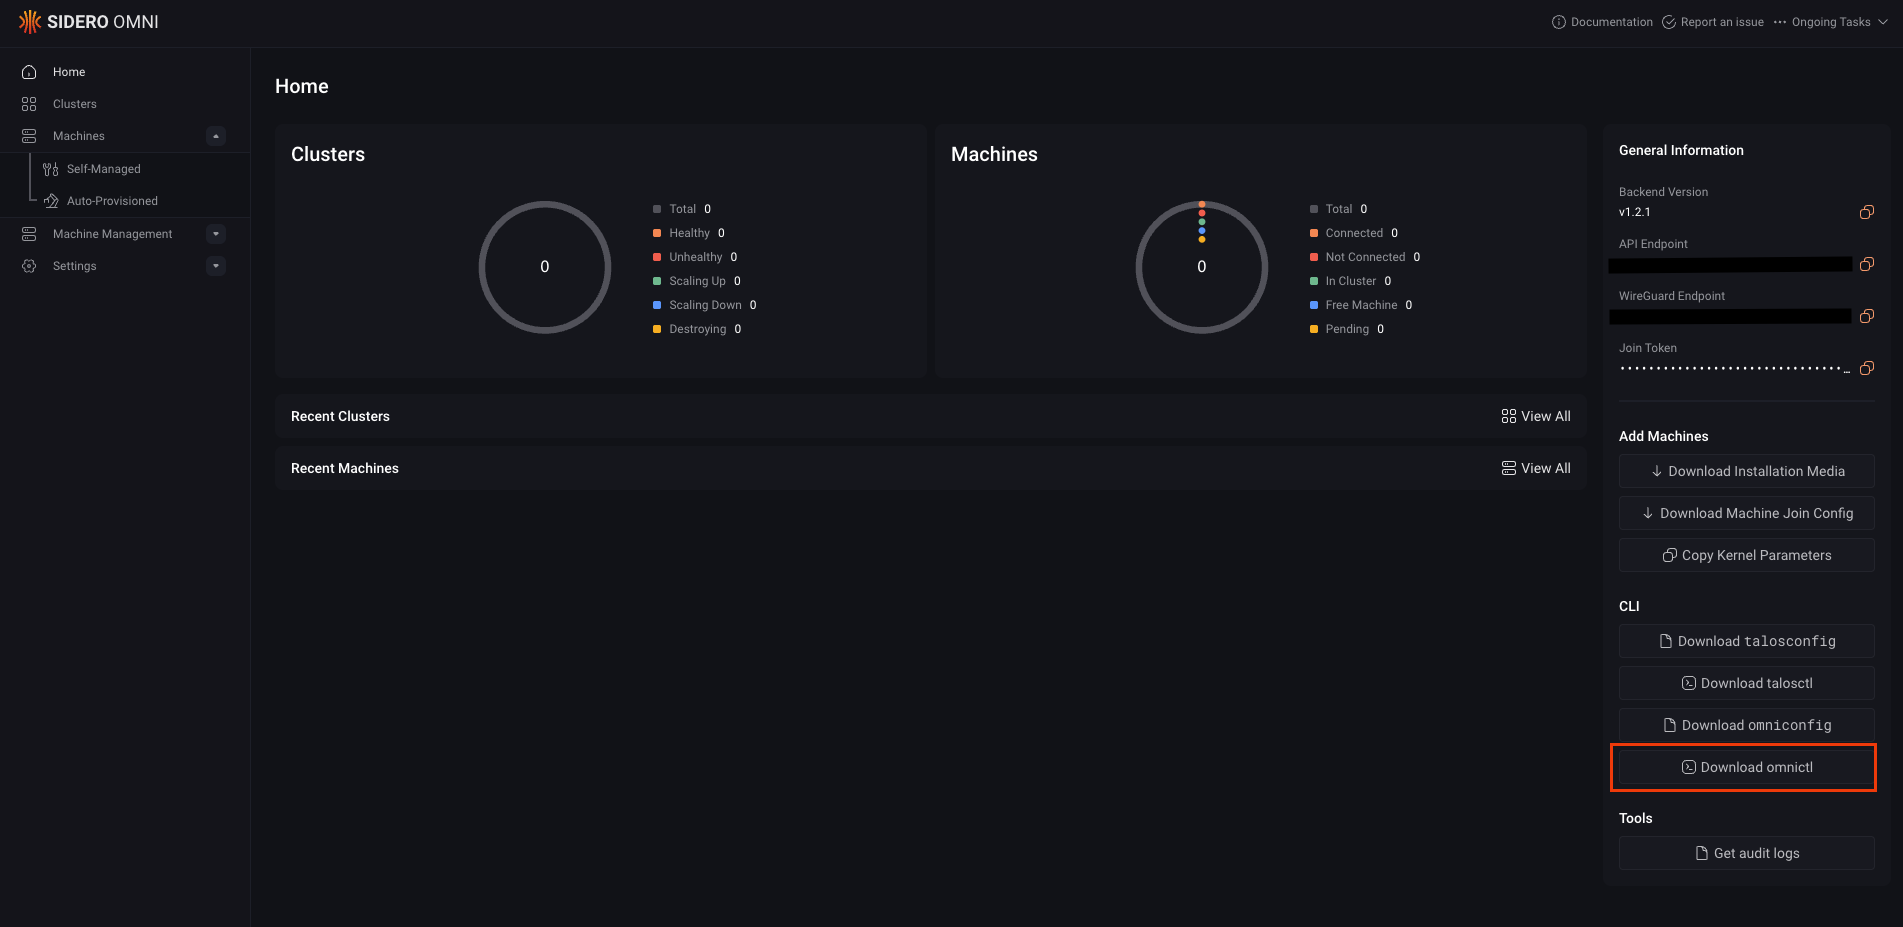 Visit the [Omni releases page](https://github.com/siderolabs/omni/releases) to download the latest version of `omnictl`.
Alternatively, you can download the latest release using `curl`:
```bash theme={null}
curl -LO "https://github.com/siderolabs/omni/releases/latest/download/omnictl-$(uname -s | tr '[:upper:]' '[:lower:]')-$(uname -m | sed 's/x86_64/amd64/; s/aarch64/arm64/')"
```
The downloaded file is named based on your operating system and architecture, for example `omnictl-linux-amd64` or `omnictl-darwin-arm64`.
After downloading the binary, rename it, make it executable, and move it into a directory on your system `PATH`.
On macOS and Linux, create a variable that points to the downloaded `omnictl` binary. Replace `` with the actual path to the file:
```bash theme={null}
export PATH_TO_FILE=
```
Then rename the binary, make it executable, and move it to `/usr/local/bin`:
```bash theme={null}
mv "$PATH_TO_FILE" omnictl
chmod +x omnictl
sudo mv omnictl /usr/local/bin/
```
On Windows:
1. Rename the file in File Explorer or PowerShell:
```powershell theme={null}
Move-Item omnictl-windows-amd64.exe omnictl.exe
```
2. Move the file to a folder that’s in your `PATH`.
3. Verify your installation:
```powershell theme={null}
omnictl --version
```
After completing these steps, you should be able to run `omnictl` from any terminal window.
## Step 2: Configure `omnictl`
Next, configure omnictl by adding your `omniconfig.yaml` file to the default configuration directory.
First, download the `omniconfig.yaml` file from your Omni dashboard to your local machine.
Visit the [Omni releases page](https://github.com/siderolabs/omni/releases) to download the latest version of `omnictl`.
Alternatively, you can download the latest release using `curl`:
```bash theme={null}
curl -LO "https://github.com/siderolabs/omni/releases/latest/download/omnictl-$(uname -s | tr '[:upper:]' '[:lower:]')-$(uname -m | sed 's/x86_64/amd64/; s/aarch64/arm64/')"
```
The downloaded file is named based on your operating system and architecture, for example `omnictl-linux-amd64` or `omnictl-darwin-arm64`.
After downloading the binary, rename it, make it executable, and move it into a directory on your system `PATH`.
On macOS and Linux, create a variable that points to the downloaded `omnictl` binary. Replace `` with the actual path to the file:
```bash theme={null}
export PATH_TO_FILE=
```
Then rename the binary, make it executable, and move it to `/usr/local/bin`:
```bash theme={null}
mv "$PATH_TO_FILE" omnictl
chmod +x omnictl
sudo mv omnictl /usr/local/bin/
```
On Windows:
1. Rename the file in File Explorer or PowerShell:
```powershell theme={null}
Move-Item omnictl-windows-amd64.exe omnictl.exe
```
2. Move the file to a folder that’s in your `PATH`.
3. Verify your installation:
```powershell theme={null}
omnictl --version
```
After completing these steps, you should be able to run `omnictl` from any terminal window.
## Step 2: Configure `omnictl`
Next, configure omnictl by adding your `omniconfig.yaml` file to the default configuration directory.
First, download the `omniconfig.yaml` file from your Omni dashboard to your local machine.
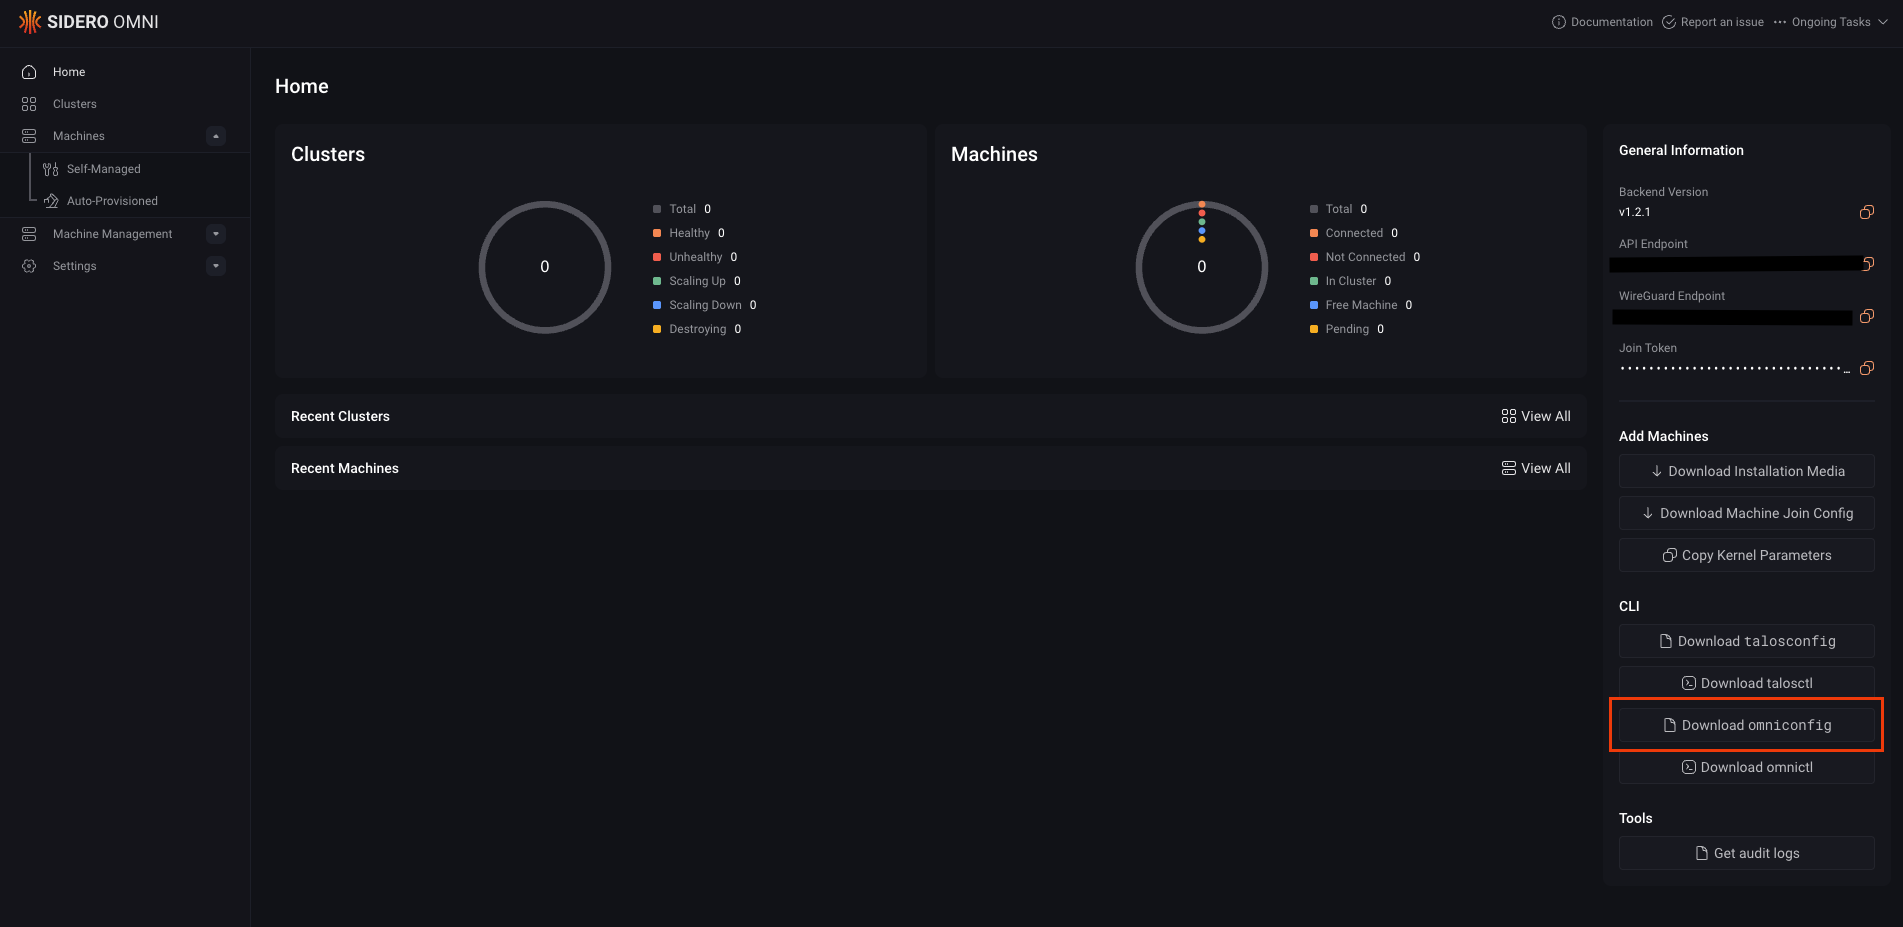 `omnictl` stores its configuration under `~/.talos/omni/config`.
Copy the downloaded file to that location:
```bash theme={null}
cp omniconfig.yaml ~/.talos/omni/config
```
If you already have an existing Omni configuration and want to merge the new file into it, run:
```bash theme={null}
omnictl config merge ./omniconfig.yaml
```
To confirm that the configuration was added successfully, list the available contexts:
```bash theme={null}
omnictl config contexts
```
```bash theme={null}
CURRENT NAME URL
...
example https://example.omni.siderolabs.io/
...
```
## Step 3: Authenticate and verify
The final step is authentication, which connects your local CLI to your Omni account.
Run the following command:
```bash theme={null}
omnictl get clusters
```
A browser window should open automatically for sign-in. If it does not, print the authentication URL and open it manually:
```bash theme={null}
BROWSER=echo omnictl get clusters
```
After signing in, your credentials are cached locally, and you can begin managing your clusters with `omnictl`.
`omnictl` stores its configuration under `~/.talos/omni/config`.
Copy the downloaded file to that location:
```bash theme={null}
cp omniconfig.yaml ~/.talos/omni/config
```
If you already have an existing Omni configuration and want to merge the new file into it, run:
```bash theme={null}
omnictl config merge ./omniconfig.yaml
```
To confirm that the configuration was added successfully, list the available contexts:
```bash theme={null}
omnictl config contexts
```
```bash theme={null}
CURRENT NAME URL
...
example https://example.omni.siderolabs.io/
...
```
## Step 3: Authenticate and verify
The final step is authentication, which connects your local CLI to your Omni account.
Run the following command:
```bash theme={null}
omnictl get clusters
```
A browser window should open automatically for sign-in. If it does not, print the authentication URL and open it manually:
```bash theme={null}
BROWSER=echo omnictl get clusters
```
After signing in, your credentials are cached locally, and you can begin managing your clusters with `omnictl`.