> ## Documentation Index
> Fetch the complete documentation index at: https://docs.siderolabs.com/llms.txt
> Use this file to discover all available pages before exploring further.
# Getting Started with Omni
> Set up your first Talos cluster with Omni.
export const version = 'v1.13';
This guide walks you through creating a high-availability Kubernetes cluster managed by [Omni](https://www.siderolabs.com/omni/) using [Talos Linux](https://talos.dev).
While the example uses UTM/QEMU for local virtualization, the same process applies to bare metal machines, cloud instances, or edge devices.
If you just want to evaluate Omni quickly, you can register a few disposable local machines with Omni in minutes, then build a cluster from them, before working through the full guide.
Want to evaluate Omni without provisioning real machines? On macOS or Linux you can boot throwaway VMs locally with QEMU and register them with your Omni instance.
This is a local trial path for evaluation only. For bare metal, cloud, or edge deployments, see the rest of this guide.
You'll need `talosctl` 1.12+ and `omnictl` installed:
```bash theme={null}
brew tap siderolabs/tap
brew trust siderolabs/tap
brew install siderolabs/tap/sidero-tools
```
Boot temporary VMs that auto-register with Omni as available machines:
```bash theme={null}
sudo -E talosctl cluster create qemu \
--name talos-omni-cluster-default \
--omni-api-endpoint $(omnictl jointoken omni-endpoint) \
--workers 0 --controlplanes 3
```
After a minute or two, the VMs appear under **Machines** in your Omni dashboard as *available* machines, they aren't a cluster yet. Continue to [Step 3: Create cluster](#step-3-create-cluster) to build a cluster from them.
**Tear down** when you're done:
```bash theme={null}
sudo -E talosctl cluster destroy --name talos-omni-cluster-default
```
For a visual walkthrough of the full setup covered in this guide, see the video below:
## Prerequisites
You must have the following to create a cluster with Omni:
* **Network access**: Your machines must have outbound internet access and be able to reach the **WireGuard endpoint** shown on your Omni Home panel.
This endpoint lists an IP address and port (e.g., `199.99.99.100:10001`) that nodes connect to.
Machines need to reach that address over:
* **UDP** on the specified port (for WireGuard)
* **TCP** on port `443` (for Omni communication)
* **Virtual or physical machines**: You can use any virtualization platform that supports booting from an ISO image, for example, UTM, Proxmox, or VMware Fusion.
Alternatively, you can deploy on cloud platforms or physical hardware. Bare metal systems can boot using a CD, USB drive, virtual media, or PXE.
* **CLI tools**: To work effectively with Omni, you’ll need the CLI tools `omnictl`, `talosctl`, and `kubelogin`. Download `talosctl`, `kubectl`, `kubectl-oidc-login`, and `omnictl` for macOS and Linux systems by running this command:
```bash theme={null}
brew tap siderolabs/tap
brew trust siderolabs/tap
brew install siderolabs/tap/sidero-tools
```
For manual and Windows installation, refer to the alternate installation methods in the Talos documentation.
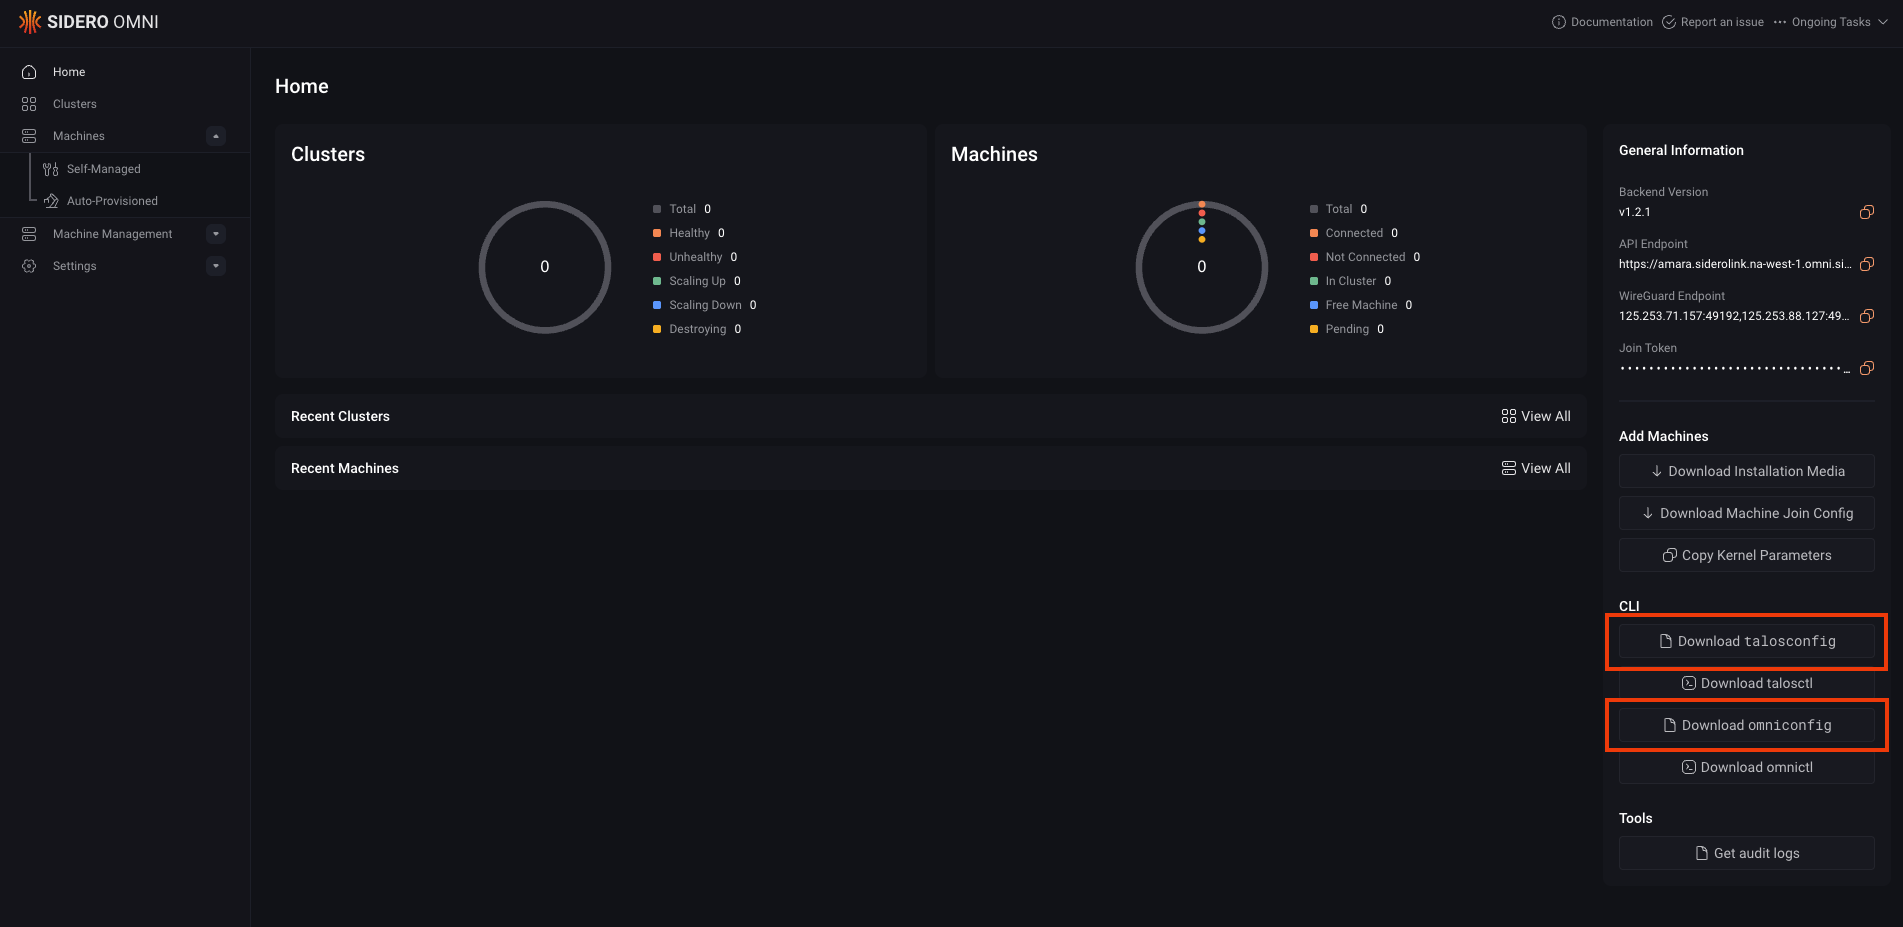
* `talosconfig` **and** `omniconfig` **files**: Download the `talosconfig` and `omniconfig` configuration files from your Omni dashboard.
These files let you manage your Talos nodes and connect to Omni from your local environment.
Alternatively, you can download the `talosconfig` file from the CLI by running the following command.
Replace the `` placeholder with your cluster’s name:
```bash theme={null}
omnictl talosconfig --cluster
```
Once you’ve set up these prerequisites, you can move on to creating your cluster with Omni.
## Step 1: Download installation media
Omni is a Bring Your Own Machine platform. You only need to boot a machine from a Talos Omni image configured to connect to your Omni instance.
You can download the Talos Omni image using either the CLI or the Omni UI:
Run the following command to download a Talos Omni ISO image:
```bash theme={null}
omnictl download iso
```
To see additional options such as targeting different machines or adding extensions and customizations, run:
```bash theme={null}
omnictl download iso --help
```
To download the Talos Omni image from the Omni dashboard:
1. Log in to your Omni dashboard.
2. Click the **Download Installation Media** button to open the **Create New Media** wizard.
3. On each page of the **Create New Media** wizard, select the appropriate options for your setup, then click **Next** to continue.
The **Create New Media** wizard is identical to the [Image Factory](https://factory.talos.dev/) and it is split across multiple pages. Each page presents a different set of configuration options, such as architecture, hardware type, and Talos Linux version, that you can use to customize your Talos Omni image.
4. Select the appropriate boot option for your machine on the Schematic Ready page to download the Talos Omni image.
## Step 2: Boot your machines
Boot each machine you want to add to the cluster using the Omni image you downloaded in **Step 1**.
After the machines have booted, they’ll appear in the **Machines** section.
Depending on your environment, you can use the following methods:
If your environment is not listed here, see the [Register machines with Omni documentation](../omni-cluster-setup/registering-machines/register-machines-with-omni) for more details
To create temporary VMs on your local system (requires Talosctl v1.12+):
```bash theme={null}
talosctl cluster create qemu --omni-api-endpoint $(omnictl jointoken omni-endpoint) --workers 0 --controlplanes 3
```
This command boots virtual machines locally and connects them to your Omni instance.
If you have `omnictl` configured, you can create EC2 instances directly:
```bash theme={null}
aws ec2 run-instances \
--image-id $(aws ec2 describe-images --owners 540036508848 --filters "Name=architecture,Values=x86_64" --query 'Images | sort_by(@, &CreationDate) | reverse(@) | [?!contains(Name, `beta`) && !contains(Name, `alpha`) && !contains(Name, `Beta`) && !contains(Name, `Alpha`)] | [0].[ImageId]' --output text) \
--count 3 \
--instance-type t3.small \
--associate-public-ip-address \
--user-data "$(omnictl jointoken machine-config)"
```
This launches three EC2 instances that automatically join your Omni cluster.
To PXE boot physical machines:
```bash theme={null}
docker run --rm --network host \
ghcr.io/siderolabs/booter:v0.3.0 \
--extra-kernel-args "$(omnictl jointoken kernel-args)"
```
This runs the SideroLabs Booter utility, which provisions PXE-booted machines using your Omni join token.
**Machine not appearing?** Verify that the machine has outbound access to **UDP** (the WireGuard port shown on your Omni Home panel) and **TCP 443**. If a firewall or NAT rule blocks either port, the machine will not be able to register. For more information, see the [Prerequisites](#prerequisites) section and the [Omni Firewall and Egress Requirements](../omni-cluster-setup/omni-firewall-egress-requirement) documentation.
## Step 3: Create cluster
Now that your machines are visible in Omni, you can create your cluster either via the UI or cluster templates. Refer to the [create a cluster documentation](./create-a-cluster) for information on how to create a cluster template.
To create a cluster via the Omni UI by following these steps:
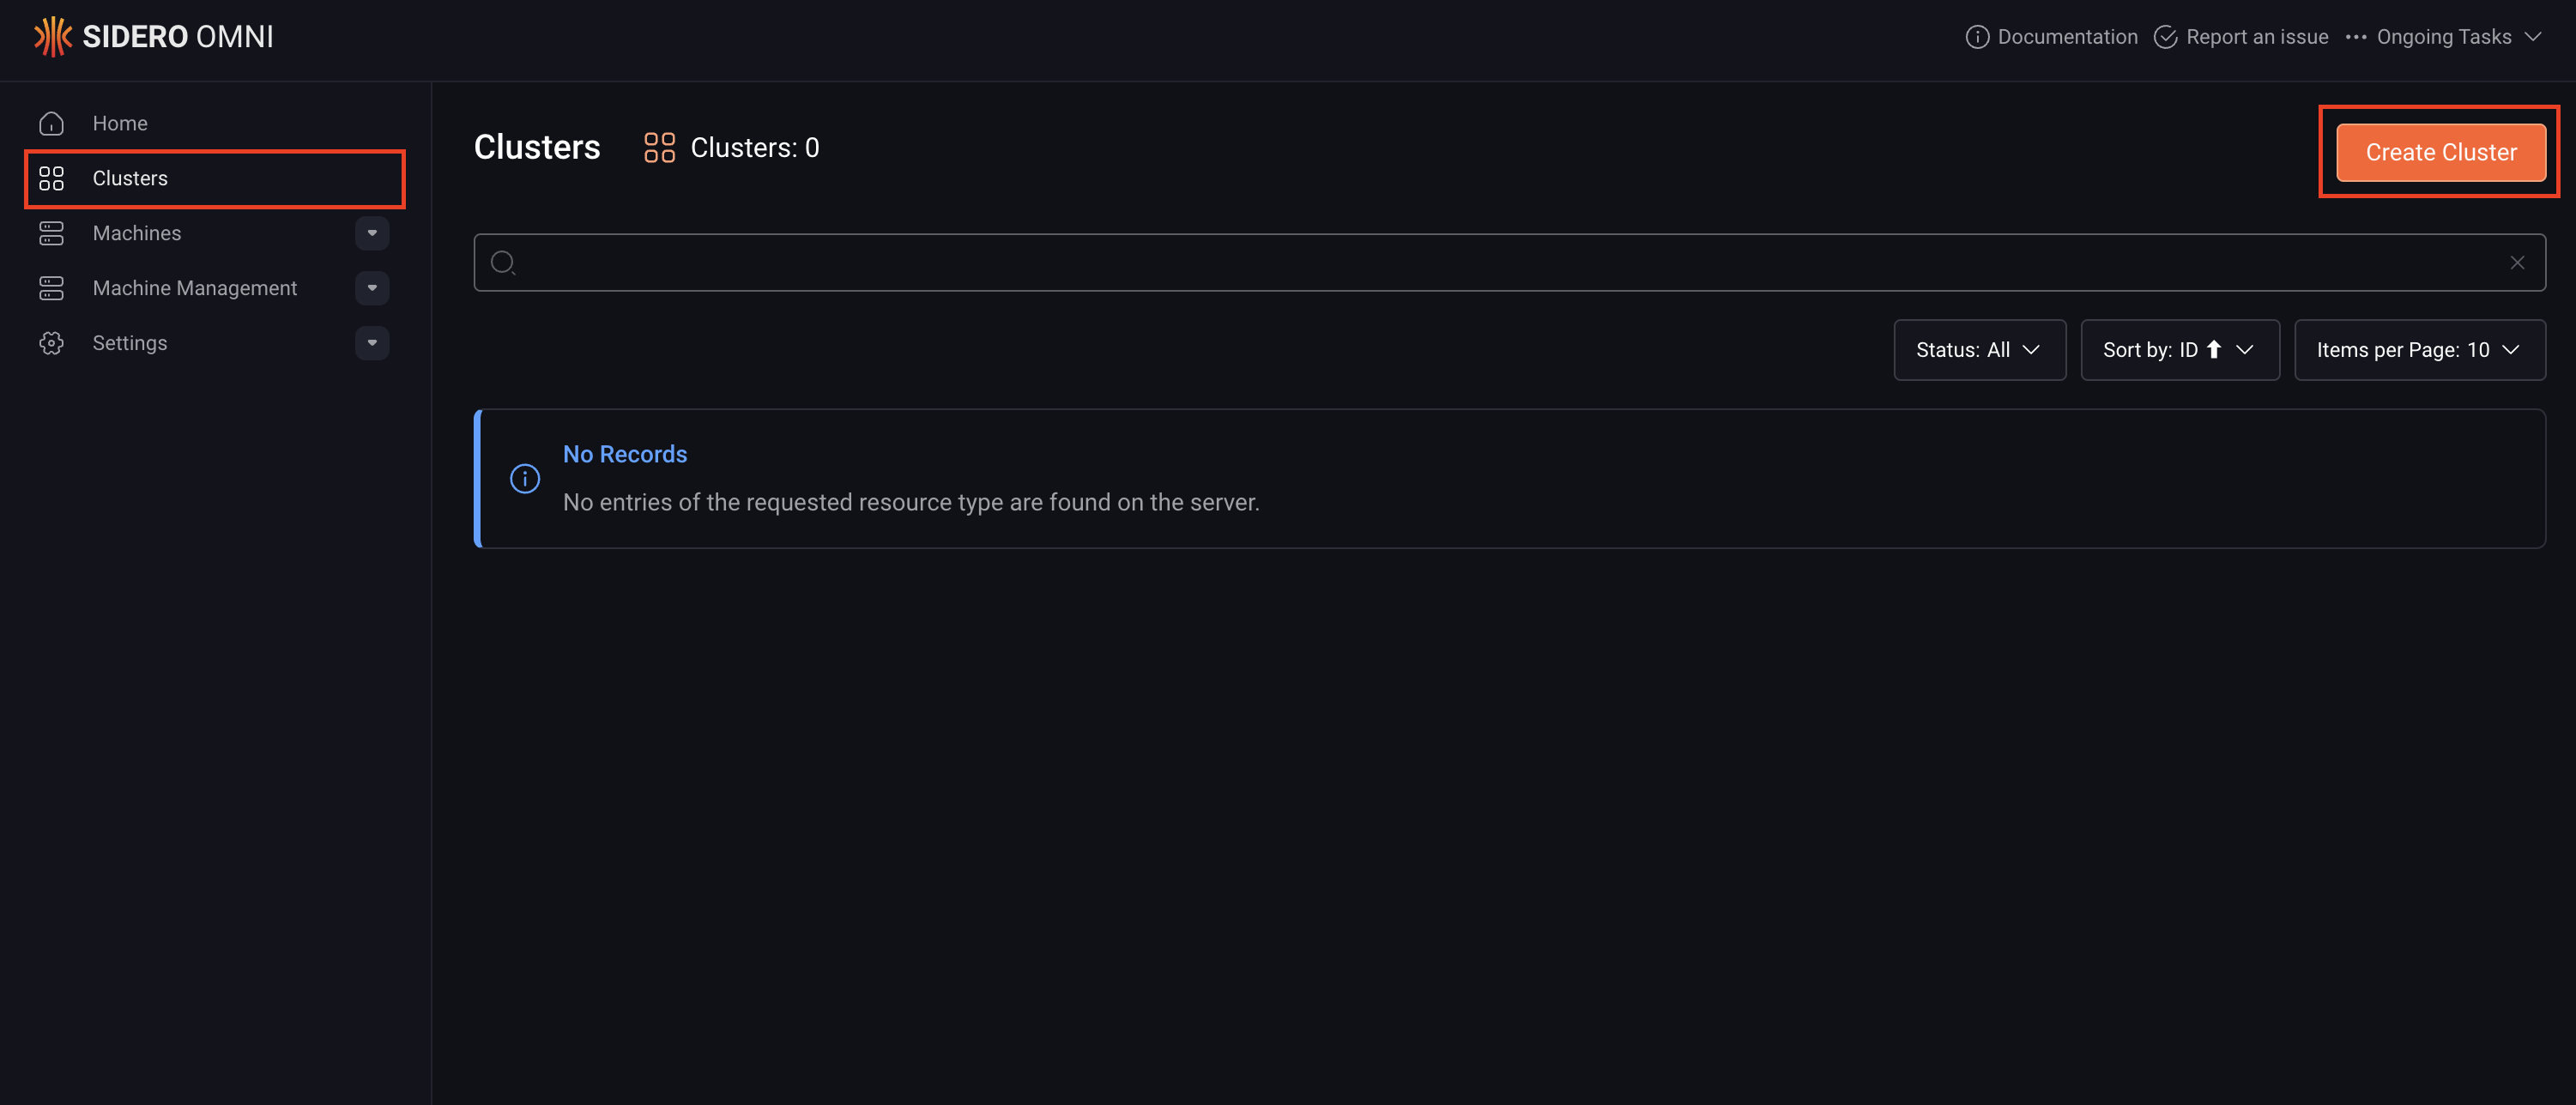
1. In the Omni sidebar, go to **Clusters** → **Create Cluster**.
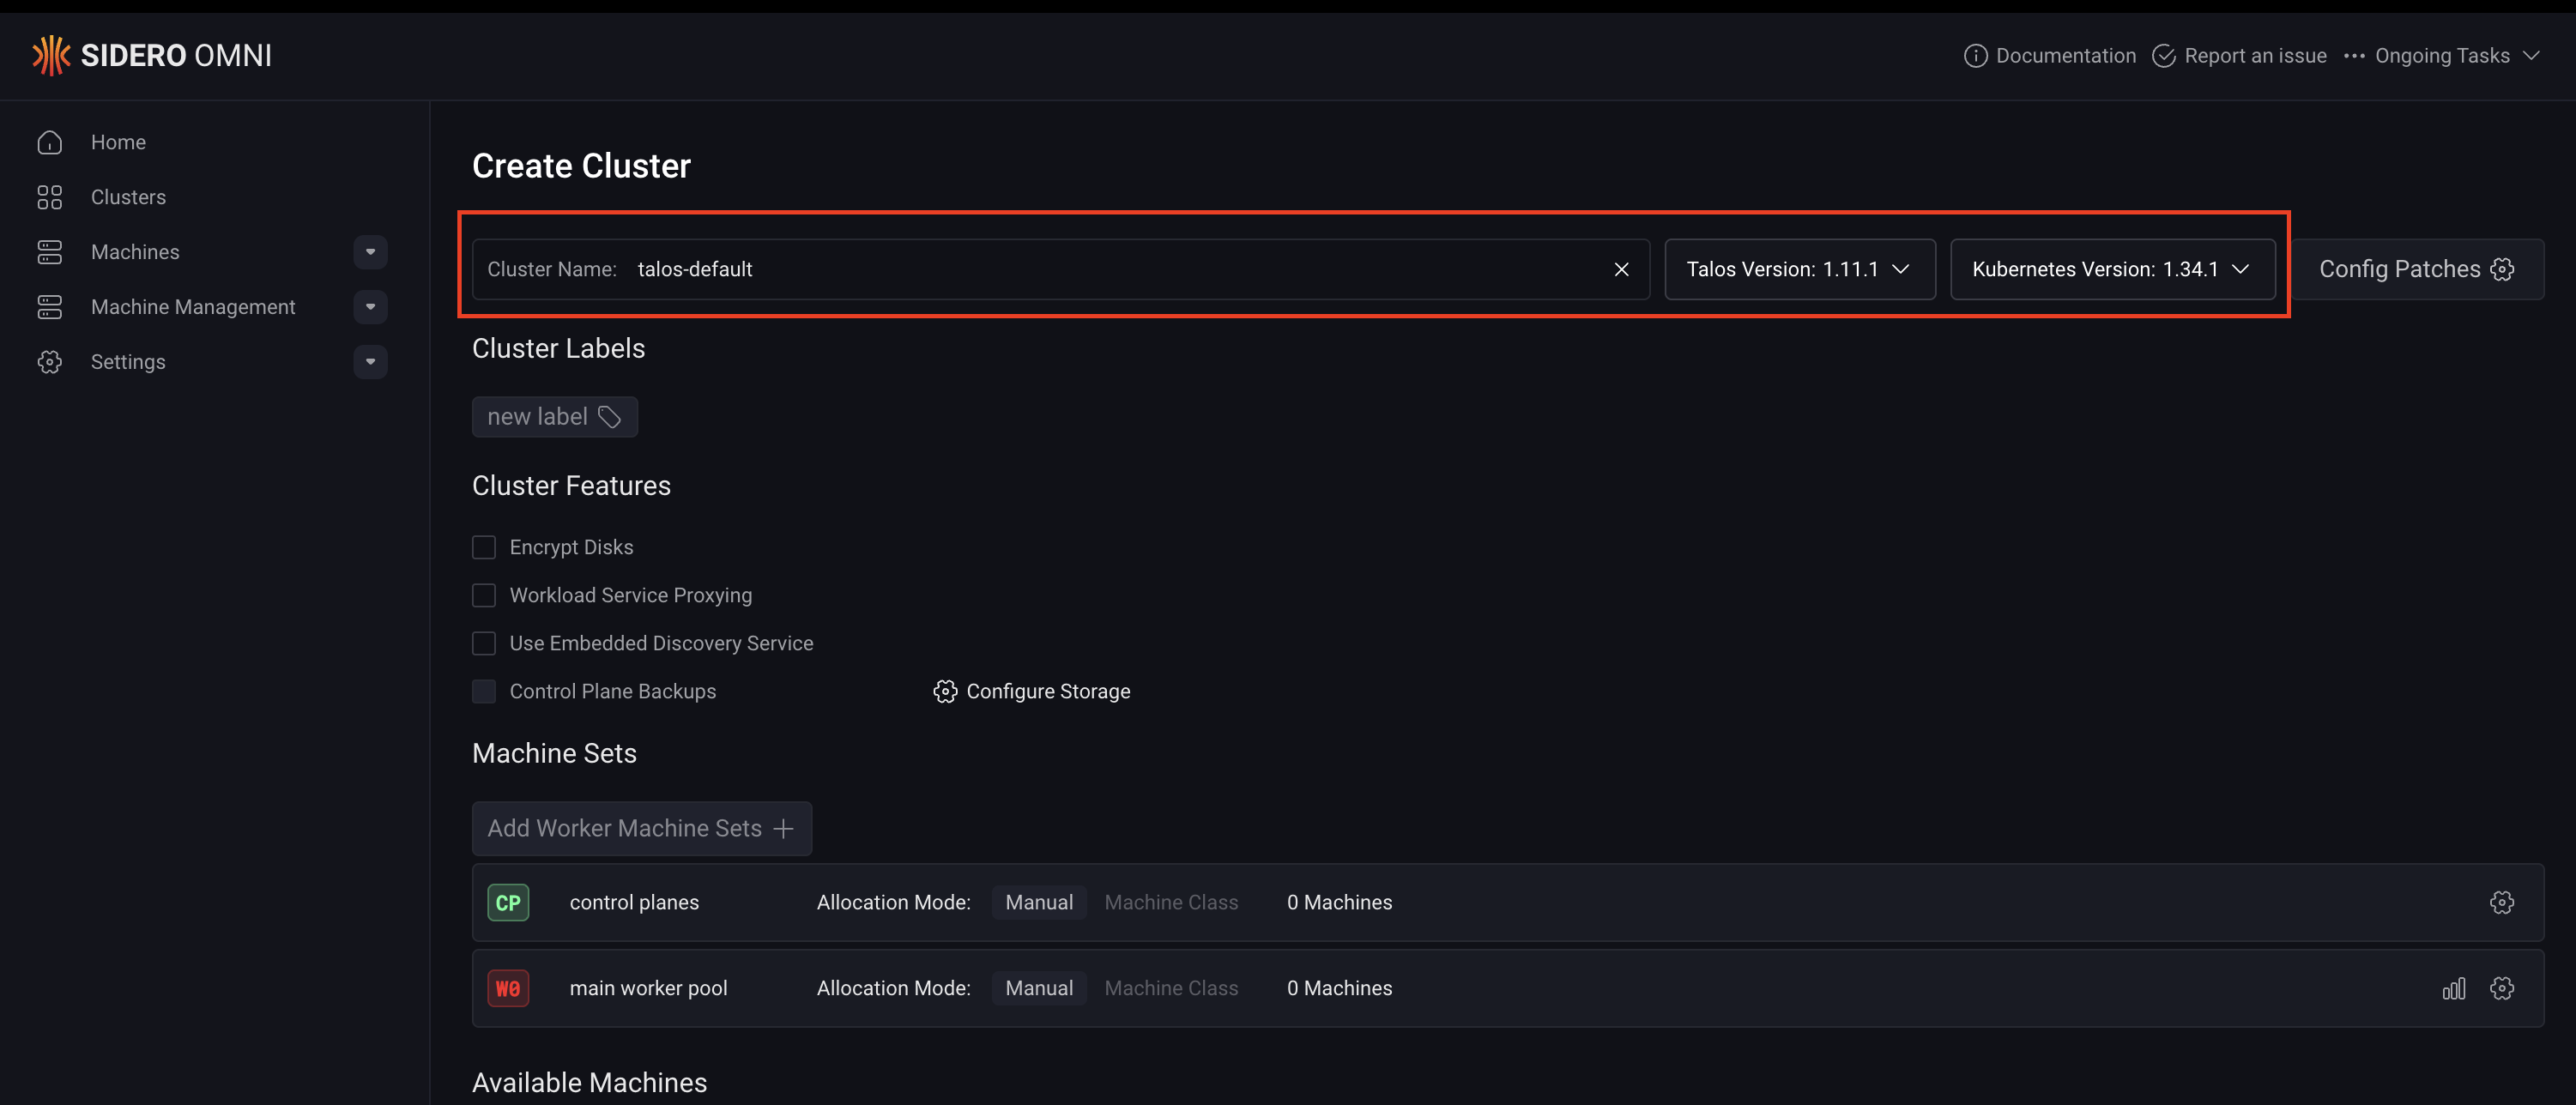
2. Enter a cluster name and select the Talos Linux and Kubernetes versions.
3. (Optional) Add configuration patches. See [Create a Patch for Cluster Machines](../omni-cluster-setup/create-a-patch-for-cluster-machines) to learn how to create and apply patches.
4. Under the **Available Machines** section, select at least one machine as a control plane by clicking **CP**.
For high availability, use an odd number of control plane nodes. We suggest using 3 nodes.
5. Select one or more worker machines by clicking **W0**, **W1**, etc.
6. Click **Create Cluster**.
You’ll be redirected to the **Cluster Overview** page, where you can monitor the cluster’s creation progress.
If the cluster remains in a pending or provisioning state after you click Create Cluster, check the following:
* **Machine connectivity**: Verify that all selected machines are still connected in the Machines list.
* **etcd quorum**: For a 3-node control plane, all three nodes must be healthy before etcd can establish quorum. If one or more nodes are unavailable, cluster creation will stall.
* **Node startup**: Newly provisioned nodes may take a minute or two to finish booting and become ready to join the cluster.
If the issue persists, see the cluster [troubleshooting documentation](../troubleshooting/troubleshooting).
## Step 4: Download the `kubeconfig` file
To make `omnictl`, `talosctl`, and `kubectl` automatically detect your cluster configuration:
1. Export your cluster name in a variable, replacing the `` variable with your name of the cluster:
```bash theme={null}
export CLUSTER_NAME=
```
2. Merge each configuration file into its default location:
```bash theme={null}
# Merge Omni configuration
omnictl config merge $HOME/Downloads/omniconfig.yaml
# Merge Talos configuration
talosctl config merge $HOME/Downloads/talosconfig.yaml
# Merge kubeconfig
omnictl kubeconfig --cluster $CLUSTER_NAME
```
## Step 5: Access your Kubernetes cluster
Once your cluster is created, you can confirm that your nodes are registered in Kubernetes by running:
```bash theme={null}
kubectl get nodes
```
The first time you run `kubectl`, a browser window will open prompting you to sign in with your identity provider (Google or GitHub).
If you see the error `error: unknown command "oidc-login"`, ensure you’ve installed the kubectl-oidc-login plugin as described in the [prerequisites section](#install-cli-tools).
## Step 6: Deploy your first workload
To run your first application on the cluster:
1. Deploy a sample application:
```bash theme={null}
kubectl apply -f \
https://raw.githubusercontent.com/siderolabs/example-workload/refs/heads/main/deploy/example-svc-nodeport.yaml
```
2. Verify that the pods and services are running:
```bash theme={null}
kubectl get pods,services
```
3. Forward the service port to your local machine:
```bash theme={null}
kubectl port-forward svc/example-workload 8080:8080
```
4. To view the application, open [http://localhost:8080](http://localhost:8080) in your browser or run:
```bash theme={null}
curl http://localhost:8080
```
For a more complete example of a production-style cluster, including a monitoring stack, GitOps-based application management, and supporting infrastructure, see the examples in our [community contrib repo](https://github.com/siderolabs/contrib/blob/main/examples/omni).
## Explore Omni
Congratulations, you have successfully created a Talos Linux cluster with Omni!
From here, you can explore what else Omni can do, such as:
* [etcd backup and restores](../cluster-management/etcd-backups)
* [Omni cluster upgrades](../cluster-management/upgrading-clusters)
* [Expose a Workload via Service Proxy](../cluster-management/expose-a-workload-via-service-proxy)
* [Scale your clusters up or down](../cluster-management/scale-your-cluster/scale-a-cluster-up-or-down)
* [Machine classes](../omni-cluster-setup/create-a-machine-class)
* [Cluster templates](../reference/cluster-templates)
* [Infrastructure providers](../infrastructure-and-extensions/infrastructure-providers)
 Alternatively, you can download the `talosconfig` file from the CLI by running the following command.
Replace the `
Alternatively, you can download the `talosconfig` file from the CLI by running the following command.
Replace the `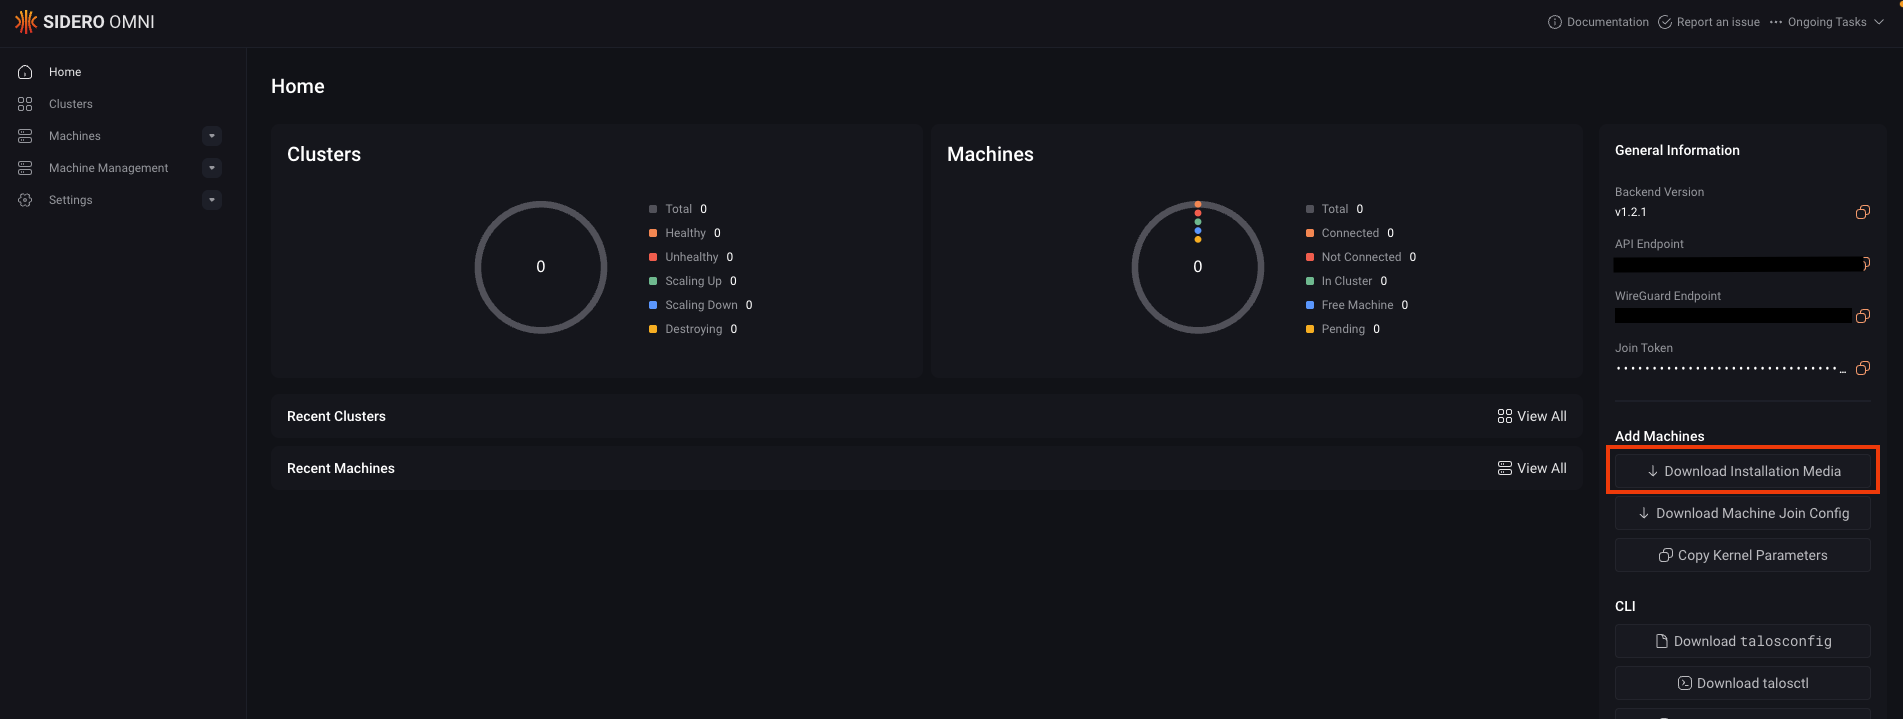 3. On each page of the **Create New Media** wizard, select the appropriate options for your setup, then click **Next** to continue.
The **Create New Media** wizard is identical to the [Image Factory](https://factory.talos.dev/) and it is split across multiple pages. Each page presents a different set of configuration options, such as architecture, hardware type, and Talos Linux version, that you can use to customize your Talos Omni image.
4. Select the appropriate boot option for your machine on the Schematic Ready page to download the Talos Omni image.
3. On each page of the **Create New Media** wizard, select the appropriate options for your setup, then click **Next** to continue.
The **Create New Media** wizard is identical to the [Image Factory](https://factory.talos.dev/) and it is split across multiple pages. Each page presents a different set of configuration options, such as architecture, hardware type, and Talos Linux version, that you can use to customize your Talos Omni image.
4. Select the appropriate boot option for your machine on the Schematic Ready page to download the Talos Omni image.
 2. Enter a cluster name and select the Talos Linux and Kubernetes versions.
 3. (Optional) Add configuration patches. See [Create a Patch for Cluster Machines](../omni-cluster-setup/create-a-patch-for-cluster-machines) to learn how to create and apply patches.
4. Under the **Available Machines** section, select at least one machine as a control plane by clicking **CP**.
3. (Optional) Add configuration patches. See [Create a Patch for Cluster Machines](../omni-cluster-setup/create-a-patch-for-cluster-machines) to learn how to create and apply patches.
4. Under the **Available Machines** section, select at least one machine as a control plane by clicking **CP**.
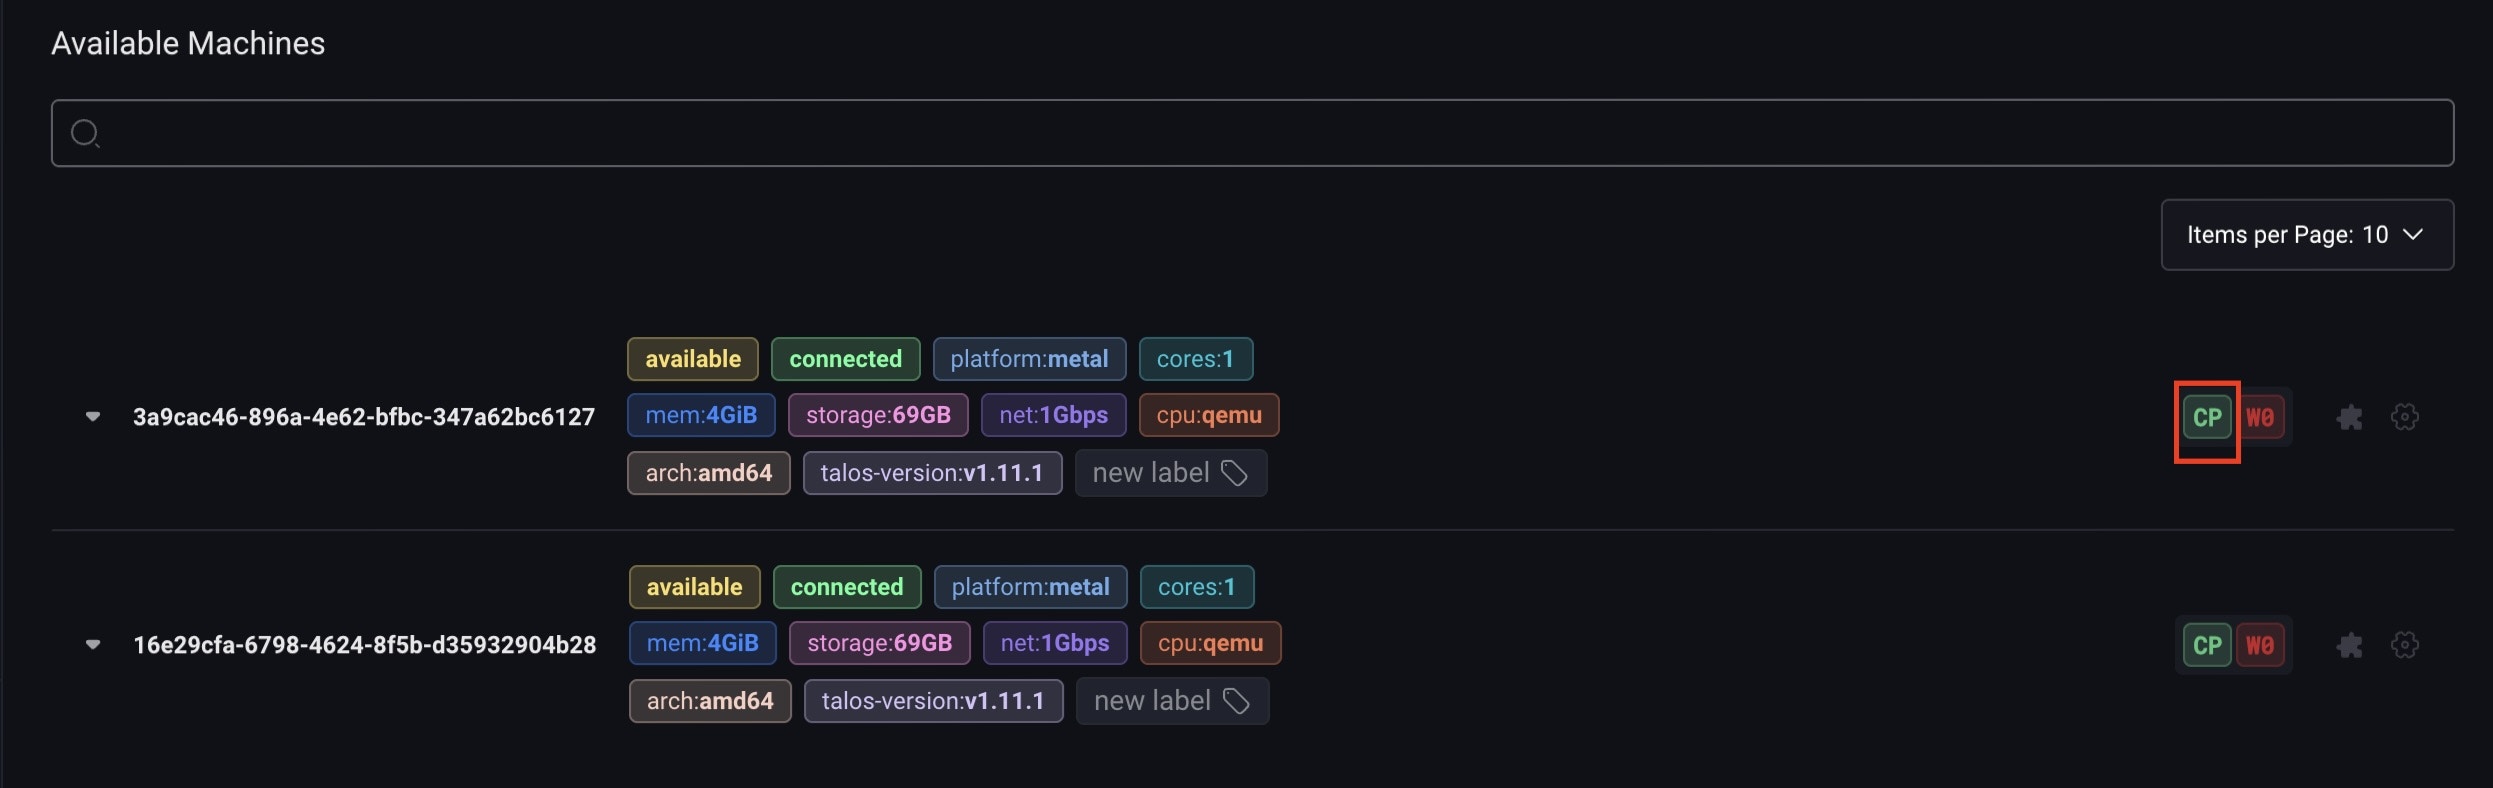 5. Select one or more worker machines by clicking **W0**, **W1**, etc.
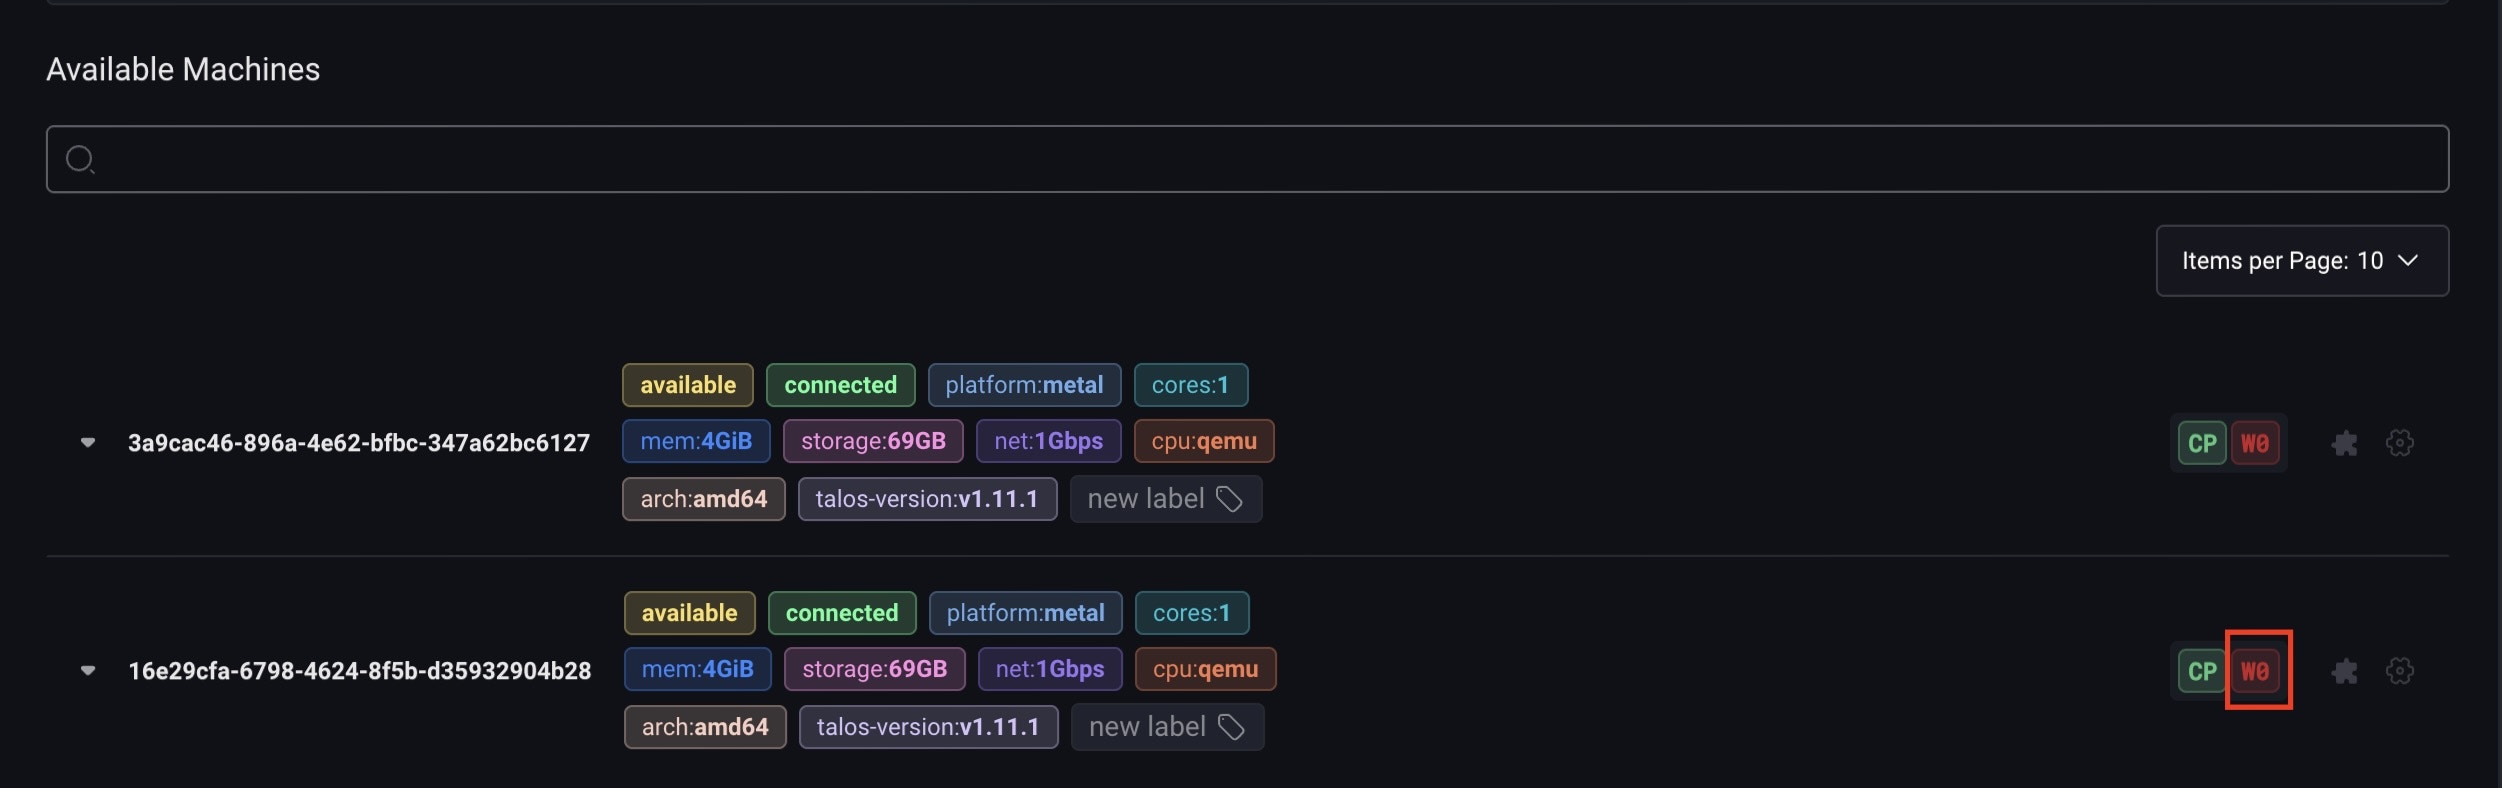 6. Click **Create Cluster**.
You’ll be redirected to the **Cluster Overview** page, where you can monitor the cluster’s creation progress.
6. Click **Create Cluster**.
You’ll be redirected to the **Cluster Overview** page, where you can monitor the cluster’s creation progress.